
Vanilla Bean Crème Brûlée Cheesecake Cupcakes

Decadent vanilla bean cheesecake tucked into tender cupcake cake, finished with a crisp brûléed top for an elegant handheld dessert.

This recipe began as a weekend experiment to combine two beloved desserts into one bite sized delight. I first made these Vanilla Bean Crème Brûlée Cheesecake Cupcakes on a bright Sunday morning when guests were arriving for brunch. The goal was simple, create something that looked refined yet was easy to serve. The result was a silky cream cheese center infused with true vanilla bean character, surrounded by a tender, buttery cake, and finished with the satisfying crack of caramelized sugar. The first bite delivered contrasting textures, creamy and velvety against a delicate crisp topping, and the room went quiet for a few blissful seconds before the compliments started.
I keep the method approachable so you can make this for a special brunch, a dinner party, or for a holiday table. I learned early on that the quality of the vanilla matters. Using vanilla bean paste or scraping a fresh bean elevates the flavor beyond ordinary vanilla extract. Another key discovery was the ratio of cake to filling. Filling the liner halfway with batter, adding the cheesecake dollop, and topping with more batter creates the perfect swirl so every cupcake has a generous, creamy center without sinking or overflowing. These small decisions turned this idea into a dependable favorite that guests request again and again.
Why You'll Love This Recipe
- Combines two classic desserts into one elegant portion that is easy to serve at parties and brunches, and they look impressive with minimal effort.
- Ready in about one hour from start to finish, including baking and cooling, making them suitable for last minute entertaining when you plan ahead by an hour or two.
- Uses pantry staples and a small amount of specialty vanilla bean paste for a gourmet flavor without hard to find ingredients.
- Make ahead friendly. You can bake the cupcakes a day in advance and torch the sugar just before serving so the caramel is fresh and crisp.
- Kid friendly and crowd pleasing. The familiar cake texture keeps picky eaters happy while the brûlée top adds theater for adults.
- Adaptable for different dietary needs by swapping sour cream or using lactose free dairy in a pinch, though the final texture will vary slightly.
I have served these at a family birthday, a holiday brunch, and an impromptu coffee visit with neighbors. Every time someone asks how long they take to make because they assume something that looks this good must be complicated. The trick is taking a few thoughtful steps, like bringing cream cheese to room temperature before beating and measuring the dry ingredients accurately, and the rest falls into place.
Ingredients
- All-purpose flour: One cup provides structure and a tender crumb. Use a spoon and level method when measuring to avoid a dry cake. King Arthur or Gold Medal are reliable brands.
- Granulated sugar: Half a cup sweetens the cake layer while additional sugar is used for caramelizing the tops. Regular granulated works best for torching.
- Baking powder and salt: A half teaspoon of baking powder lifts the cake and a quarter teaspoon of salt balances sweetness. Use fresh baking powder for the best rise.
- Unsalted butter: Half a cup, softened to room temperature, adds richness and flavor. Soften but do not melt, for proper creaming with sugar.
- Eggs: Two large eggs for the batter and one large egg for the cheesecake filling. Bring them to room temperature to emulsify smoothly with fats.
- Vanilla extract and vanilla bean paste: One teaspoon of extract for the batter and one teaspoon of vanilla bean paste in the filling. The paste adds speckled vanilla pods and concentrated flavor.
- Sour cream: Half a cup keeps the cake layer moist and tender. Full fat sour cream yields the best texture.
- Cream cheese: Eight ounces softened provides the creamy base for the filling. Full fat cream cheese is recommended for stability and flavor.
- Powdered sugar: Half a cup sweetens the filling while keeping it silky. Sifted sugar helps avoid lumps.
Instructions
Step 1 Preheat the oven: Preheat to 350 degrees Fahrenheit. Line a standard 12 cup muffin pan with liners or lightly grease the wells. Preheating ensures even rise and reliable baking time. Allow the oven to reach full temperature before placing the pan inside. Step 2 Prepare the cupcake batter: Combine one cup all-purpose flour, half a cup granulated sugar, half a teaspoon baking powder, and quarter teaspoon salt in a bowl and whisk to aerate. In a separate bowl cream half a cup softened unsalted butter with half a cup granulated sugar until light and slightly fluffy, about two to three minutes using an electric mixer. Beat in two large eggs one at a time, then add one teaspoon vanilla extract and half a cup sour cream. Fold the dry ingredients into the wet until just combined. Over mixing will develop gluten and toughen the cake. Step 3 Make the cheesecake filling: Beat eight ounces softened cream cheese until smooth and free of lumps. Add half a cup powdered sugar and one teaspoon vanilla bean paste, beating until fully incorporated. Add one large egg and mix until the filling is glossy and smooth. Scrape the bowl frequently to ensure there are no pockets of unmixed cheese. Step 4 Assemble: Fill each cupcake liner halfway with the cake batter. Spoon or pipe about one to one and a half tablespoons of cheesecake filling into the center of each. Top with enough batter to cover the filling and level gently with the back of a spoon. This layering prevents the filling from sinking and ensures a neat dome. Step 5 Bake: Bake for twenty to twenty five minutes or until a toothpick inserted into the cake portion comes out with a few moist crumbs but the filling is set. Rotate the pan once halfway through baking if your oven has hot spots. The cake edge will be lightly golden and the center should not wobble significantly when jiggled. Step 6 Cool and caramelize: Allow cupcakes to cool completely in the pan on a wire rack. For the brûlée finish sprinkle about a teaspoon of granulated sugar evenly atop each cheesecake center. Use a kitchen torch to melt and caramelize the sugar until golden and crisp. If you do not have a torch place the cupcakes under a preheated broiler for one to two minutes, watching carefully to avoid burning.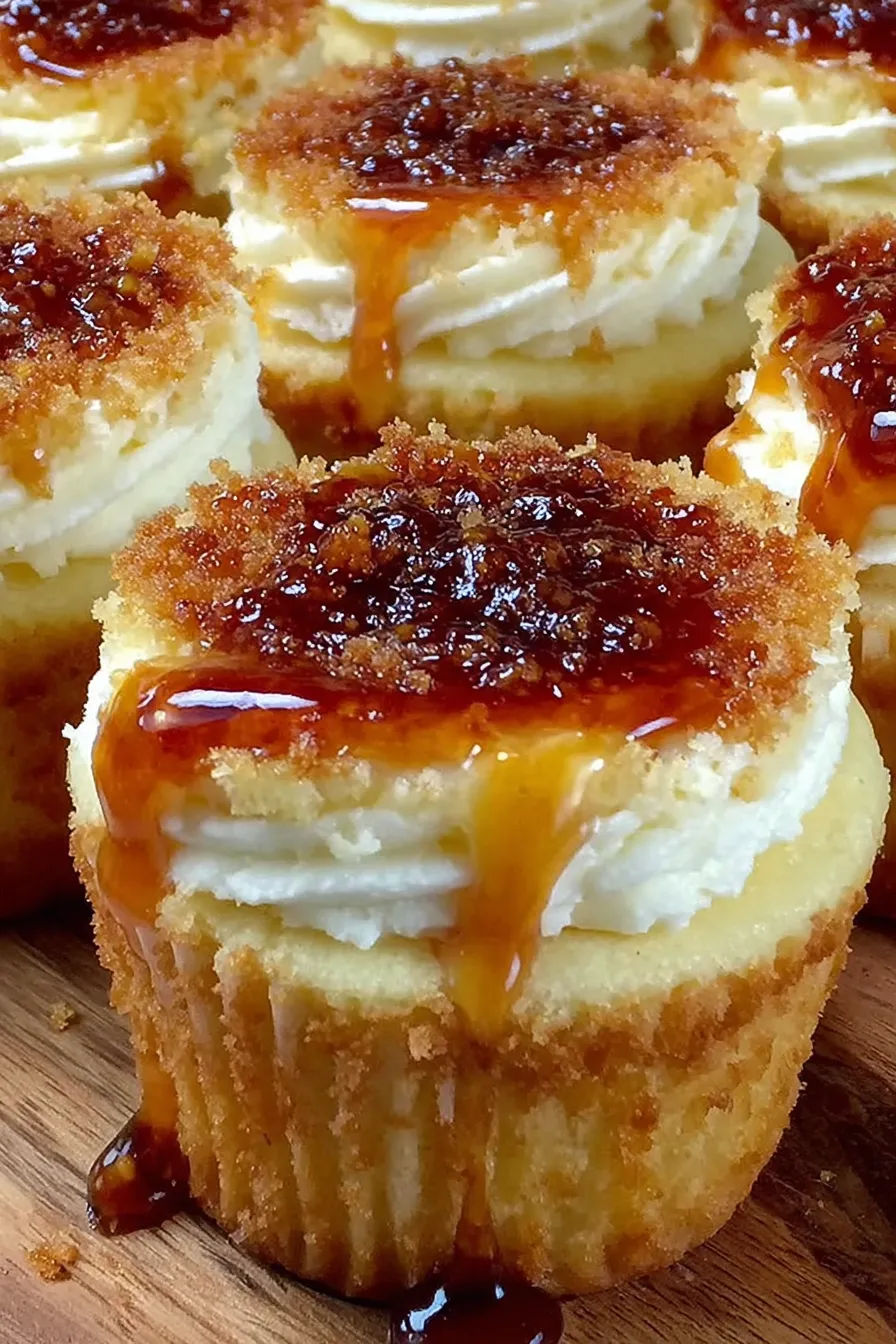
You Must Know
- Store in the refrigerator covered for up to three days, or freeze unbrûléed for up to three months. Torch sugar fresh before serving for best texture.
- This combination is moderate in calories and high in fat due to cream cheese and butter; serving size controls indulgence.
- Allow cream cheese to reach room temperature before beating to avoid lumps and over beating which can incorporate too much air.
- Crystallized sugar on top will stay crisp for a few hours; humidity will soften it over time, so caramelize just before serving when possible.
My favorite part is the moment the torch tip touches the sugar and the aroma of caramel rises. It feels theatrical yet simple. Family members have used these as party showstoppers because the cracking top invites conversation and always elicits a request for the recipe. A small finishing detail like a tiny sprinkle of flaky salt on one or two cupcakes creates an addictive contrast.

Storage Tips
Store cupcakes in a single layer in an airtight container in the refrigerator for up to three days. If you must stack, place parchment between layers to protect the brûlée tops. For longer storage, skip the brûlée step and freeze cooled cupcakes in a single layer on a tray, then transfer to a freezer safe container for up to three months. Thaw in the refrigerator overnight and torch sugar just before serving to restore the crisp texture. Avoid leaving them at room temperature longer than two hours due to the dairy filling.
Ingredient Substitutions
For lower fat options substitute light sour cream and reduced fat cream cheese, though the filling will be slightly less rich and more delicate. Use lactose free alternatives if lactose is a concern. If vanilla bean paste is unavailable, use two teaspoons of high quality vanilla extract instead. To make a gluten free version use a one to one gluten free flour blend; texture will differ slightly. For dairy free adaptations try a vegan cream cheese and plant based butter, but baking times and set may require adjustment.
Serving Suggestions
Serve warm right after torching with a small dollop of lightly whipped cream or a few fresh berries for color. For brunch pair with coffee or a light sparkling wine to cut through richness. For dinner parties present on a platter with a few extra vanilla pods for garnish and tiny spoons so guests can enjoy the crisp top and creamy interior. A tiny pinch of flaky sea salt on one or two cupcakes adds a professional finishing touch.
Cultural Background
This concept blends classic French technique and American comfort. Crème brûlée originates from France and is known for its silky custard and caramelized sugar crust. Cheesecake has ancient roots and evolved through European influences into the modern baked American version. Combining a brûlée finish with a cream cheese filling placed inside a cake base is a playful fusion that takes the best of both traditions and presents it in a portable form that suits contemporary entertaining.
Seasonal Adaptations
In summer interchange a tablespoon of lemon zest into the cake batter for a bright lift and top with macerated berries. In autumn fold a teaspoon of pumpkin pie spice into the cheesecake filling for a seasonal twist. During winter use warm spices like a pinch of ground cardamom or cinnamon in the batter and serve with candied orange peel. These small swaps help the recipe feel fresh across seasons.
Meal Prep Tips
Bake the cupcakes a day ahead and refrigerate. Keep the sugar uncaramelized and torch thirty minutes before guests arrive. If transporting, pack cooled cupcakes in a shallow container with a flat lid and torch at the venue if possible. For buffet style events display them on a tiered stand so guests can appreciate the caramelized shine. Label containers with the torching instruction to prevent them being served with softened sugar.
These cupcakes reward small, deliberate touches. The payoff is in the balance of textures and the depth of vanilla. They make any gathering feel more special and are surprisingly forgiving when you follow a few key steps. Try them once and you will find yourself returning to this formula for many celebrations to come.
Pro Tips
Bring cream cheese and eggs to room temperature before mixing to ensure a silky filling with no lumps.
Use vanilla bean paste for visible specks and concentrated vanilla flavor; substitute with high quality vanilla extract if needed.
Torch the sugar just before serving for the best crisp texture; under a broiler watch continuously to prevent burning.
Measure flour by spooning into the cup and leveling with a knife to avoid dry, dense cake.
This nourishing vanilla bean crème brûlée cheesecake cupcakes recipe is sure to be a staple in your kitchen. Enjoy every moist, high protein slice — it is perfect for breakfast or as a wholesome snack any time.
Tags
Vanilla Bean Crème Brûlée Cheesecake Cupcakes
This Vanilla Bean Crème Brûlée Cheesecake Cupcakes recipe makes perfectly juicy, tender, and flavorful steak every time! Serve with potatoes and a side salad for an unforgettable dinner in under 30 minutes.
Instructions
Preheat the Oven
Preheat oven to 350 degrees Fahrenheit. Line a 12 cup muffin pan with liners or grease the wells.
Prepare the Batter
Whisk dry ingredients. Cream butter with sugar and add eggs, vanilla, and sour cream. Fold in dry ingredients until just combined.
Make the Filling
Beat cream cheese until smooth. Add powdered sugar, vanilla bean paste, and one egg. Mix until glossy and lump free.
Assemble
Fill liners halfway with batter, add a spoonful of filling, and top with more batter so filling is enclosed.
Bake
Bake for 20 to 25 minutes until cake portion is set and a toothpick comes out with a few moist crumbs.
Cool and Caramelize
Cool completely. Sprinkle granulated sugar on top and caramelize with a torch or under a hot broiler for one to two minutes.
Last Step: Please leave a rating and comment letting us know how you liked this recipe! This helps our business to thrive and continue providing free, high-quality recipes for you.
Nutrition
Did You Make This?
Leave a comment & rating below or tag
@delishum on social media!
Categories:
You might also like...

Gooey Marshmallow Chocolate Brownies
Thick chocolate chunk brownies crowned with melted mini marshmallows and drenched in glossy chocolate frosting for the ultimate fudgy, crowd-pleasing bite.

Buttery Pecan Pie Bars
Buttery shortbread crust meets a lush brown sugar pecan topping. Crunchy, caramelly, and ready with just 10 minutes of prep for effortless indulgence.

No-Crack Pumpkin Cheesecake
Ultra-smooth pumpkin cheesecake with warm spice and a sturdy graham crust. A showstopper on its own, unforgettable with caramel and rum-kissed whipped cream.
Did You Make This?
Leave a comment & rating below or tag @delishum on social media!
Rate This Recipe
Share This Recipe
Enjoyed this recipe? Share it with friends and family, and don't forget to leave a review!
Comments (1)
This recipe looks amazing! Can't wait to try it.
Comments are stored locally in your browser. Server comments are displayed alongside your local comments.

Hi, I'm Amelia!
What's Popular

30-Minute Meals!
Join to receive our email series which contains a round-up of some of our quick and easy family favorite recipes.