
>>

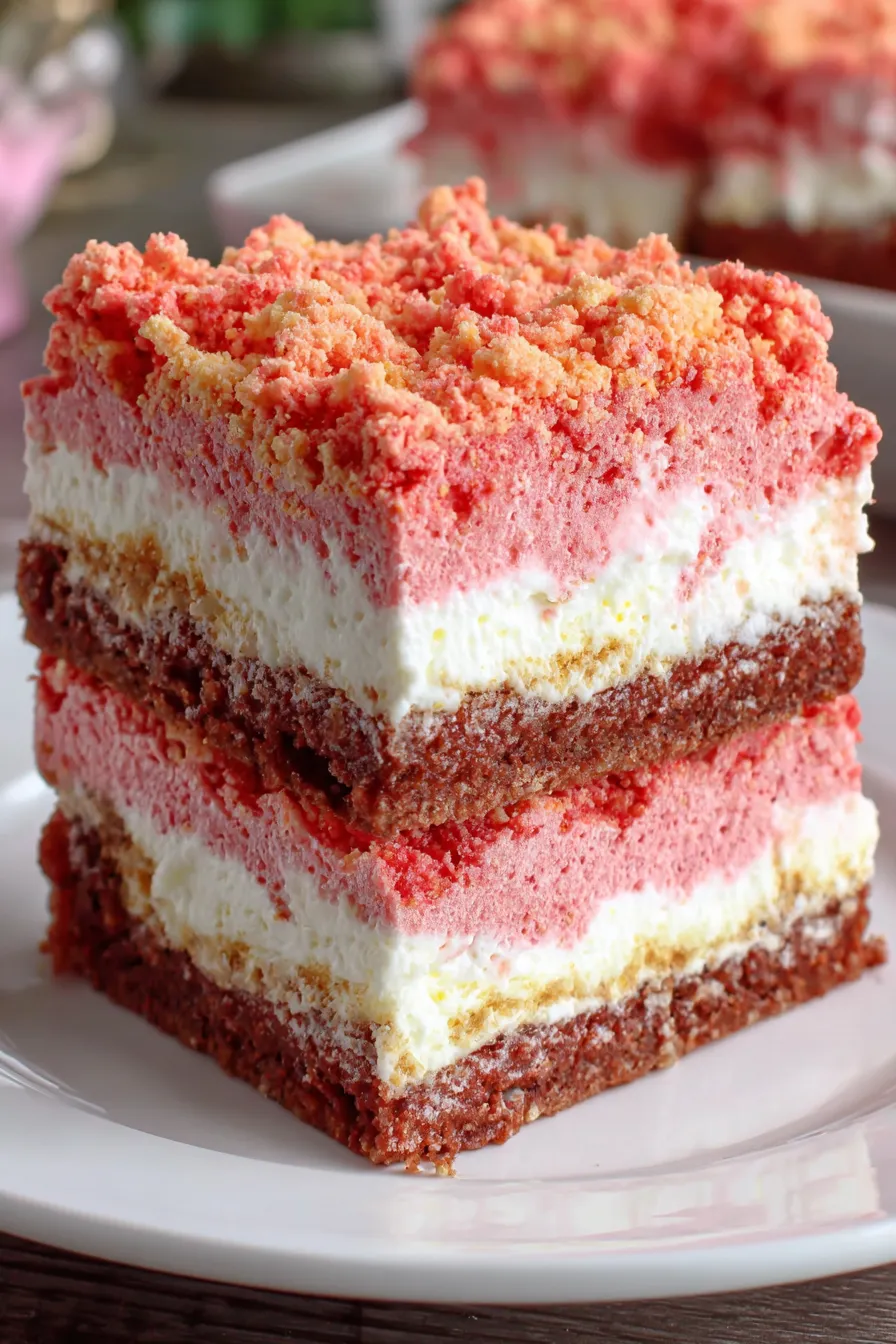
Layered bars with a tender strawberry cake base, silky cream center, and a crunchy strawberry cookie topping—an easy, crowd-pleasing treat for picnics and parties.

Personally, I love how forgiving this is. The first time I made it I worried the cream layer would slide, but after refrigerating it set beautifully and the bars cut into tidy squares. Neighbors kept coming back for seconds, saying the top had a delightful crunch that made the whole thing feel gourmet despite its humble ingredients.

My favorite part is watching how the crunch layer transforms the texture of the whole bar; it turns an otherwise soft confection into something with addictive bite. Years of serving these at family gatherings taught me to label them clearly—several guests asked if there was a secret ingredient because the top tastes both familiar and elevated. I always keep a bag of freeze-dried fruit on hand now because it brightens desserts without extra moisture.
Store refrigerated in an airtight container for up to 4 days to preserve the cream layer’s texture; keep individual layers from touching by using parchment squares between layers if stacking. For longer storage, wrap the whole tray in plastic wrap and a layer of aluminum foil, then freeze for up to 3 months. Thaw overnight in the refrigerator before slicing. If you plan to transport, chill the tray well beforehand and pack on ice or use insulated carriers to keep the topping crisp and the filling firm. Warm bars lose structure and become messy, so serve chilled.
To make the base gluten-free, use a certified gluten-free strawberry cake mix and substitute gluten-free sandwich cookies for the crunch. For a dairy-free version, use vegan cream cheese and a coconut-based whipped topping—texture will be slightly different but still delicious. Replace the butter with melted coconut oil at a 1:1 ratio for a subtle coconut note. If you want less sugar, skip the jello and use unsweetened freeze-dried strawberries, increasing sugar by taste if needed. Egg substitute (1 egg replacement) can work for the base, though texture may be a touch more crumbly.
Serve chilled on a dessert tray garnished with a light dusting of powdered sugar or a few fresh strawberries for contrast. These bars pair nicely with black coffee, a sparkling rosé, or a simple lemony iced tea to cut through the sweetness. For a buffet, cut into bite-sized squares and place on skewers with a mint leaf for an elegant touch. They’re ideal for summer potlucks, baby showers, or a casual brunch spread alongside scones and fruit salad.
This layered style draws from American community-bake traditions where boxed mixes meet homemade flair. The approach echoes icebox cakes and layered refrigerator desserts popular in mid-20th-century home cooking—mix convenience with fresh additions like cream cheese and fruit-tinted crunch to elevate the classic. Using sandwich cookies for texture is a modern twist that borrows from no-bake crumble bars and popular cookie-crusted cheesecakes.
In spring and summer, emphasize fresh fruit by folding small diced strawberries into the cream layer and using freeze-dried fruit for the topping. For fall, swap the strawberry cake for a spice cake mix and use cinnamon cookies for the crunch, adding a pinch of nutmeg to the cream. Around holidays, top with edible glitter or swap strawberry jello for raspberry for a different color and tartness, keeping the same assembly method.
Make the base and crunch up to 2 days ahead; keep them covered separately in the fridge to maintain crispness. Assemble the cream layer and put it on the base the day you plan to serve for the freshest texture, then add the crunch just before guests arrive or at least 2 hours before serving to allow the layers to settle. Use a 9x13 pan with a parchment sling for quick removal and smoother slicing. Label containers with date and any allergen notes if serving to a group.
These Strawberry Crunch Bars have become my reliable dessert when I want something pretty and effortless. They’re resilient to substitutions, travel well, and always spark compliments. Try making them ahead the next time you need a dessert that will travel or feed a crowd—you may find they become a potluck favorite like they did in my kitchen.
Soften cream cheese to room temperature before mixing to avoid lumps and achieve a silky cream layer.
Chill the assembled bars at least 2 hours, or overnight, for cleaner slices and firmer texture.
Warm and dry your knife under hot water and wipe between cuts to get neat bar edges.
If using freeze-dried strawberries, pulse them to a fine powder for even distribution in the crunch layer.
Line the pan with parchment and leave an overhang to lift the whole slab for easy slicing.
This nourishing strawberry crunch bars recipe is sure to be a staple in your kitchen. Enjoy every moist, high protein slice — it is perfect for breakfast or as a wholesome snack any time.
This Strawberry Crunch Bars recipe makes perfectly juicy, tender, and flavorful steak every time! Serve with potatoes and a side salad for an unforgettable dinner in under 30 minutes.
Preheat oven to 350°F and lightly grease a 9x13-inch baking dish or line with parchment for easy removal.
In a large bowl combine the strawberry cake mix, 1/2 cup melted butter, and 1 large egg until a thick dough forms. Press evenly into the prepared pan and bake 18–22 minutes until a toothpick shows a few moist crumbs. Cool completely.
Beat 8 oz softened cream cheese until smooth, then fold in the thawed 8 oz frozen whipped topping and 1 teaspoon vanilla until evenly combined and spreadable.
Spoon and spread the cream mixture over the cooled cake base into an even layer. Smooth with a spatula or offset knife.
Crush 20 Golden Oreos to a sandy texture. Mix crumbs with 1/4 cup melted butter. For option A, stir in a 3 oz box strawberry gelatin. For option B, add 2 oz crushed freeze-dried strawberries and 1 tablespoon sugar.
Sprinkle the crunch mixture evenly over the cream layer, pressing lightly to adhere. Refrigerate at least 2 hours or overnight for best results. Slice into 12 bars to serve.
Last Step: Please leave a rating and comment letting us know how you liked this recipe! This helps our business to thrive and continue providing free, high-quality recipes for you.
Leave a comment & rating below or tag
@delishum on social media!

Thick chocolate chunk brownies crowned with melted mini marshmallows and drenched in glossy chocolate frosting for the ultimate fudgy, crowd-pleasing bite.

Buttery shortbread crust meets a lush brown sugar pecan topping. Crunchy, caramelly, and ready with just 10 minutes of prep for effortless indulgence.

Ultra-smooth pumpkin cheesecake with warm spice and a sturdy graham crust. A showstopper on its own, unforgettable with caramel and rum-kissed whipped cream.
Leave a comment & rating below or tag @delishum on social media!
Enjoyed this recipe? Share it with friends and family, and don't forget to leave a review!
This recipe looks amazing! Can't wait to try it.
Comments are stored locally in your browser. Server comments are displayed alongside your local comments.

Join to receive our email series which contains a round-up of some of our quick and easy family favorite recipes.
