
>>

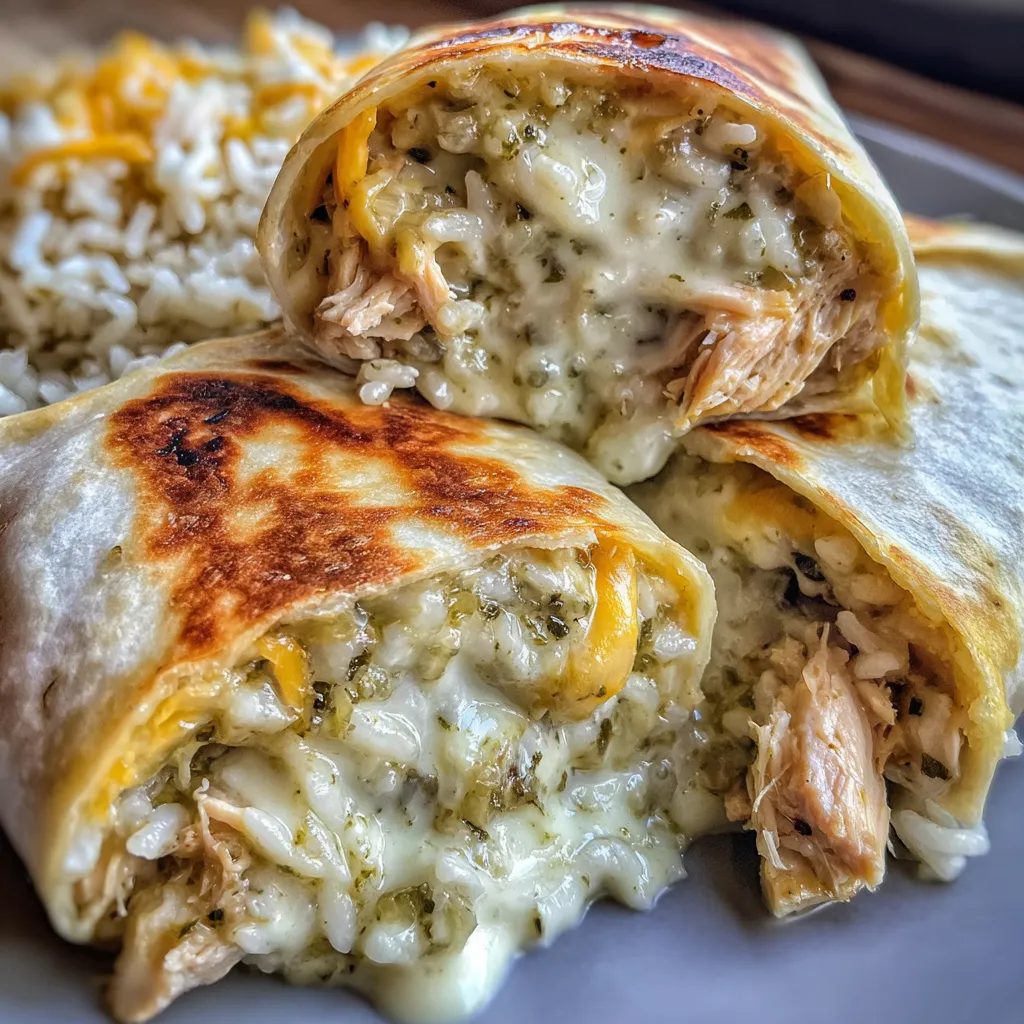
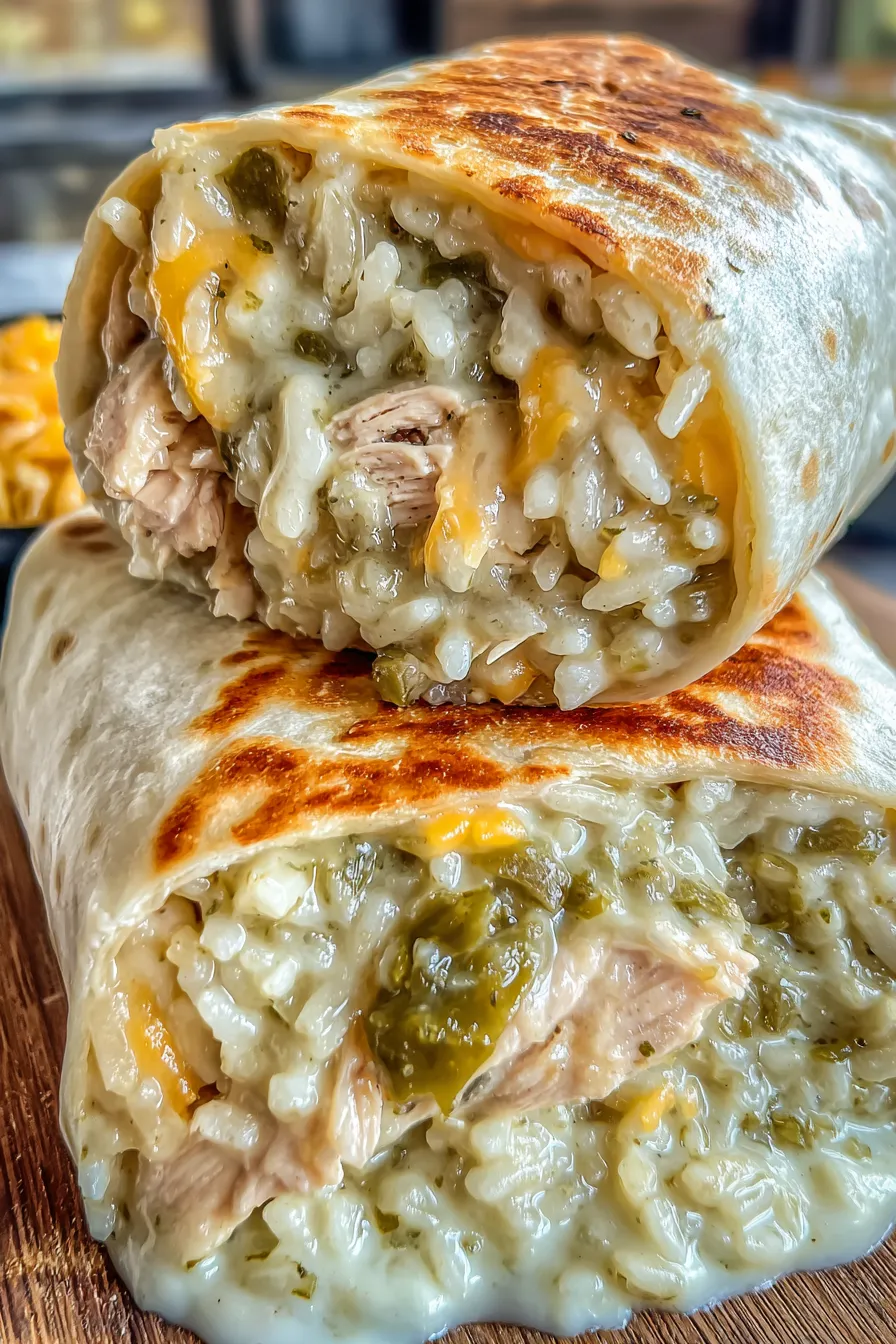
A smoky, creamy burrito filled with shredded smoked chicken, green chiles, rice, and cheddar then crisped to a golden finish. Perfect for a quick weeknight meal or a weekend brunch.
This smoky chicken and green chile burrito is one of those dishes I reach for when I want big flavor with minimal fuss. I discovered this combination late one summer after a backyard smoking session left me with extra shredded chicken. I wanted something that would be comforting but also travel well for a picnic. The blend of smoky meat, tangy sour cream, mild salsa, and canned green chiles came together in a way that felt both familiar and exciting. It quickly became a family favorite and is now a go to when I need a portable meal that satisfies everyone at the table.
The texture is all part of the appeal. The filling is creamy because of the sour cream and cheese yet has bite from the rice and chiles. The exterior becomes golden and crisp in a skillet which adds a pleasing contrast. When you bite into one you get smoky chicken, melty cheddar, a touch of heat from the chiles and salsa, and the comfort of warm rice. It is simple but layered and it has become my answer for busy nights or casual gatherings with friends.
My family always asks for extras when I make these. On the first night we served them they vanished quickly and someone declared them restaurant worthy. I learned to double the filling when guests are coming because they always want seconds.

My favorite part of this dish is how flexible it is. I often switch the salsa type depending on the season and I have served these at tailgates and casual brunches. People comment on the crisp outside and creamy interior which is exactly the contrast I aim for.
For short term storage keep assembled but unfried burritos in an airtight container in the refrigerator for up to two days. For longer storage wrap each burrito tightly in plastic wrap then foil and place in a freezer safe bag for up to three months. To reheat from frozen unwrap and toast in a skillet until the exterior crisps then transfer to a 350 degree Fahrenheit oven for 8 to 12 minutes to heat through. For best texture avoid microwaving from frozen because it can make the tortilla soft and gummy.
Swap smoked chicken for rotisserie chicken if you do not have smoked meat. Use pepper jack cheese for more heat or Monterey jack for a milder melt. For a lower fat version use light sour cream and reduced fat cheese. If you need a gluten free option choose large corn or gluten free flour tortillas and press gently when rolling to avoid tearing. If you want more vegetables add cooked peppers and onions at a ratio of one cup for each additional person.
Serve with fresh lime wedges and chopped cilantro for brightness. A side of tortilla chips and extra salsa or guacamole complements the burritos well. For brunch pair with a simple green salad and pickled red onions. For a heartier plate add refried beans or roasted corn salad on the side. Garnish with a sprinkle of extra cheddar or a dollop of sour cream if serving at a casual gathering.
This style of filled and rolled tortilla traces to Tex Mex traditions where tortillas are a vehicle for portable foods. The use of smoked chicken adds an American barbecue influence while the canned green chiles and salsa nod to Southwestern and Mexican flavors. The result is a hybrid that is approachable and familiar to many home cooks across the United States.
In summer use fresh grilled corn and chopped tomatoes instead of some of the rice for a brighter filling. In winter add roasted poblano peppers and swap white rice for Mexican rice cooked with tomato and garlic for deeper flavor. For holiday gatherings make a large sheet pan of assembled burritos and crisp them in the oven to serve a crowd quickly.
Make the filling two days in advance and portion it in the refrigerator. Warm tortillas just before assembly to make rolling easier. If you plan to freeze make sure the filling is cooled completely before wrapping to reduce ice crystals. Label frozen portions with the date and reheat from frozen using a skillet and oven for the best texture.
These burritos are one of my reliable weeknight fixes because they come together quickly and everyone enjoys them. They are soulful yet tidy which makes them great for packed lunches and casual entertaining. I hope you find as much satisfaction making and sharing them as I do.
Warm tortillas briefly before rolling so they do not crack when folded.
Press burritos seam side down in the skillet to ensure they stay closed while crisping.
Cool filling completely before freezing to prevent ice crystals and soggy texture.
Use block cheese shredded at home for a better melt and fewer anti caking agents.
This nourishing smoked chicken green chile burrito recipe is sure to be a staple in your kitchen. Enjoy every moist, high protein slice — it is perfect for breakfast or as a wholesome snack any time.
This Smoked Chicken Green Chile Burrito recipe makes perfectly juicy, tender, and flavorful steak every time! Serve with potatoes and a side salad for an unforgettable dinner in under 30 minutes.
In a large bowl add shredded smoked chicken, drained diced green chiles, shredded cheddar, cooked rice, sour cream, salsa, garlic powder, and onion powder. Season with salt and black pepper then mix until evenly coated and cohesive.
Place flour tortillas on a microwave safe plate and heat for 20 seconds to make them pliable. Alternatively use a damp towel in the microwave or a warm oven set low if you prefer.
Divide the filling into four portions and place each portion in the center of a warmed tortilla. Fold the sides in and roll from the bottom up using gentle pressure so the filling is snug and the seam is sealed.
Heat a large skillet over medium and coat with cooking spray or a teaspoon of vegetable oil. Place burritos seam side down and cook 2 to 3 minutes per side until golden brown and crisp. Press gently while cooking to seal the seam.
Last Step: Please leave a rating and comment letting us know how you liked this recipe! This helps our business to thrive and continue providing free, high-quality recipes for you.
Leave a comment & rating below or tag
@delishum on social media!

Thick chocolate chunk brownies crowned with melted mini marshmallows and drenched in glossy chocolate frosting for the ultimate fudgy, crowd-pleasing bite.

Buttery shortbread crust meets a lush brown sugar pecan topping. Crunchy, caramelly, and ready with just 10 minutes of prep for effortless indulgence.

Ultra-smooth pumpkin cheesecake with warm spice and a sturdy graham crust. A showstopper on its own, unforgettable with caramel and rum-kissed whipped cream.
Leave a comment & rating below or tag @delishum on social media!
Enjoyed this recipe? Share it with friends and family, and don't forget to leave a review!
This recipe looks amazing! Can't wait to try it.
Comments are stored locally in your browser. Server comments are displayed alongside your local comments.

Join to receive our email series which contains a round-up of some of our quick and easy family favorite recipes.
