
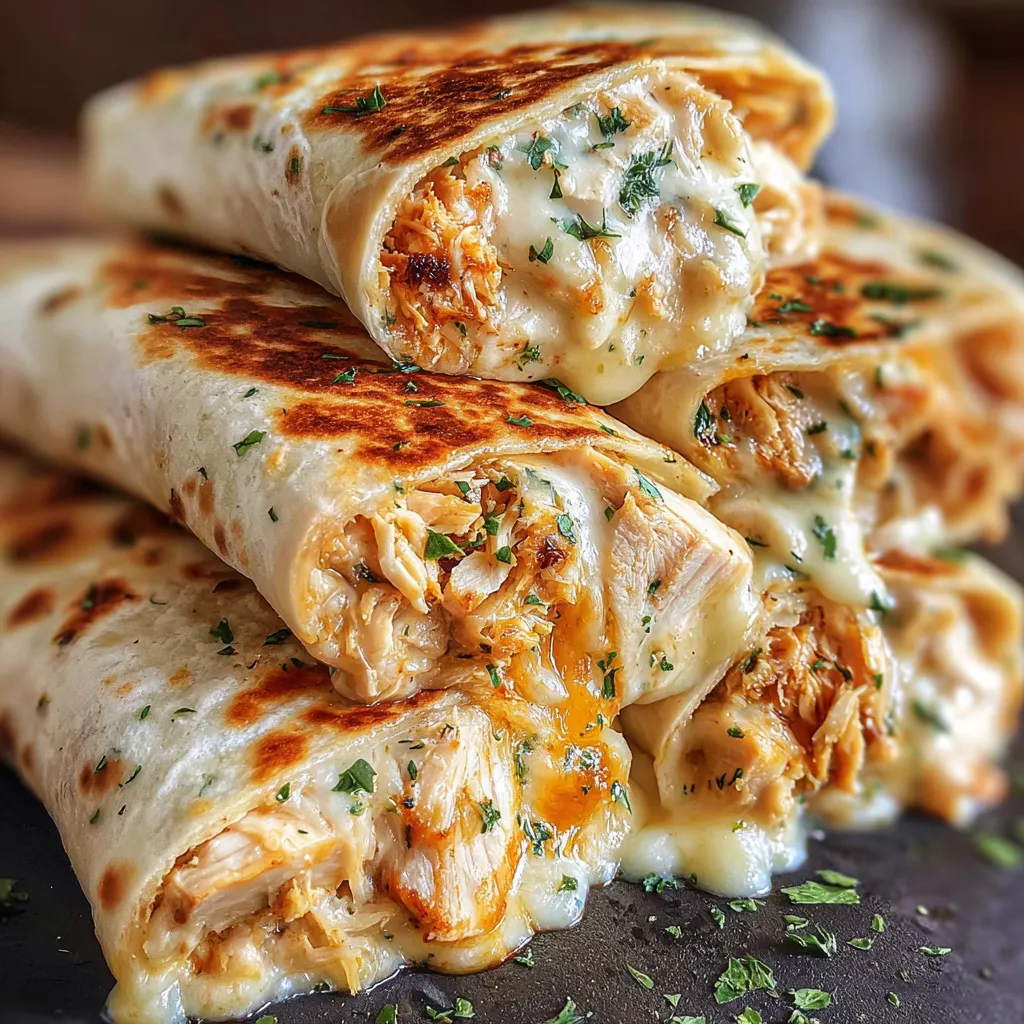
Ooey-Gooey Cheesy Garlic Chicken Wraps

Crispy seared chicken tossed with fragrant garlic, Italian seasoning and melted cheddar tucked into warm flour tortillas for the ultimate comfort wrap.
This recipe is my go-to for busy weeknights when everyone wants something hearty, comforting, and fast. I first put these together on an evening when school projects and piano practice collided, and I wanted something that felt indulgent but could be made quickly from pantry and fridge staples. The combination of seared chicken, aromatic garlic, and molten cheddar creates a satisfying contrast of textures: crispy edges where the chicken browned, silky melted cheese, and the soft, slightly chewy tortilla that holds it all together. It quickly became a family favorite because it disappears the minute it hits the table.
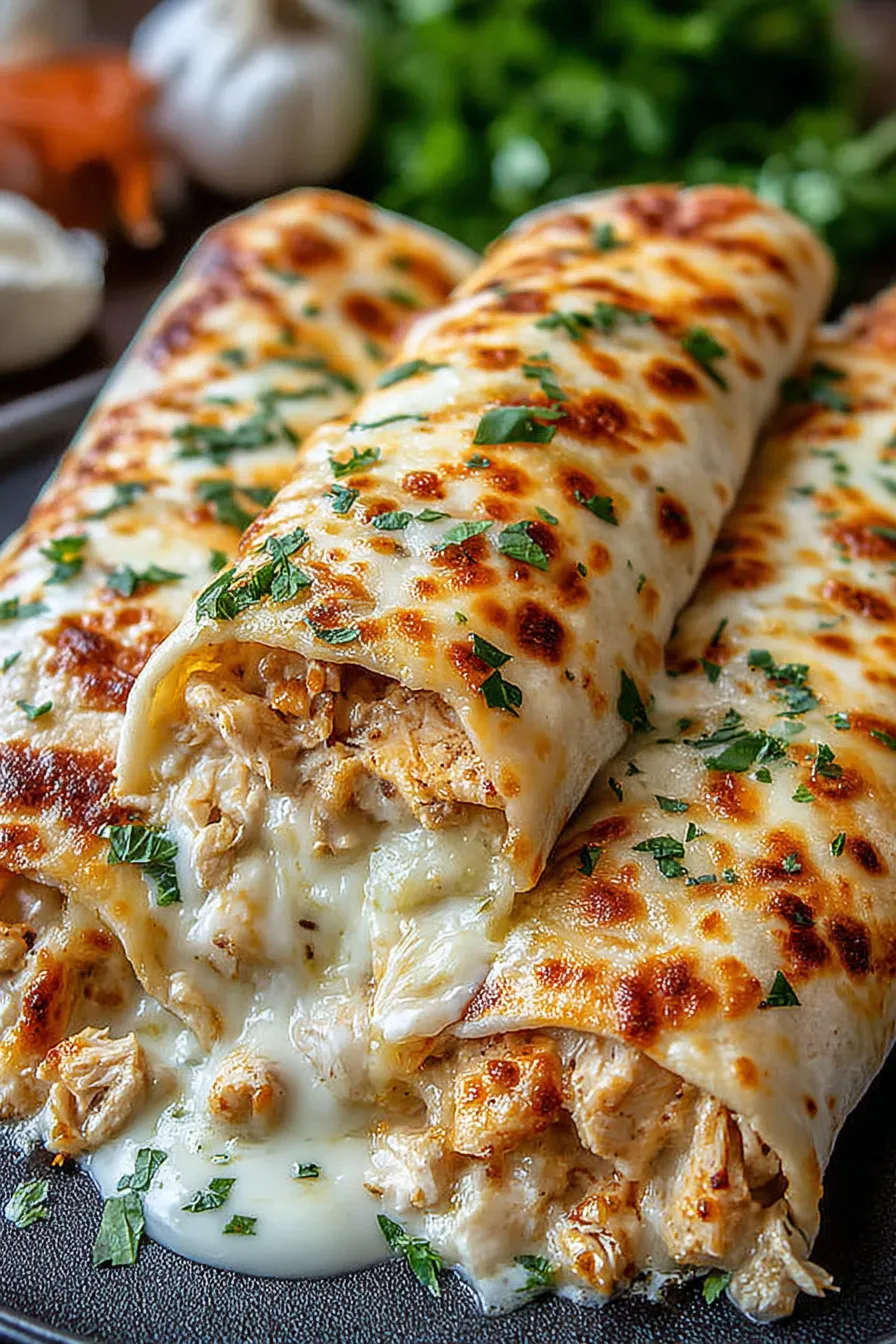
What makes this dish special is how forgiving and flexible it is. The chicken stays juicy when seared briefly and then given a short rest, and the garlic aroma that blooms in the pan ties everything together. Rolling the tortillas tightly and baking them seam-side down creates that slightly crisped exterior with molten cheese inside, reminiscent of a hot handheld casserole. I discovered a few small technique tweaks — resting the chicken, shredding instead of slicing, and not skimping on cheese — that take the wraps from ordinary to memorable. These wraps travel well, freeze nicely, and are a delightful option for lunchboxes, potlucks, or casual dinner nights.
Why You'll Love This Recipe
- Fast and family-friendly: ready in about 30 minutes from start to finish, perfect for hectic weeknights when you want comfort without fuss.
- Uses pantry staples and simple proteins: flour tortillas, cheddar, garlic and boneless chicken are easy to source and keep on hand.
- Make-ahead friendly: you can cook and shred the chicken a day ahead and assemble then bake when needed, saving active time.
- Customizable: swap cheese, add veggies or sauces easily to suit picky eaters or to use up produce in your fridge.
- Great for sharing: the filling is crowd-pleasing and the baked wraps travel and reheat well for potlucks or picnics.
My family always asks for a second round. One evening I doubled the recipe for a small gathering and still ran out; guests loved the garlicky aroma and the gooey center. Over time I learned a few tricks, like using a generous amount of cheese and not overcooking the chicken, that consistently win praise at the table.
Ingredients
- Boneless, skinless chicken breasts (3, about 1.5 pounds): Choose evenly sized breasts for uniform cooking. If one is much thicker, butterfly it or lightly pound to even thickness so everything finishes at the same time. I like organic or free-range breasts for flavor, but any supermarket packs will work.
- Fresh garlic (4 cloves, minced): Freshly minced garlic gives a brighter, more aromatic note than jarred. Smash the cloves with the flat of a knife first to release oils, then mince fine so it saut茅s quickly and evenly.
- Shredded cheddar cheese (2 cups): Sharp cheddar adds tang and melts beautifully. Pre-shredded cheese is convenient but freshly shredded blocks melt creamier; I prefer a 50/50 mix of sharp and mild for balance.
- Large flour tortillas (4): Use burrito-size tortillas about 10 to 12 inches wide. Warm them slightly before assembling to make rolling easier and to prevent tearing.
- Olive oil (2 tablespoons): Use a neutral-tasting extra virgin for searing. Heat it hot enough to brown the chicken but not so hot that it smokes.
- Italian seasoning (1 teaspoon): A ready blend saves time; oregano and basil are the dominant flavors that complement garlic and cheddar nicely.
- Salt and freshly ground black pepper: Season generously to bring flavors forward. I recommend Kosher salt and a few grinds of pepper to taste.
Instructions
Preheat and prepare: Preheat the oven to 400 degrees Fahrenheit and grease a baking dish with nonstick spray. Heating the oven first ensures the wraps bake quickly and the cheese melts uniformly. Use a shallow dish that fits the wraps snugly so they sit seam-side down without touching too much. Season and sear the chicken: Pat the chicken breasts dry and season both sides with salt and pepper. In a skillet over medium heat add 2 tablespoons olive oil and let it shimmer but not smoke. Sear the breasts 5 to 7 minutes per side until a golden crust forms and the internal temperature reaches 165 degrees Fahrenheit. Searing gives a flavorful browned exterior; if your breasts are thick, reduce heat after browning and finish cooking a few minutes longer to avoid burning. Rest and shred: Remove the cooked chicken to a cutting board and let it rest 5 minutes so juices redistribute. Shred the meat with two forks or chop finely for bite-sized pieces. Resting prevents the wrapped filling from drying out and yields juicier shreds. Saut茅 the garlic: In the same skillet, lower heat to medium-low and add the minced garlic. Cook about 30 to 60 seconds until fragrant and lightly golden. Use the rendered fond and any remaining oil to carry flavor into the garlic without burning it. Toss and season the filling: Toss the shredded chicken with the saut茅ed garlic and 1 teaspoon Italian seasoning. Adjust salt and pepper to taste. If you like, add a splash of chicken broth or a teaspoon of butter to moisten the mixture slightly so it melds with the cheese. Assemble the wraps: Lay each warmed tortilla flat, divide the shredded chicken among them, and pile about 1/2 cup of shredded cheddar on each. Roll tightly and place seam-side down in the prepared baking dish. Tight rolling helps the wraps hold together while baking and creates a tidy presentation. Bake until melty: Bake in the preheated oven for 10 to 15 minutes until heated through and the cheese is thoroughly melted. For a golden exterior, switch the oven to broil for the final 1 to 2 minutes while watching closely to prevent burning. Let the wraps rest a minute before serving so the filling settles.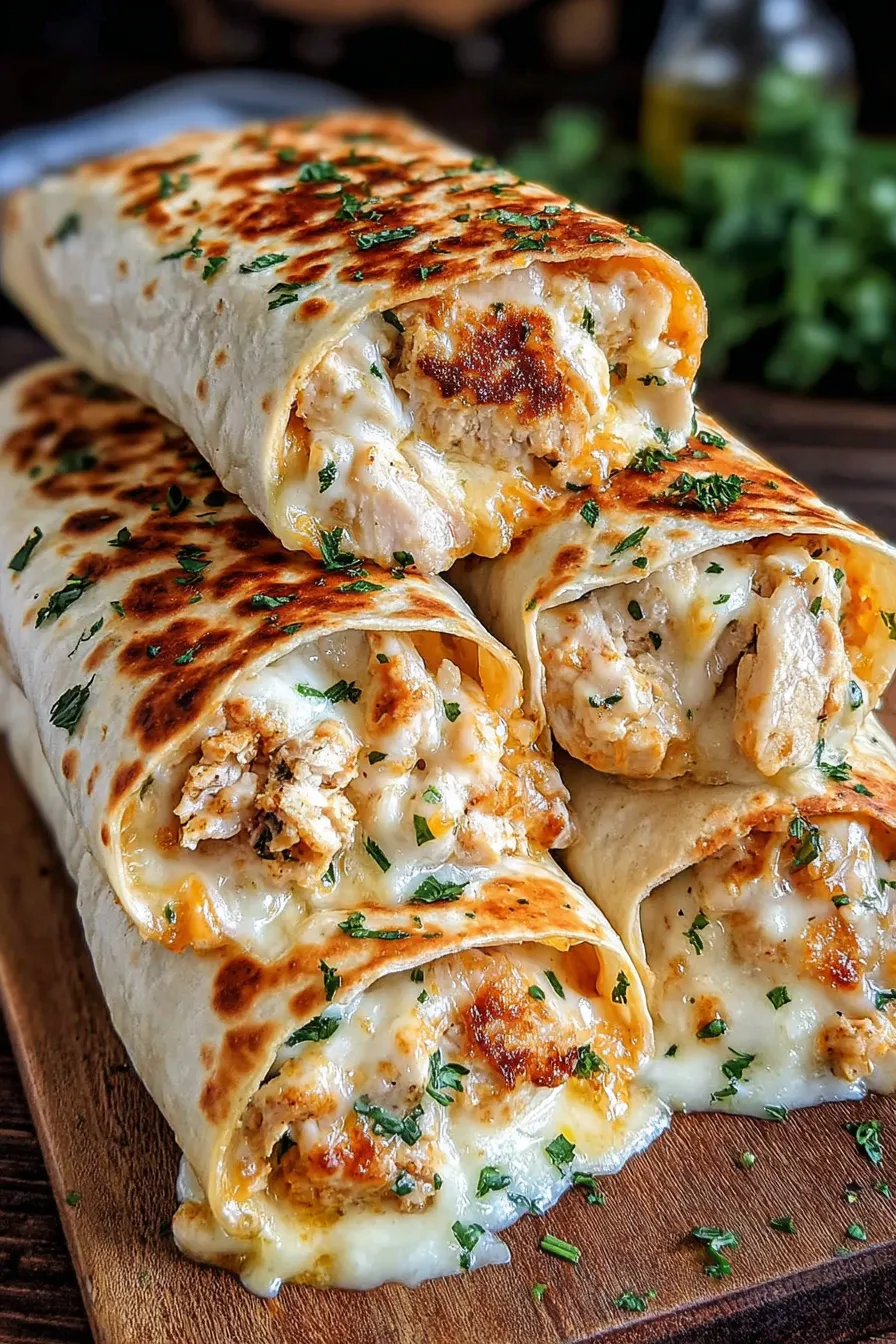
You Must Know
- High in protein and satisfying: each serving delivers a substantial protein hit from chicken and dairy from cheddar.
- Storage friendly: wraps keep well refrigerated for up to 3 days and can be frozen for up to 2 months when individually wrapped in foil.
- Reheating: reheat in a 350 degrees Fahrenheit oven until warmed through to restore crispness; microwaving is faster but softens the tortilla.
- Allergen note: contains dairy and gluten; swap ingredients for allergy-friendly alternatives as needed.
What I love most about these wraps is their versatility. They are decadent enough for a weekend brunch yet straightforward for a quick dinner. Once, I prepped the chicken on Sunday for an easy weekday lunch — reheated in under 10 minutes, the wraps tasted nearly fresh, and the family appreciated the extra ease on a busy day.
Storage Tips
To store, cool the wraps to room temperature and place them in an airtight container or wrap individually in plastic wrap then foil. Refrigerate for up to 3 days; to freeze, wrap each tightly and place in a freezer-safe bag for up to 2 months. When reheating from frozen, unwrap and bake at 350 degrees Fahrenheit for 20 to 30 minutes until hot in the center, or thaw overnight in the refrigerator and reheat for about 10 minutes. For best texture, re-crisp in a skillet over medium heat for 1 to 2 minutes per side after baking.
Ingredient Substitutions
If you need dairy-free options, use a plant-based shredded cheese that melts well, such as a cashew-based cheddar alternative. To make the wraps gluten-free, choose large gluten-free tortillas made from rice and tapioca flour. If you prefer a different protein, substitute cooked rotisserie chicken or shredded turkey in equal weight. For extra moisture and flavor, stir in 1 to 2 tablespoons of sour cream, plain yogurt, or a spoonful of mayonnaise before rolling.
Serving Suggestions
Serve warm with a simple green salad dressed in lemon vinaigrette to cut through the richness, or pair with roasted vegetables for a heartier meal. For dipping, offer salsa, sour cream, or a light cilantro-lime crema. Garnish with fresh parsley or sliced scallions for color and brightness. These wraps also make a fun party platter — slice them on the diagonal and present on a wooden board with assorted dips.
Cultural Background
While handheld filled flatbreads appear across many cultures, these wraps blend Tex-Mex comfort with everyday American convenience. The use of cheddar and flour tortillas mirrors popular burrito-style presentations, while the simple seared chicken and garlic nod to classic home-cooking techniques. This melding of influences makes the dish familiar and flexible, ideal for home cooks looking to adapt flavors to family preferences.
Seasonal Adaptations
Adjust fillings by season: in spring add blanched asparagus and fresh peas; in summer fold in grilled corn and diced tomatoes for brightness; in fall, mix in roasted butternut squash and sage for a cozy twist; in winter, add caramelized onions or sautéed mushrooms for depth. Swap the cheddar for a smoked variety in colder months to lend a warming, robust flavor.
Meal Prep Tips
For efficient meal prep, cook and shred the chicken on Sunday and store in an airtight container. Keep shredded cheese separate and warm tortillas wrapped in a cloth inside a low oven or microwave for a few seconds before rolling. Assemble wraps up to one day ahead and bake just before serving to maintain a fresh texture. Label frozen wraps with date and contents to rotate stock efficiently.
These ooey-gooey wraps are a true comfort hit and an adaptable staple. Whether feeding a family, packing lunches, or offering a savory snack at a gathering, they bring warmth and satisfaction with minimal fuss. Try the small tweaks suggested here to make the recipe your own and enjoy the smiles it brings at the table.
Pro Tips
Pat chicken dry before searing to ensure a golden crust and develop deeper flavor.
Let chicken rest 5 minutes before shredding to retain juices and avoid dryness.
Warm tortillas slightly in the microwave wrapped in a damp towel to prevent cracking while rolling.
Toss shredded chicken with a tablespoon of reserved cooking oil or a splash of chicken broth if the filling seems dry before adding cheese.
Broil for the last 1 to 2 minutes to get a lightly crisped exterior, watching closely to avoid burning.
This nourishing ooey-gooey cheesy garlic chicken wraps recipe is sure to be a staple in your kitchen. Enjoy every moist, high protein slice — it is perfect for breakfast or as a wholesome snack any time.
FAQs about Recipes
How do I reheat the wraps without drying them out?
Reheat in a 350 degrees Fahrenheit oven for 8 to 10 minutes to restore crispness. From frozen, bake at 350 degrees Fahrenheit for 20 to 30 minutes until heated through.
Can I make these dairy-free or gluten-free?
Yes. Substitute dairy-free shredded cheese and gluten-free tortillas. Adjust seasoning and add a touch of oil or vegan spread if needed for moisture.
Tags
Ooey-Gooey Cheesy Garlic Chicken Wraps
This Ooey-Gooey Cheesy Garlic Chicken Wraps recipe makes perfectly juicy, tender, and flavorful steak every time! Serve with potatoes and a side salad for an unforgettable dinner in under 30 minutes.
Ingredients
Protein
Aromatics & Seasoning
Cheese & Wrap
Fat
Instructions
Preheat and prepare
Preheat oven to 400 degrees Fahrenheit and grease a baking dish with nonstick spray. This ensures the wraps bake quickly and cheese melts evenly.
Season and sear the chicken
Pat chicken dry, season with salt and pepper. Heat 2 tablespoons olive oil in a skillet over medium heat and sear chicken 5 to 7 minutes per side until golden and cooked to 165 degrees Fahrenheit.
Rest and shred
Remove chicken to a cutting board and rest 5 minutes. Shred with forks or chop finely to create even pieces for the filling.
Saut茅 the garlic and toss
Saut茅 minced garlic in the same skillet 30 to 60 seconds until fragrant. Toss shredded chicken with the garlic and 1 teaspoon Italian seasoning, adjusting salt and pepper as needed.
Assemble and bake
Warm tortillas slightly, divide chicken among them, top with 1/2 cup shredded cheddar each, roll tightly and place seam-side down in the baking dish. Bake 10 to 15 minutes until cheese melts; broil 1 to 2 minutes for a crisped exterior if desired.
Last Step: Please leave a rating and comment letting us know how you liked this recipe! This helps our business to thrive and continue providing free, high-quality recipes for you.
Nutrition
Did You Make This?
Leave a comment & rating below or tag
@delishum on social media!
Categories:
You might also like...

Gooey Marshmallow Chocolate Brownies
Thick chocolate chunk brownies crowned with melted mini marshmallows and drenched in glossy chocolate frosting for the ultimate fudgy, crowd-pleasing bite.

Buttery Pecan Pie Bars
Buttery shortbread crust meets a lush brown sugar pecan topping. Crunchy, caramelly, and ready with just 10 minutes of prep for effortless indulgence.

No-Crack Pumpkin Cheesecake
Ultra-smooth pumpkin cheesecake with warm spice and a sturdy graham crust. A showstopper on its own, unforgettable with caramel and rum-kissed whipped cream.
Did You Make This?
Leave a comment & rating below or tag @delishum on social media!
Rate This Recipe
Share This Recipe
Enjoyed this recipe? Share it with friends and family, and don't forget to leave a review!
Comments (1)
This recipe looks amazing! Can't wait to try it.
Comments are stored locally in your browser. Server comments are displayed alongside your local comments.

Hi, I'm Amelia!
What's Popular

30-Minute Meals!
Join to receive our email series which contains a round-up of some of our quick and easy family favorite recipes.