
No-Bake Cottage Cheese Brownie Bites

Creamy, chocolatey no-bake bites made with cottage cheese, cocoa, and a touch of sweetener — a protein-rich treat ready in under an hour.
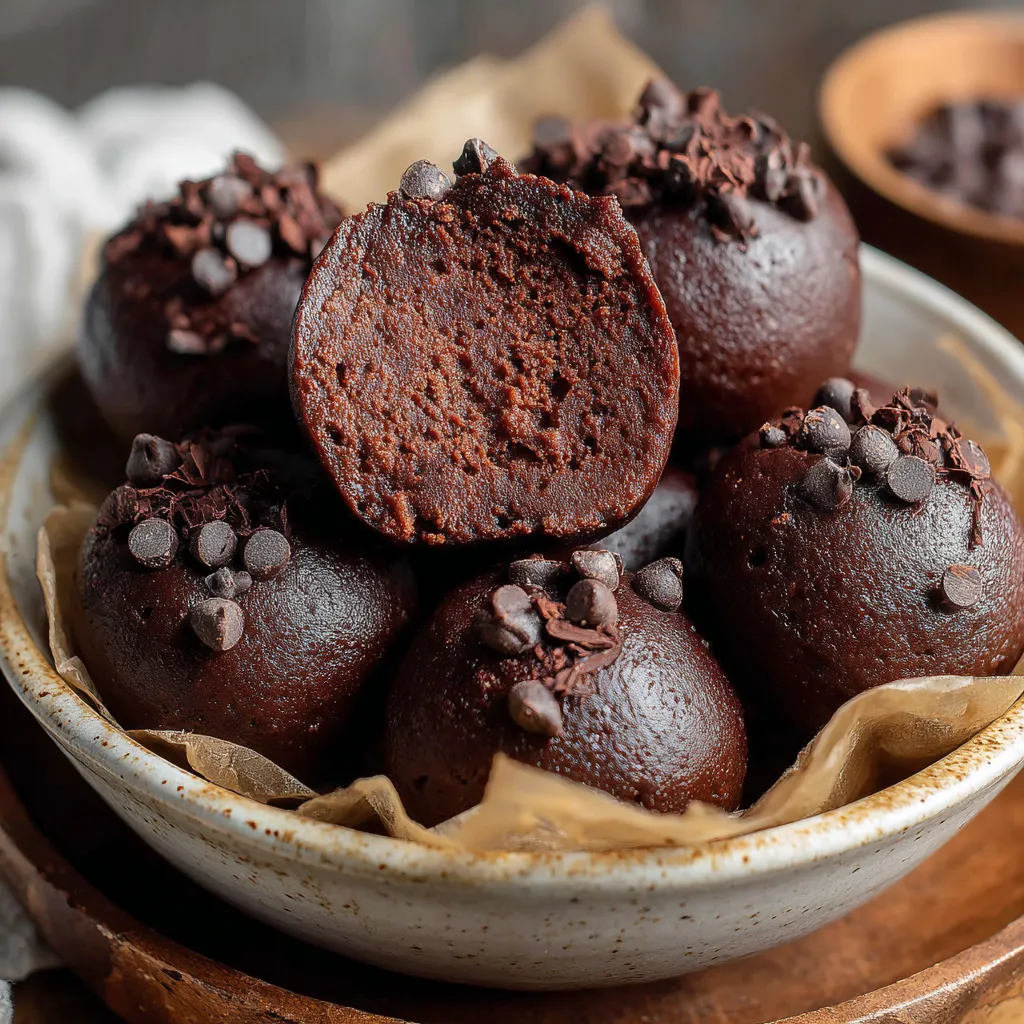
This no-bake cottage cheese brownie is one of those discoveries that changed my snack game. I first made these on a busy Sunday afternoon when the kids wanted something sweet but I didn’t want to start baking. Using 1 cup of cottage cheese as the base created an unexpectedly rich, fudgy texture that mimics a brownie without heat. The blend of unsweetened cocoa, a little honey (or maple syrup), and a splash of vanilla produces a deep chocolate flavor with a creamy lift from the dairy. They satisfy chocolate cravings, pack protein, and come together in minutes — no oven required.
I keep a container of these chilled in the fridge for school lunches, mid-afternoon pick-me-ups, or an after-dinner nibble. They set firm after chilling and have a pleasant balance of sweetness and bitterness when you use unsweetened cocoa. Because they use cottage cheese, these bites feel indulgent but are more wholesome than many store-bought treats. Over time I've tuned the texture by experimenting with different cottage cheese styles and nut mix-ins. Friends who first hesitated at the idea were pleasantly surprised — the flavor and texture win over skeptics every time.
Why You'll Love This Recipe
- Ready in about 40 minutes from start to finish (10 minutes active prep, 30 minutes chilling) — perfect for busy days when you want a fast homemade treat.
- Uses pantry staples and one main fresh ingredient: cottage cheese. No baking skills or special equipment required beyond a blender.
- High-protein snack option — cottage cheese and optional protein powder add staying power and make these suitable for breakfast-on-the-go or post-workout nibbling.
- Completely customizable: swap honey for maple syrup or sweetener, add different nuts, seeds, or chocolate chips to match dietary needs and preferences.
- Make-ahead friendly — form the bites and chill or freeze for quick grab-and-go portions. They keep well in the fridge for up to 5 days.
When I introduced these to our family, my teenager proclaimed them “healthier candy” and my partner started packing them for hikes. I love how adaptable they are — sometimes I add a scoop of protein powder for extra heft, other times I omit it and let the dairy shine. They’ve become a staple for potlucks and low-effort gatherings because everyone can pop one and keep chatting.
Ingredients
- Cottage cheese (1 cup): Use low-fat or full-fat depending on desired richness. Full-fat yields a silkier, more indulgent bite while low-fat keeps calories lower. I often choose a small-curd brand for creamier texture; Fresh Farms or Good Culture work nicely.
- Honey or maple syrup (2 tablespoons): Acts as the primary sweetener. Honey adds floral notes; maple brings a deeper, woodsy sweetness. Use liquid sweetener or a granular sweetener of choice dissolved into the blended base.
- Vanilla extract (1 teaspoon): Pure vanilla elevates the chocolate, adding rounded warmth. Avoid imitation vanilla if you want the cleanest flavor.
- Unsweetened cocoa powder (1/2 cup): Provides the chocolate backbone. Use Dutch-processed for a mellower, darker taste or natural cocoa for brighter acidity — both work.
- Protein powder (1 scoop, optional): Chocolate or vanilla flavors both pair well. Adding a scoop increases protein and creates a slightly firmer texture; choose a powder you like for taste and sweetness.
- Chopped nuts or seeds (2 tablespoons): Toasted walnuts, almonds, or sunflower seeds add crunch and complexity. Chop finely so they distribute evenly.
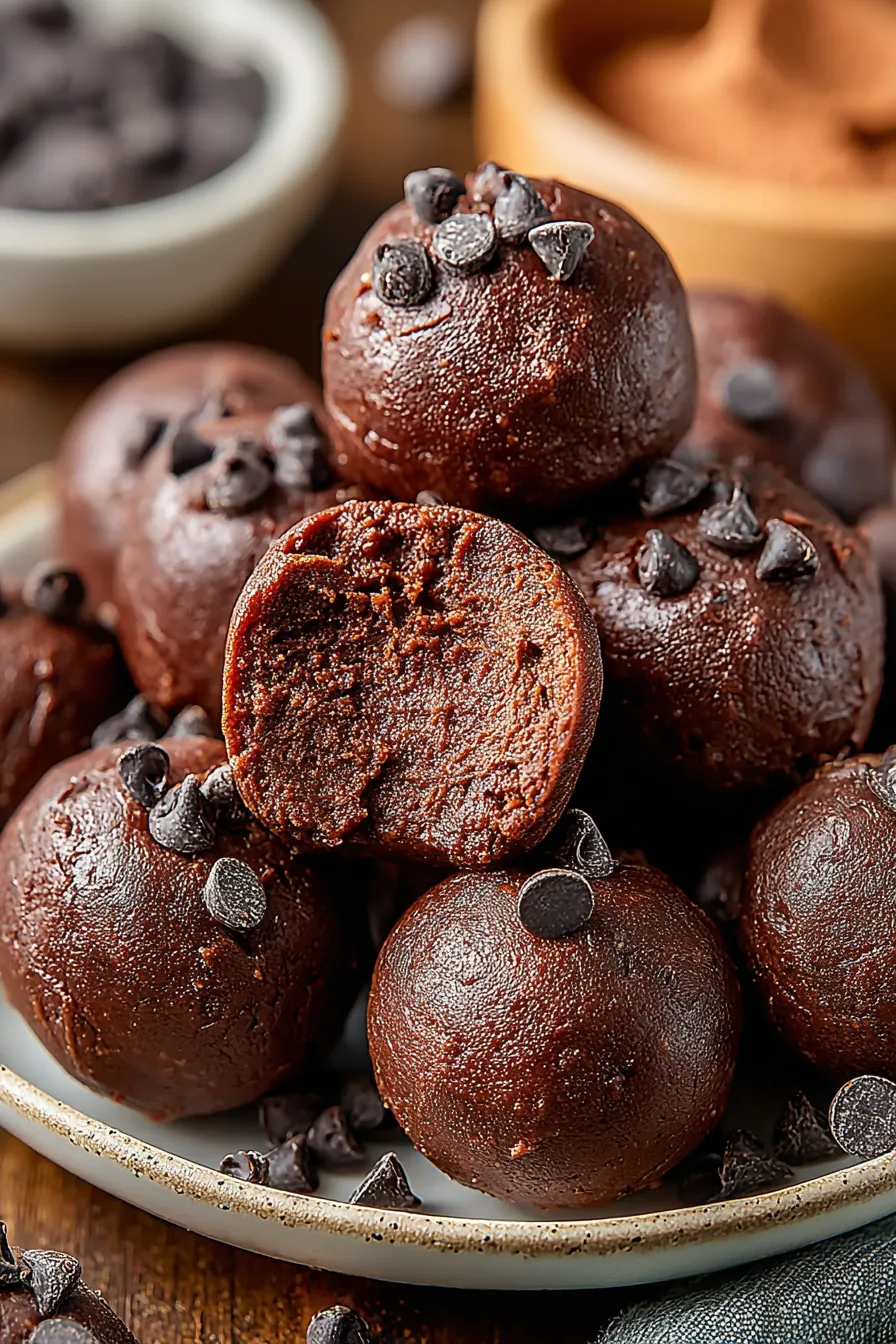
- Mini chocolate chips (1/4 cup, optional): Sprinkle in for bursts of melty chocolate. Use dark chips if you prefer less sweetness, or dairy-free chips to accommodate dietary needs.
Instructions
Blend the base: Place 1 cup cottage cheese, 2 tablespoons honey (or maple syrup), and 1 teaspoon vanilla into a blender. Process until the mixture is completely smooth, about 30–60 seconds. Smoothness is the key visual cue — no visible curds should remain. If your blender struggles, scrape down the sides and blend another 15–20 seconds. Incorporate dry ingredients: Transfer the blended mixture to a mixing bowl. Sift in 1/2 cup unsweetened cocoa powder and add 1 scoop protein powder if using. Stir vigorously with a spatula until the mixture thickens and becomes fudgy. The cocoa absorbs moisture; allow 1–2 minutes for it to hydrate fully and reach a scoopable consistency. Fold in mix-ins: Fold in 2 tablespoons chopped nuts or seeds and 1/4 cup mini chocolate chips, distributing them evenly. Be gentle so the batter retains its creaminess but becomes studded with texture. Taste and adjust sweetness with an extra teaspoon of honey if desired. Portion the bites: Use a 1-inch cookie scoop or dampened hands to portion the mixture into 1-inch balls. Roll each between your palms to create smooth rounds and arrange them on a parchment-lined tray. Wetting your hands with a tiny bit of water or oil helps prevent sticking. Set and chill: Refrigerate for 1 hour or freeze for 30 minutes until set. Freezing shortens waiting time and firms the bites quickly; refrigeration yields a softer, chewy center. After chilling, transfer to an airtight container. Store for later: Keep the bites refrigerated for up to 5 days or frozen for up to 3 months. Thaw in the fridge before serving if frozen. For best texture, allow refrigerated bites to sit at room temperature 5–10 minutes before eating.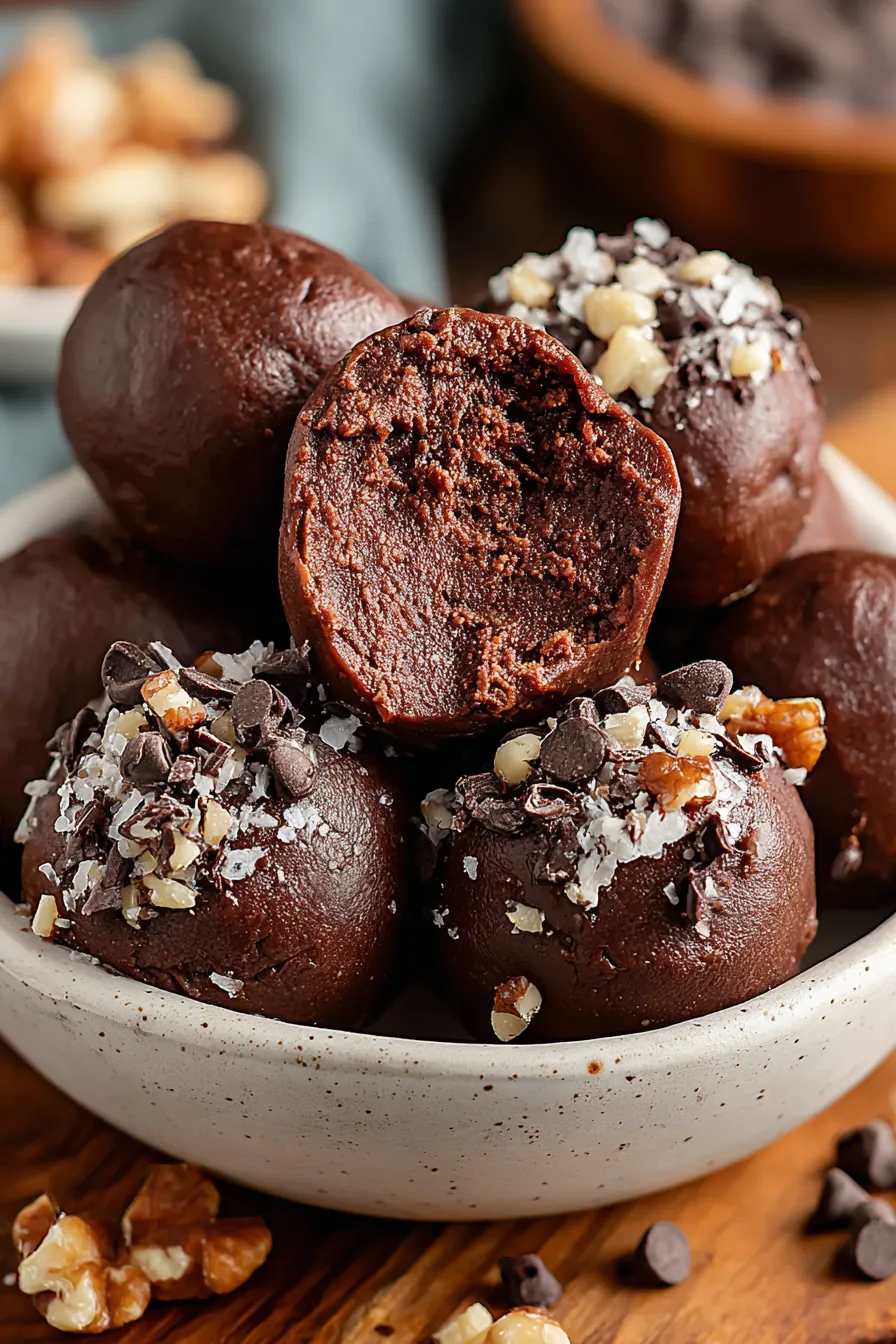
You Must Know
- High in protein relative to typical snacks due to cottage cheese and optional protein powder, making these great post-workout or as a mid-morning refresher.
- Texture depends on cottage cheese choice: small-curd full-fat yields silky results; low-fat or large-curd may be slightly grainier unless blended thoroughly.
- Store in an airtight container in the fridge for up to 5 days; they can be frozen in a single layer and transferred to a freezer-safe bag for up to 3 months.
- Freezing for 30 minutes speeds up setting, but refrigeration for an hour gives a creamier bite with less chill.
What I love most is how approachable this is: a blender, a bowl, and a few common ingredients. Guests often ask if I baked them because the texture reads as indulgent. I appreciate the versatility — flavors, sweeteners, and add-ins can all be swapped without losing the essence of the treat. Over time I’ve learned that giving the cocoa a minute to hydrate makes the difference between crumbly and delightfully fudgy bites.
Storage Tips
Store chilled in an airtight container. For short-term use keep them in the refrigerator for up to 5 days; separate layers with parchment to prevent sticking. If you plan to freeze, flash-freeze the tray for 30–45 minutes until the bites are firm, then transfer to a freezer bag or rigid container. Thaw overnight in the fridge or for 15–30 minutes at room temperature before eating. When reheating is desired, a 10–12 second zap in the microwave softens the center without melting chips completely.
Ingredient Substitutions
Swap honey for maple syrup or agave if vegan (use dairy-free cottage cheese alternatives if fully vegan). Use Greek yogurt in a pinch, though it will be tangier and less dense. Replace nuts with seeds like pumpkin or sunflower to avoid tree nut allergens. If you want no chocolate chips, fold in a tablespoon of tahini for a nutty background. For a sugar-free version, use a zero-calorie liquid sweetener calibrated to taste and choose sugar-free chips.
Serving Suggestions
Serve chilled on a dessert platter or tuck a few into a lunchbox with fruit and a small sandwich for a balanced midday meal. Garnish with a dusting of cocoa powder, a light drizzle of melted dark chocolate, or a sprinkle of flaky sea salt to offset sweetness. Pairing ideas include fresh berries, a dollop of Greek yogurt, or a cup of black coffee. These also work well as bite-sized dessert options at gatherings.
Cultural Background
While these bites are a modern fusion rather than a traditional dish, they borrow from dairy-forward comfort foods common in American and European home cooking. Using cottage cheese as a base reflects a movement toward high-protein, minimally processed snacks that emerged from health-conscious kitchen trends. The flavor profile — cocoa, vanilla, and sweetener — references classic brownie ingredients, while the no-bake technique aligns with contemporary convenience-focused recipes.
Seasonal Adaptations
In winter, stir in a pinch of ground cinnamon and chopped toasted pecans for holiday flavors. Spring and summer benefit from bright additions like finely grated orange zest or chopped freeze-dried raspberries for contrast. For fall, fold in a tablespoon of pumpkin puree and a dash of pumpkin pie spice, reducing honey slightly to balance moisture. These seasonal tweaks refresh the core idea without changing the simple method.
Meal Prep Tips
Make a double batch and portion into individual containers for grab-and-go snacks all week. If you’re packing lunches, keep an ice pack alongside to maintain texture. Label frozen batches with the date and flavor notes. Using a cookie scoop ensures uniform sizing for consistent calories and makes rolling faster. If transporting, place bites in a single layer or separate layers with parchment to avoid clumping.
These bites are a small everyday joy — easy, adaptable, and reliably satisfying. Give them a try and let them become your quick chocolate fix that still feels thoughtful and homemade.
Pro Tips
Blend the cottage cheese until completely smooth to avoid a grainy texture.
Allow the cocoa powder a minute to hydrate in the blended base before rolling for firmer bites.
Wet your hands slightly when rolling to prevent sticking and achieve smooth rounds.
Flash-freeze for 30 minutes to set quickly if you’re short on time.
This nourishing no-bake cottage cheese brownie bites recipe is sure to be a staple in your kitchen. Enjoy every moist, high protein slice — it is perfect for breakfast or as a wholesome snack any time.
Tags
No-Bake Cottage Cheese Brownie Bites
This No-Bake Cottage Cheese Brownie Bites recipe makes perfectly juicy, tender, and flavorful steak every time! Serve with potatoes and a side salad for an unforgettable dinner in under 30 minutes.
Instructions
Blend cottage cheese, sweetener, and vanilla
Combine 1 cup cottage cheese, 2 tablespoons honey (or preferred sweetener), and 1 teaspoon vanilla extract in a blender. Process until completely smooth, 30–60 seconds, scraping down sides as needed to eliminate curds.
Mix in cocoa and protein powder
Transfer the smooth mixture to a bowl. Add 1/2 cup unsweetened cocoa powder and 1 scoop protein powder if using. Stir until the mixture thickens and becomes fudge-like. Let cocoa hydrate for 1–2 minutes.
Fold in mix-ins
Gently fold in 2 tablespoons chopped nuts or seeds and 1/4 cup mini chocolate chips, ensuring even distribution without overworking the texture.
Portion and shape bites
Using a 1-inch cookie scoop or dampened hands, portion the mixture into 1-inch balls and roll between your palms for a smooth finish. Place on a parchment-lined tray.
Chill to set
Refrigerate for 1 hour or freeze for 30 minutes until the bites are firm to the touch. Chilling longer yields a firmer texture.
Store properly
Place set bites in an airtight container with parchment layers and refrigerate up to 5 days or freeze up to 3 months. Thaw in the fridge before serving if frozen.
Last Step: Please leave a rating and comment letting us know how you liked this recipe! This helps our business to thrive and continue providing free, high-quality recipes for you.
Nutrition
Did You Make This?
Leave a comment & rating below or tag
@delishum on social media!
Categories:
You might also like...

Gooey Marshmallow Chocolate Brownies
Thick chocolate chunk brownies crowned with melted mini marshmallows and drenched in glossy chocolate frosting for the ultimate fudgy, crowd-pleasing bite.

Buttery Pecan Pie Bars
Buttery shortbread crust meets a lush brown sugar pecan topping. Crunchy, caramelly, and ready with just 10 minutes of prep for effortless indulgence.

No-Crack Pumpkin Cheesecake
Ultra-smooth pumpkin cheesecake with warm spice and a sturdy graham crust. A showstopper on its own, unforgettable with caramel and rum-kissed whipped cream.
Did You Make This?
Leave a comment & rating below or tag @delishum on social media!
Rate This Recipe
Share This Recipe
Enjoyed this recipe? Share it with friends and family, and don't forget to leave a review!
Comments (1)
This recipe looks amazing! Can't wait to try it.
Comments are stored locally in your browser. Server comments are displayed alongside your local comments.

Hi, I'm Amelia!
What's Popular

30-Minute Meals!
Join to receive our email series which contains a round-up of some of our quick and easy family favorite recipes.