
>>

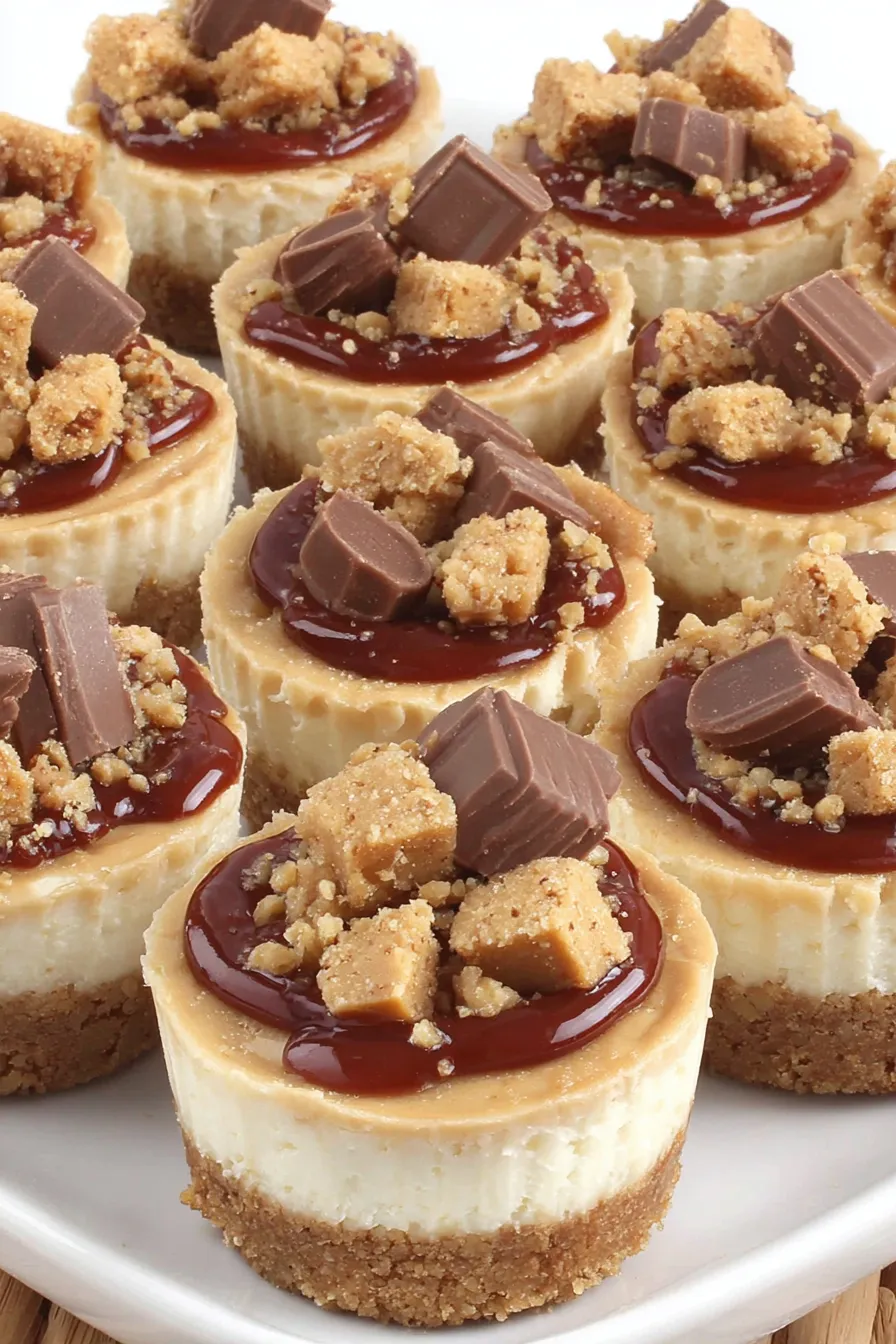
Tiny peanut butter cookie cups filled with silky peanut butter cheesecake — perfect for parties, potlucks, and making-ahead as sweet little bites.

This recipe for mini peanut butter cheesecakes has been a celebration staple in my kitchen for years. I first developed the idea when I wanted to combine two beloved treats — peanut butter cookies and classic cheesecake — into a handheld dessert for a summer picnic. The result was a tray of miniature cookie cups with a creamy peanut butter cheesecake center that vanished before I could take a second bite. The contrast of the slightly crisp cookie shell with the dense, tangy filling creates a balance of textures that keeps everyone coming back for more.
I discovered this combination during a long weekend of testing dessert ideas for a neighborhood potluck. I wanted something that could be baked in a standard muffin tin, travel well, and still feel indulgent. What makes these special is how the peanut butter cookie base bakes into a thin, sturdy cup that holds a rich but lightened cheesecake filling. Each bite delivers the roasted nuttiness of peanut butter, the sweet tang of cream cheese and sour cream, and the satisfying crumb of a cookie — a real crowd-pleaser for kids and adults alike.
I still remember the first time I served these at a summer block party — they disappeared in under twenty minutes, and neighbors kept asking for the recipe. My teenage nephew declared them the official unofficial dessert of our family gatherings, and I often double the batch now because one pan is never enough.
Tip: soften cream cheese and sour cream at room temperature for at least 30 minutes to avoid lumps in the filling. If you're short on time, set the cream cheese on a plate and microwave in 5-8 second bursts until just soft but not melted.
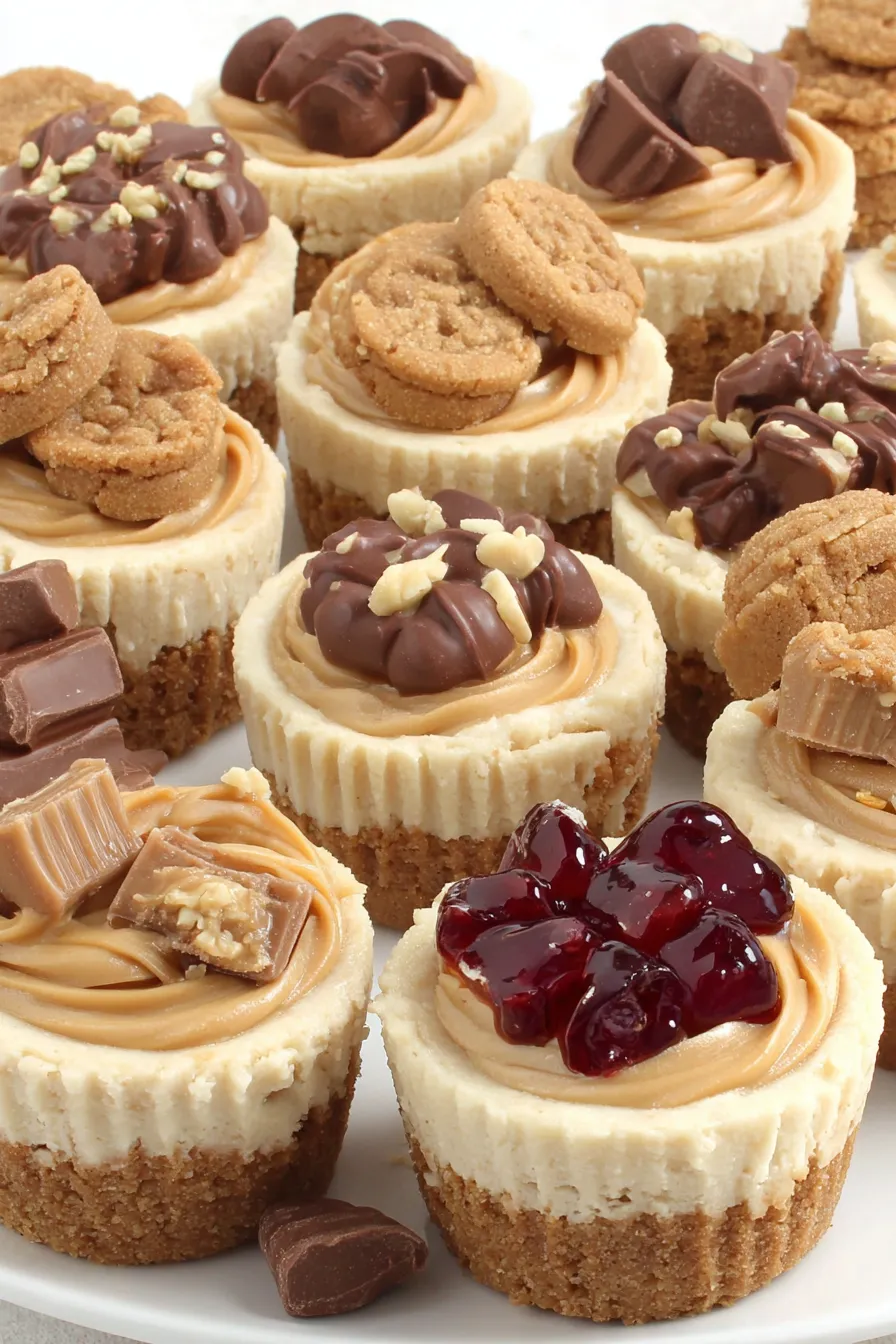
What I love most about this little dessert is how adaptable it is — the basic assembly lets me switch toppings depending on the season. At Christmas I add a drizzle of salted caramel and chopped peanuts; in summer I pair them with a spoonful of grape jelly for playful peanut-butter-and-jelly flavor. Friends often ask for my make-ahead tips because they travel wonderfully and stay tidy in a cooler for outdoor celebrations.
Store the chilled minis in a single layer or in stacked layers separated by parchment in an airtight container. Keep refrigerated for up to four days. For longer storage, place them in a freezer-safe container with parchment between layers and freeze for up to three months. To serve from frozen, thaw in the refrigerator overnight; avoid microwaving, which will ruin texture. If refrigerated, allow 10–15 minutes at room temperature before serving so flavors bloom and the filling loses the chill stiffness.
For peanut allergies, swap peanut butter for almond butter or sunbutter (sunflower seed butter) using the same volume. Use a dairy-free cream cheese and coconut-based sour cream alternative to create a dairy-free version, though texture will be slightly softer. For a gluten-free base, substitute a 1-to-1 gluten-free all-purpose flour blend and reduce mixing — cups may absorb differently, so add flour gradually. To reduce sweetness, cut the filling sugar to 1/2 cup; for more pronounced peanut flavor, fold in 2 tablespoons of peanut butter powder dissolved in a little water.
Serve these miniature treats on a tiered stand for brunch, at a bridal shower, or as an after-dinner dessert bite. Pair with espresso or a rich cold brew to balance sweetness. Garnish with a small smear of jelly for a playful PB&J variation, or finish with a chilled chocolate ganache and crushed roasted peanuts for an elegant presentation. These also work well plated alongside fresh berries for a touch of acidity.
Peanut butter and cheesecake are Americana staples. Peanut butter became popular in the United States in the early 20th century, while cheesecake traces back to ancient Greece but evolved into the dense, cream cheese–based American version in the late 19th century. Combining the two is a contemporary twist that celebrates comfort-food flavors in bite-sized form — a nod to both treasured pantry ingredients and modern party culture where small-plate desserts rule.
In summer, top with a spoonful of tangy berry jam and a few fresh raspberries. In the fall, fold 1/4 teaspoon cinnamon into the cookie dough and finish with a drizzle of warm caramel. For winter holidays, add a pinch of flaky salt and use chopped toffee or crushed peppermint for a festive crunch. These small changes keep the core technique intact while letting you riff on seasonal produce and candy.
Make the cookie cups a day ahead and store them at room temperature in a sealed container. Prepare the filling and keep it chilled; on the day you want to serve, pour the filling into the cooled cups and bake as directed, then chill. Alternatively, fully assemble and refrigerate up to 24 hours in advance. For party prep, double the recipe and freeze one tray of assembled but unbaked minis; thaw in the fridge and bake, adding a few extra minutes to the bake time if starting from partially chilled.
These mini peanut butter cheesecakes are small in size but big on flavor — they invite experimentation and always earn compliments. Try the variations, bring them to your next gathering, and make them your own.
Soften cream cheese and sour cream to room temperature to avoid lumps in the filling.
Rest the cookie dough 10 minutes before shaping to relax the gluten for a tender cup.
Chill minis at least 30 minutes before removing from liners so they hold their shape.
Avoid overmixing the filling to prevent air bubbles and cracking; mix on low and stop when combined.
This nourishing mini peanut butter cheesecakes recipe is sure to be a staple in your kitchen. Enjoy every moist, high protein slice — it is perfect for breakfast or as a wholesome snack any time.
This Mini Peanut Butter Cheesecakes recipe makes perfectly juicy, tender, and flavorful steak every time! Serve with potatoes and a side salad for an unforgettable dinner in under 30 minutes.
Preheat the oven to 350°F and line muffin tins and a baking sheet as instructed to ensure even baking and easy cleanup.
Melt butter and combine with peanut butter and sugars until smooth. Add egg and vanilla. Whisk dry ingredients separately then fold into wet until just combined; do not overmix.
Let dough rest 10 minutes. Press slightly less than 2 tablespoons into each lined muffin cup to form cups and roll 1 teaspoon balls for tiny cookies, flattening with a fork.
Bake cookie cups 10–12 minutes until edges are golden. Bake tiny cookies about 8 minutes. Cool cookie cups in the pan and cool tiny cookies completely on a rack.
Beat softened cream cheese until smooth, add peanut butter and sugar, then eggs and vanilla. Fold in sour cream; mix on low to avoid adding air.
Pour filling into cooled cookie cups and bake 14–16 minutes at 350°F until edges are set and center jiggles. Cool 30 minutes in the pan, then chill at least 30 minutes before removing.
Add optional toppings just before serving: whipped cream, ganache, jelly, peanut butter drizzle, and a small cookie or chopped candies for garnish.
Last Step: Please leave a rating and comment letting us know how you liked this recipe! This helps our business to thrive and continue providing free, high-quality recipes for you.
Leave a comment & rating below or tag
@delishum on social media!

Thick chocolate chunk brownies crowned with melted mini marshmallows and drenched in glossy chocolate frosting for the ultimate fudgy, crowd-pleasing bite.

Buttery shortbread crust meets a lush brown sugar pecan topping. Crunchy, caramelly, and ready with just 10 minutes of prep for effortless indulgence.

Ultra-smooth pumpkin cheesecake with warm spice and a sturdy graham crust. A showstopper on its own, unforgettable with caramel and rum-kissed whipped cream.
Leave a comment & rating below or tag @delishum on social media!
Enjoyed this recipe? Share it with friends and family, and don't forget to leave a review!
This recipe looks amazing! Can't wait to try it.
Comments are stored locally in your browser. Server comments are displayed alongside your local comments.

Join to receive our email series which contains a round-up of some of our quick and easy family favorite recipes.
