
Italian Pear Cake

A tender, mascarpone-rich cake studded with ripe pears and brushed with butter for a golden finish—perfect for brunch, dessert, or a cozy coffee moment.
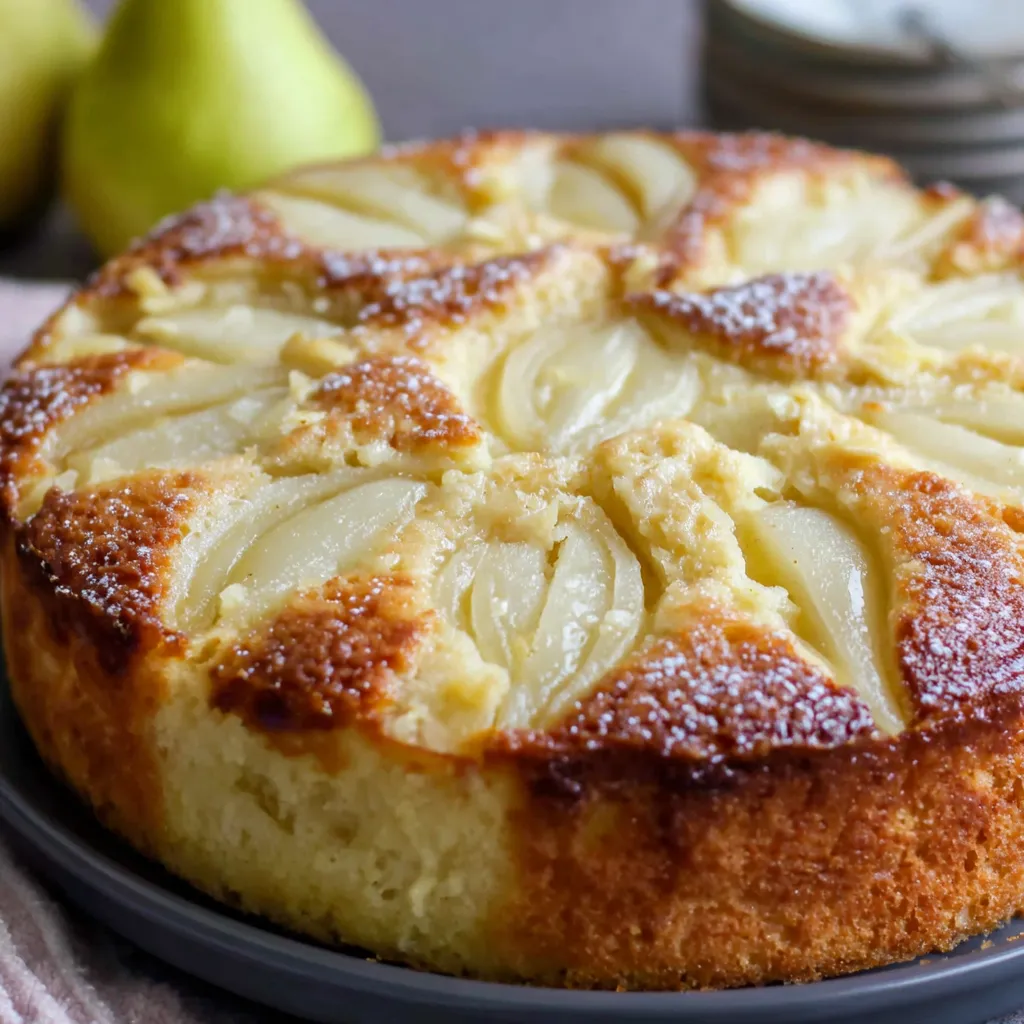
This Italian pear cake has been a quiet staple in my kitchen for years, the kind of recipe that surfaces whenever friends drop by unannounced or when I want something a little indulgent without fuss. I first adapted this version during a damp autumn when Bosc pears were at their peak: ripe but still firm, their honeyed sweetness and fine texture married wonderfully with creamy mascarpone and a tender crumb. The result is a cake that is neither too sweet nor heavy—just softly structured, lightly caramelized at the edges, and rich in mouthfeel thanks to the mascarpone.
I remember the first time I served it to my neighbor for coffee; she closed her eyes after the first bite and said it reminded her of countryside pastries she grew up with in Italy. That memory stuck with me. The buttery top and the gentle pear slices create a homey presentation that feels both rustic and refined. This version uses pantry-friendly ingredients, takes about an hour from start to finish, and delivers a sophisticated finish with minimal effort—ideal for entertaining or a relaxed weekend brunch.
Why You'll Love This Recipe
- Ready in about 60 minutes from start to finish—quick enough for a spontaneous gathering yet special enough for guests.
- Uses simple pantry staples plus mascarpone for a lusciously creamy crumb that feels luxurious without complicated technique.
- Fruit-forward: ripe but firm pears keep their shape when baked, adding texture and natural sweetness instead of relying on a lot of sugar.
- Make-ahead friendly: it keeps well for 2 days at room temperature or up to 4 days refrigerated, and it freezes beautifully for up to 3 months.
- Versatile: serve warm with a spoonful of yogurt or chilled with espresso for a relaxed dessert or elegant brunch centerpiece.
Personal note: I often halve the recipe for a midweek treat, but when I make the full 9-inch round I find it becomes the center of conversation. My family always hovers around the kitchen while it cools—the scent of butter and pears does that every time.
Ingredients
- 2 Small Pears: Choose pears that are ripe but still firm—Bosc or Anjou are ideal. They should give slightly under gentle pressure but not be soft. One pear will be diced into bite-size cubes to fold into the batter; the other will be sliced thinly to fan on top for an attractive finish.
- 3 oz Unsalted Butter, melted: I use high-quality European-style butter for its deeper flavor. Reserve about 1 teaspoon to brush the pear slices before baking to encourage caramelization and glossy finish.
- 8 oz Mascarpone, room temperature: Let it sit out for 30 minutes so it folds smoothly into the batter. Brands like BelGioioso or President work well—mascarpone adds creaminess and helps keep the cake tender.
- 2 Large Eggs: Bring to room temperature for best emulsification; this helps the batter hold air and bakes into a lighter crumb.
- 1 teaspoon Pure Vanilla Extract: Use a real vanilla extract for depth; this supports the pear flavor without competing.
- 1 1/4 Cup All-Purpose Flour: Spoon and level for accuracy. If you prefer an even more tender crumb, substitute 1/4 cup with cake flour.
- 1 1/4 teaspoon Baking Powder: Ensures a gentle rise and even structure.
- 1/2 teaspoon Kosher Salt: Balances sweetness and enhances the mascarpone flavor.
- 2/3 Cup Granulated Sugar, divided: Reserve about 1 teaspoon to sprinkle on top of the pears for a delicate sparkle and slight crunch.
Instructions
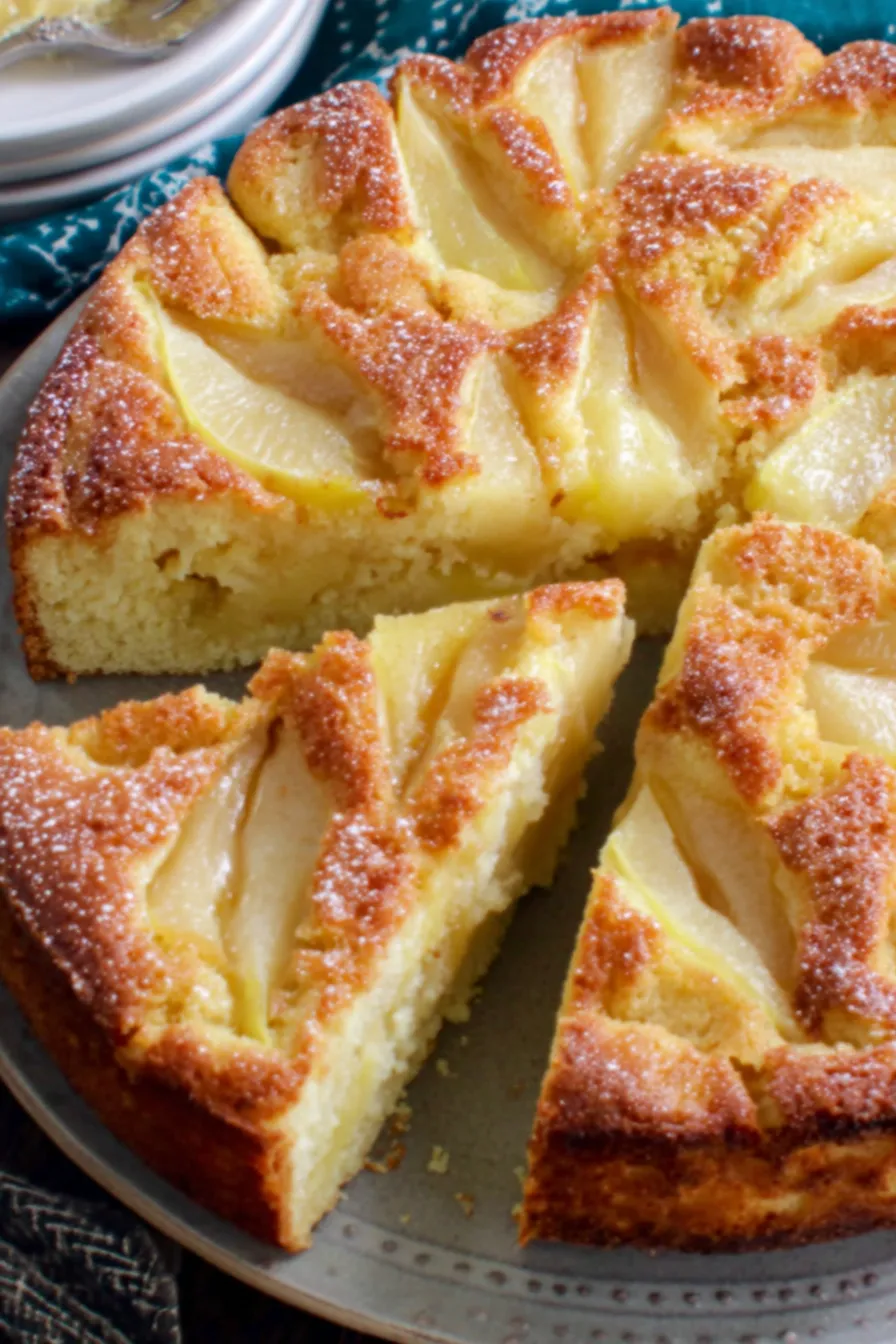
Preheat and Prepare: Preheat the oven to 350°F. Grease a 9-inch springform pan with about 2 teaspoons of the melted butter, ensuring the base and sides are well coated to prevent sticking. Reserve roughly 1 teaspoon of melted butter for brushing fruit later; keep the rest for the batter. This step gives the cake a crisp golden edge and helps with unmolding. Prepare the Pears: Peel both pears. Dice one pear into bite-size cubes (about 1/2-inch pieces) so they distribute evenly through the batter and won’t sink. Cut the second pear into 1/8-inch slices—thin enough to fan but thick enough to hold shape. Place the diced and sliced pears on separate plates while you mix the batter. Mix Wet Ingredients: In a medium bowl combine the remaining melted butter, mascarpone, eggs, and vanilla extract. Whisk until the mixture is smooth and homogenous; the mascarpone should be fully incorporated and the mixture slightly aerated. If the mascarpone is still cool, let it warm another 10 minutes to avoid clumps. Combine Dry Ingredients: In a small bowl whisk together flour, baking powder, salt, and the majority of the sugar, reserving about 1 teaspoon of sugar for the topping. Whisking these together ensures even rising and no pockets of baking powder. Fold Batter and Pears: Add the dry mix to the wet mixture and fold gently with a spatula until just combined—do not overmix. Overmixing develops gluten and will make the crumb tough. Fold the diced pears into the batter so they are evenly distributed. The batter should be thick but spoonable; if it seems excessively stiff, a tablespoon of milk will loosen it slightly. Assemble and Top: Transfer batter into the prepared pan, smoothing the top with a spatula. Arrange the pear slices on top in a concentric pattern or simple overlapping rows. Brush the pear slices with the reserved teaspoon of melted butter and sprinkle the reserved teaspoon of sugar evenly over the top; this helps the pears caramelize and gives a delicate sheen. Bake: Bake at 350°F for about 45 minutes. Look for a light brown top and test with a toothpick inserted in the center—when it comes out clean with just a few moist crumbs, it is done. If the top is browning too quickly, tent loosely with foil for the last 10 minutes. Cool and Unmold: Allow the cake to cool completely in the pan on a wire rack before releasing the springform. Cooling fully helps the structure set so slices are neat and the mascarpone-enriched crumb holds together.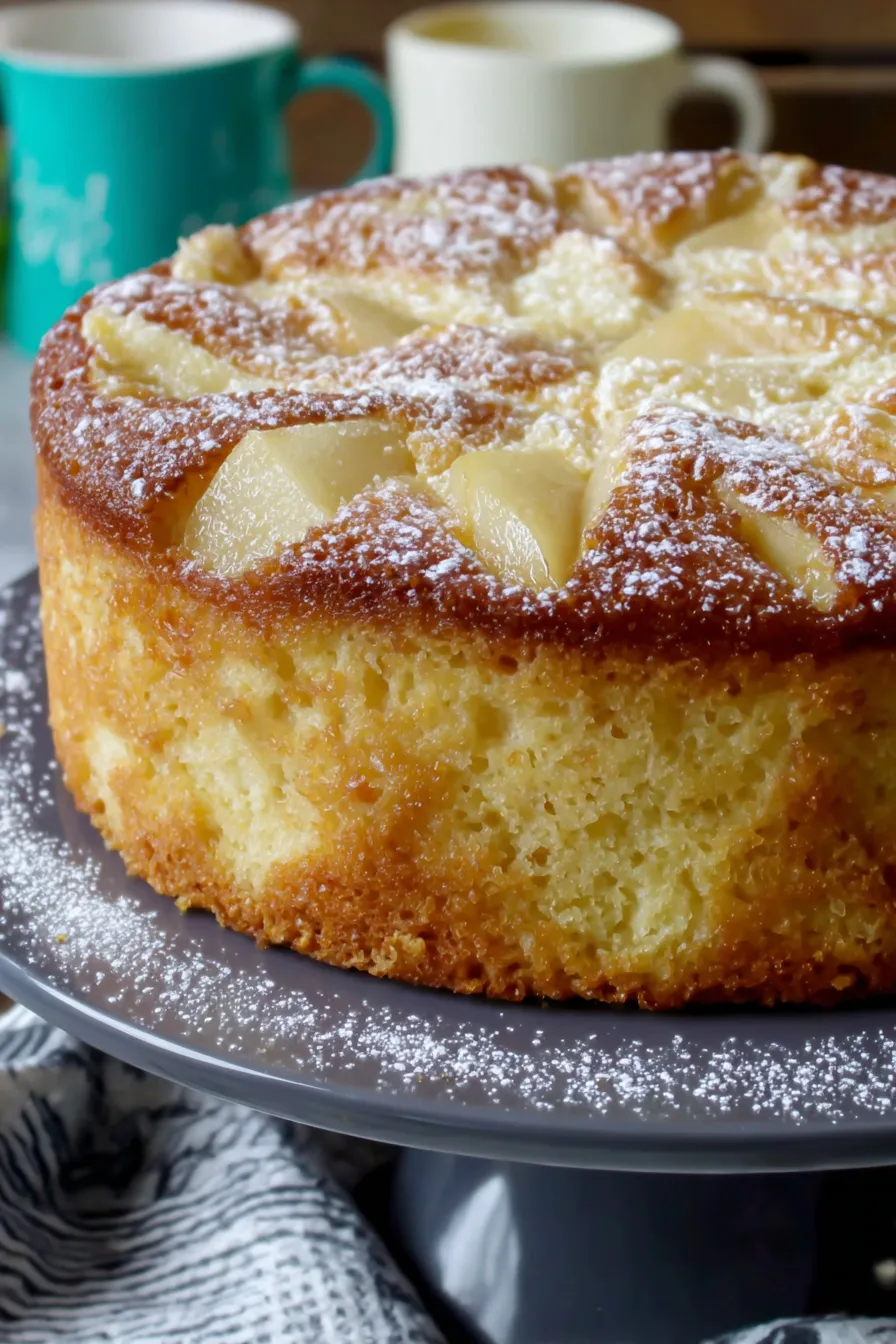
You Must Know
- This cake stores well at room temperature for 1 to 2 days in an airtight container; refrigerate if you plan to keep it longer—up to 4 days.
- Freezes beautifully: wrap cooled whole cake or slices tightly in plastic wrap and aluminum foil for up to 3 months. Thaw overnight in the refrigerator and bring to room temperature before serving.
- Texture tip: the diced pear inside keeps the crumb moist, while the thin top slices caramelize—don’t skip the reserved butter and sugar on top.
- Nutritional note: this is a dairy-rich item thanks to mascarpone and butter; it is not gluten-free or vegan without modifications.
My favorite aspect is the contrast between the creamy interior and the lightly caramelized pear topping. At holiday brunches it disappears fast; people often ask for the recipe and tell me they love that it feels elegant without being fussy—exactly the effect I aim for.
Storage Tips
Store the cake at room temperature in an airtight container for up to 48 hours. If you need longer storage, refrigerate for up to 4 days—bring to room temperature before serving to restore tenderness. For freezing, wrap slices individually in plastic wrap and aluminum foil or store the whole cooled cake in a freezer-safe container; thaw overnight in the refrigerator. Reheat individual slices briefly in a 325°F oven for 5 to 8 minutes for a fresh-from-the-oven feel.
Ingredient Substitutions
If mascarpone is unavailable, full-fat cream cheese thinned with a tablespoon of heavy cream will work but will alter the texture slightly. For a dairy-free version, use a high-quality vegan cream cheese and vegan butter, and expect a slightly different mouthfeel. To make it gluten-free, substitute a 1-to-1 gluten-free flour blend and add 1/4 teaspoon xanthan gum if the blend lacks it. Swap pears for thinly sliced apples for a more autumnal profile, increasing baking time by 5 to 8 minutes for denser apple slices.
Serving Suggestions
Serve warm with a dollop of lightly sweetened whipped cream or a spoonful of vanilla yogurt. For brunch, pair with strong espresso or a sparkling Prosecco to balance the cake’s richness. Garnish with a few thin pear slices and a light dusting of powdered sugar for an elegant finish. It also pairs beautifully with honey and ricotta for a small plate dessert option.
Cultural Background
Rustic fruit cakes like this appear across Italian regional kitchens where seasonal fruit is celebrated simply. The use of mascarpone lends a northern Italian touch—mascarpone originates around Lombardy and Piedmont and is often used to enrich pastries and desserts. This style of cake focuses on the fruit’s natural sweetness combined with a rich dairy base rather than heavy sugar or complex technique, reflecting the Italian preference for quality ingredients and straightforward preparation.
Seasonal Adaptations
Spring and summer: use ripe pears early in the season or switch to stone fruit like pluots or peaches. Autumn and winter: add 1/2 teaspoon ground cinnamon and a pinch of nutmeg to the dry mix for warming spice. For holiday gatherings, top with toasted sliced almonds or a drizzle of caramel just before serving for extra festivity.
Meal Prep Tips
Make the batter in the morning and refrigerate it for up to 4 hours before baking—this allows the flavors to meld and can help when planning a brunch. If prepping for a party, bake the cake the day before and leave it at room temperature in an airtight container; finish with a light warm-up before serving. Store pre-sliced portions in single-serve containers for grab-and-go breakfasts that feel special.
Final thought: this cake strikes a balance between homey comfort and understated elegance. It’s the sort of recipe you’ll return to season after season, tweaking tiny details like pear variety or spice levels as new memories and preferences develop. Share it with neighbors, bring it to potlucks, or savor a quiet slice with your morning coffee—the simplicity is its charm.
Pro Tips
Bring mascarpone and eggs to room temperature for smooth mixing and an even crumb.
Reserve a small amount of melted butter and sugar to brush and sprinkle on top of the pear slices so they caramelize and gain a glossy finish.
Do not overmix the batter after adding flour; fold until just combined to keep the cake tender.
If the top browns too quickly during baking, tent loosely with foil for the final 10 minutes.
To prevent pears from sinking, dice them into uniform bite-size pieces and fold gently.
This nourishing italian pear cake recipe is sure to be a staple in your kitchen. Enjoy every moist, high protein slice — it is perfect for breakfast or as a wholesome snack any time.
Tags
Italian Pear Cake
This Italian Pear Cake recipe makes perfectly juicy, tender, and flavorful steak every time! Serve with potatoes and a side salad for an unforgettable dinner in under 30 minutes.
Ingredients
Fruit
Wet Ingredients
Dry Ingredients
Instructions
Preheat and Prepare Pan
Preheat oven to 350°F. Brush a 9-inch springform pan with melted butter, coating the base and sides. Reserve about 1 teaspoon of melted butter to brush on the pear slices later.
Peel and Cut Pears
Peel both pears. Dice one into approximately 1/2-inch cubes for folding into the batter. Slice the other into 1/8-inch thin slices for the top. Set aside separately.
Mix Wet Ingredients
Combine remaining melted butter, mascarpone, eggs, and vanilla extract in a medium bowl. Whisk until completely smooth and slightly aerated, ensuring no mascarpone lumps remain.
Combine Dry Ingredients
In a separate bowl whisk together flour, baking powder, salt, and most of the sugar, reserving about 1 teaspoon for topping. This ensures even distribution of leavening agents.
Fold Batter and Add Pears
Add dry ingredients to wet mixture and fold with a spatula until just combined. Gently fold in the diced pear pieces, avoiding overmixing to keep the crumb tender.
Assemble and Top
Transfer batter to prepared pan and smooth the top. Arrange sliced pears on the surface, brush with reserved butter, and sprinkle reserved sugar evenly over the top.
Bake and Cool
Bake at 350°F for approximately 45 minutes, or until the top is light brown and a toothpick inserted in the center comes out clean with a few moist crumbs. Cool completely on a wire rack before releasing the springform.
Last Step: Please leave a rating and comment letting us know how you liked this recipe! This helps our business to thrive and continue providing free, high-quality recipes for you.
Nutrition
Did You Make This?
Leave a comment & rating below or tag
@delishum on social media!
Categories:
You might also like...

Gooey Marshmallow Chocolate Brownies
Thick chocolate chunk brownies crowned with melted mini marshmallows and drenched in glossy chocolate frosting for the ultimate fudgy, crowd-pleasing bite.

Buttery Pecan Pie Bars
Buttery shortbread crust meets a lush brown sugar pecan topping. Crunchy, caramelly, and ready with just 10 minutes of prep for effortless indulgence.

No-Crack Pumpkin Cheesecake
Ultra-smooth pumpkin cheesecake with warm spice and a sturdy graham crust. A showstopper on its own, unforgettable with caramel and rum-kissed whipped cream.
Did You Make This?
Leave a comment & rating below or tag @delishum on social media!
Rate This Recipe
Share This Recipe
Enjoyed this recipe? Share it with friends and family, and don't forget to leave a review!
Comments (1)
This recipe looks amazing! Can't wait to try it.
Comments are stored locally in your browser. Server comments are displayed alongside your local comments.

Hi, I'm Amelia!
What's Popular

30-Minute Meals!
Join to receive our email series which contains a round-up of some of our quick and easy family favorite recipes.