
Homemade Hard Candy

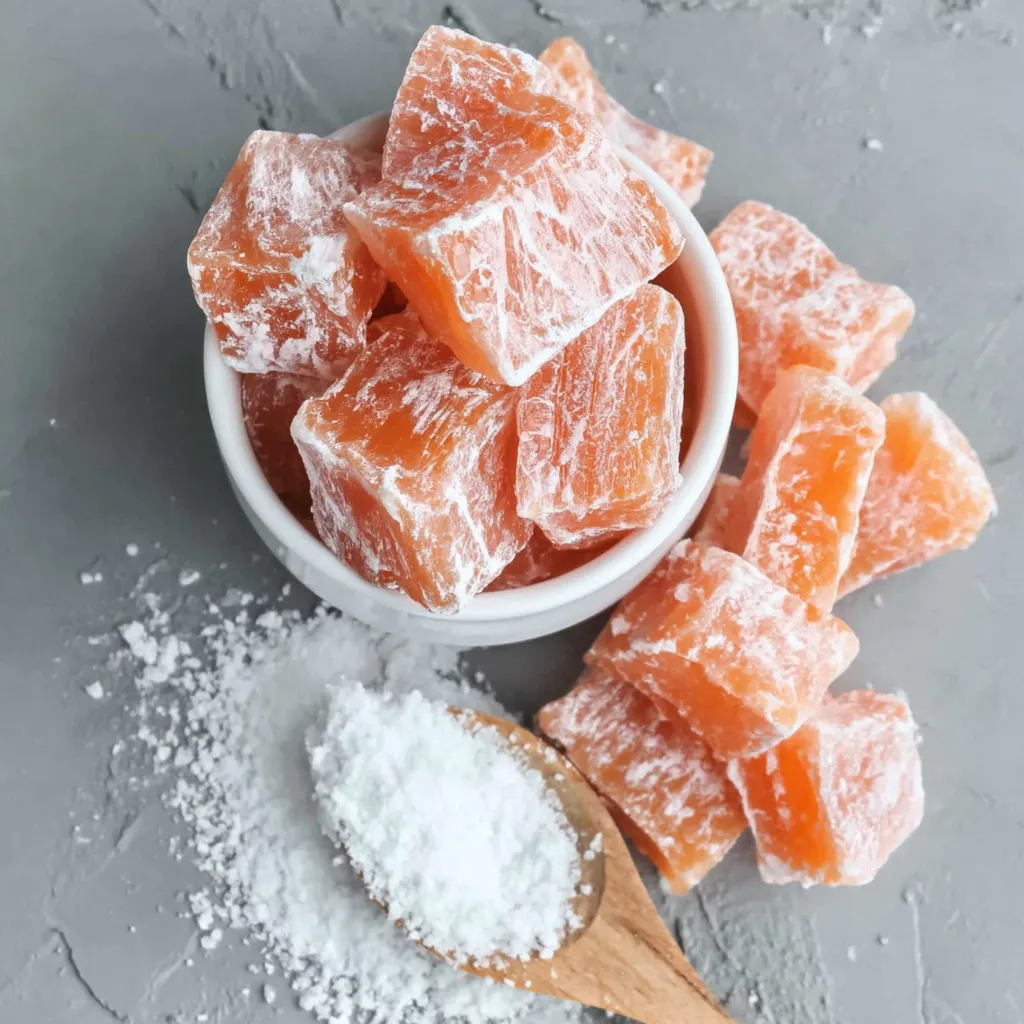
Classic, crunchy hard candy made from simple pantry ingredients—perfect for gift jars, holiday favors, or a nostalgic sweet treat.
This simple hard candy has been a small obsession of mine ever since I watched my grandmother coax a glossy, glassy sheet of candy from a bubbling pot and cut it into jewel-like pieces. I discovered this method during a snowy weekend when the grocery stores were closed and the pantry was my only option. The result—bright, clear candies with a satisfying brittle snap—felt like sunshine in winter. The texture is crisp and glassy, the flavor pure and focused whether I use a bright lemon, fragrant orange, or warm anise extract. Each bite dissolves slowly, releasing the chosen flavor in stages, and because the candy is made with just sugar, corn syrup, and water, the taste is clean and nostalgic.
I particularly love this recipe because it's approachable: no tempering of chocolate, no complex ratios—just attention to temperature and timing. The process taught me patience and respect for heat; the three-minute covered boil step is a small but crucial hack I learned from a pastry book that prevents unwanted crystallization and keeps the surface perfectly smooth. Making these candies has become a holiday ritual in my kitchen—my children decorate jars for neighbors, and the pantry always holds a small tin for last-minute gift emergencies. The bright colors, crackling snap, and long shelf life make this a versatile treat for celebrations, homemade gift-giving, or simply satisfying a craving for something sweet and beautifully handmade.
Why You'll Love This Recipe
- Made from pantry staples—2 cups granulated sugar, corn syrup, and water—so you can usually start right away without a special shopping trip.
- Ready in about 30–40 minutes from start to finish, including cooling time; active hands-on time is short and focused.
- Customizable flavors: use anise for a licorice-like bite, lemon for a bright citrus pop, or orange for a warm, sweet aroma.
- Great for batch-making and gifts—candies keep well in a covered container and can be dusted with confectioners' sugar for easy handling.
- Visual appeal: add food coloring for festive colors, or leave clear for a classic, glassy look that shines in jars.
- Minimal equipment required: a heavy saucepan, candy thermometer, a 15x10x1-inch pan, and scissors are all you need.
My family’s reaction the first time I served these was priceless—my partner tapped a candy to test the snap and the kids debated over which color was the shiniest. Over the years I’ve experimented with extracts and discovered that a touch less than the maximum suggested gives more balanced flavor, while a bolder measure works well when you plan to place candies in boxes or jars and want the flavor to remain noticeable after days of storage.
Ingredients
- Granulated sugar: Use 2 cups of reliable, fine granulated sugar. I prefer Domino or store-brand fine granulated sugar for an even melt—avoid coarse sugar that can take longer to dissolve and encourage crystallization.
- Light corn syrup: 3/4 cup of light corn syrup helps prevent recrystallization and gives the candy a clear, glassy finish; Karo Light is a classic choice.
- Water: 1/2 cup to hydrate the sugar so it dissolves evenly; filtered water is fine—tap water works too.
- Confectioners' sugar: 5 to 6 cups to line and dust the pan; this prevents sticking and creates a mold-like groove to pour into. Use standard powdered sugar (with a pinch of cornstarch as sold commercially).
- Extracts: 1 to 2 teaspoons of anise, lemon, or orange extract. Use pure extracts for the cleanest flavor; a little goes a long way—start with 1 teaspoon and increase if you prefer more intensity.
- Food coloring (optional): Red, yellow, or orange liquid food coloring for visual variety. Use gel sparingly if you want very bright hues—liquid works well for subtle color.
Instructions
Prepare the pan: Pour 5 to 6 cups of confectioners' sugar into a 15x10x1-inch rimmed pan to a depth of about 1/2 inch. Use the handle of a wooden spoon to press a continuous curved-line indentation in the sugar—this becomes the pouring groove and helps the candy set in a single, easy-to-cut piece. Keep the pan near the stove but out of direct heat so the sugar doesn't clump or melt. Combine candy ingredients: In a large, heavy-bottomed saucepan combine 2 cups granulated sugar, 3/4 cup light corn syrup, and 1/2 cup water. Place the pan over medium heat and stir gently just until the sugar begins to dissolve and the mixture is uniform—this prevents pockets of dry sugar but avoid vigorous stirring once the mixture warms. Dissolve sugar crystals: When the mixture reaches a full boil, cover the pan and let it cook covered for 3 minutes without stirring. The steam trapped under the lid melts any stray sugar crystals on the sides of the pan; this is a simple step to prevent unwanted crystallization and keep the candy glossy. Cook to hard-crack stage: Remove the lid and raise the heat to medium-high. Attach a candy thermometer to the pan, ensuring the bulb is submerged in the syrup but not touching the bottom. Cook without stirring until the thermometer reads 300°F—the hard-crack stage. Expect this to take 8–12 minutes depending on your stove. Watch carefully; the color should stay clear or very pale amber. If the syrup smokes or turns deep amber, it has overcooked. Add flavor and color: Immediately remove the pan from the heat the moment it hits 300°F. Let it sit 10–15 seconds to calm, then stir in 1 to 2 teaspoons of your chosen extract. If adding food coloring, add a few drops now and stir gently until the color is uniform. Work quickly—the syrup cools and begins to set fast. Pour into the mold: Carefully pour the hot syrup into a heatproof glass measuring cup to improve control, then pour the syrup into the prepared curved indentation in the confectioners' sugar. Move steadily along the groove to distribute the candy evenly. The sugar will absorb excess stickiness and form a nonstick surface. Coat and cool: Generously dust the top of the poured candy with more confectioners' sugar to prevent the surface from sticking while it cools. Let the candy sit at room temperature until completely firm—about 45 minutes to 1 hour depending on room temperature and humidity. Cut and store: Once cool and firm, use a pair of sharp scissors to cut the candy along the sugar indentation into bite-sized pieces. Shake any excess sugar off, then place pieces in a covered container layered with parchment to prevent sticking. Store at room temperature for up to 2 weeks in an airtight jar; the candies keep well and make lovely gifts.
You Must Know
- Cooking to 300°F is essential—use a reliable candy thermometer and keep the bulb in the syrup, not touching the pan bottom.
- Work quickly when adding extracts and pouring—the syrup begins to set fast and will harden in place.
- Covering the pot for 3 minutes after boiling melts stray crystals and helps prevent a grainy texture.
- These candies freeze well for up to 3 months in an airtight container; thaw at room temperature before serving.
- Because the recipe is nearly all sugar, store it in a cool, dry place to prevent moisture uptake and stickiness.
My favorite part of this process is the moment the cooled sheet cracks with a clean, glassy sound—there's something deeply satisfying about the texture. One winter I made several batches in different flavors and packaged them in tiny jars; neighbors called the next day asking for more, and the kids loved comparing colors and flavors. It’s a small tradition now—bright candies always mean festive season in our house.
Storage Tips
Store candies in a cool, dry place in an airtight container layered with parchment paper to prevent sticking. Do not refrigerate—condensation will make the surface tacky. At room temperature they remain crisp for about 2 weeks; for longer storage freeze in a sealed container for up to 3 months, then allow them to come to room temperature before opening to avoid moisture. If humidity is high, add a small sachet of dry rice wrapped in cloth near (not touching) the candies to help control moisture in the storage container.
Ingredient Substitutions
If you prefer a different sweetener texture, use light corn syrup as directed; dark corn syrup will change flavor and color. For a sugar-free alternative, this exact method won’t translate—sugar alcohols and artificial sweeteners have different melting and setting behaviors. For flavor swaps, vanilla will produce a mellow candy while peppermint oil (use sparingly) creates a classic minty hard candy. If you only have powdered sugar, use it for dusting but not as a replacement in the syrup. Swap liquid food coloring for gel, using about half the gel quantity to avoid over-saturating the syrup.
Serving Suggestions
Present candies in clear jars or cellophane bags tied with ribbon for an elegant gift. Use complementary colors for events—red and yellow for summer parties, pale orange for autumn gatherings, or clear with a tiny edible glitter for holiday sparkle. Pair citrus-flavored candies with tea service or include anise-flavored pieces in after-dinner mints bowls. For party platters, nestle candies in small paper cups to keep them from sticking to each other.
Cultural Background
Hard candy is a timeless confection with roots in simple sugar-boiling traditions found around the world. Classic clear hard candies were often made by street vendors and confectioners who mastered the hard-crack stage to create long-lasting sweets. In many cultures, flavored sugar confections were sold as remedies or breath-fresheners—anise and peppermint have long been used for their digestive and aromatic properties. This recipe echoes those simple, old-fashioned techniques but is adapted for the modern home cook.
Seasonal Adaptations
For winter holidays, add cinnamon or clove extracts for warm spice notes, and use red or green coloring for festive presentation. In spring, brighter citrus extracts and pastel colors work well. For Halloween, choose deep orange and black colorings and package candies in small treat bags. Adjust the extract amount when making gift jars; slightly stronger flavor helps candies retain character after days in storage.
Meal Prep Tips
Make candies in a single session and store them in jars ready to gift or use as treats throughout the season. Prepare the pans and dust them with confectioners' sugar ahead of time, and measure extracts and colorings into small bowls so you can work quickly when the syrup reaches 300°F. Use multiple pans if making different colors or flavors in one go, and keep a bowl of warm water nearby to rinse scissors between cuts if you want two-tone effects.
Making these candies is both practical and joyful—simple ingredients, clear technique, and the pleasure of serving something you made by hand. Give them a try and make the flavors your own; once you master the thermometer and timing, the possibilities are endless.
Pro Tips
Use a reliable candy thermometer and make sure the bulb is submerged in the syrup but not touching the pan bottom for accurate readings.
Cover the syrup for three minutes after it reaches a boil to melt stray crystals; this prevents grainy texture.
Work quickly when adding extract and pouring—once the syrup cools it will set rapidly and become difficult to shape.
This nourishing homemade hard candy recipe is sure to be a staple in your kitchen. Enjoy every moist, high protein slice — it is perfect for breakfast or as a wholesome snack any time.
Tags
Homemade Hard Candy
This Homemade Hard Candy recipe makes perfectly juicy, tender, and flavorful steak every time! Serve with potatoes and a side salad for an unforgettable dinner in under 30 minutes.
Ingredients
Candy Base
Preparation and Finishing
Instructions
Prepare the Pan
Pour confectioners' sugar into a 15x10x1-inch pan to a depth of 1/2 inch and create a continuous curved-line indentation with the handle of a wooden spoon to form a pouring groove.
Combine Candy Ingredients
In a large heavy saucepan combine 2 cups granulated sugar, 3/4 cup light corn syrup, and 1/2 cup water. Warm over medium heat, stirring gently until uniform.
Dissolve Sugar Crystals
When the mixture reaches a boil, cover and cook for 3 minutes without stirring to melt stray crystals and prevent crystallization.
Cook to Hard-Crack Stage
Uncover, increase heat to medium-high, and cook without stirring until the candy thermometer reads 300°F. Remove from heat immediately when reached.
Add Flavor and Color
Stir in 1 to 2 teaspoons of chosen extract and desired food coloring quickly once removed from heat. Work fast—the syrup will begin to set.
Pour Into Mold and Cool
Pour the hot syrup into a heatproof glass measuring cup, then into the sugar-lined groove. Dust the top with more confectioners' sugar and let cool until firm.
Cut and Store
Once cool, use scissors to cut into bite-sized pieces along the indentation and store in a covered container at room temperature up to 2 weeks.
Last Step: Please leave a rating and comment letting us know how you liked this recipe! This helps our business to thrive and continue providing free, high-quality recipes for you.
Nutrition
Did You Make This?
Leave a comment & rating below or tag
@delishum on social media!
Categories:
You might also like...

Gooey Marshmallow Chocolate Brownies
Thick chocolate chunk brownies crowned with melted mini marshmallows and drenched in glossy chocolate frosting for the ultimate fudgy, crowd-pleasing bite.

Buttery Pecan Pie Bars
Buttery shortbread crust meets a lush brown sugar pecan topping. Crunchy, caramelly, and ready with just 10 minutes of prep for effortless indulgence.

No-Crack Pumpkin Cheesecake
Ultra-smooth pumpkin cheesecake with warm spice and a sturdy graham crust. A showstopper on its own, unforgettable with caramel and rum-kissed whipped cream.
Did You Make This?
Leave a comment & rating below or tag @delishum on social media!
Rate This Recipe
Share This Recipe
Enjoyed this recipe? Share it with friends and family, and don't forget to leave a review!
Comments (1)
This recipe looks amazing! Can't wait to try it.
Comments are stored locally in your browser. Server comments are displayed alongside your local comments.

Hi, I'm Amelia!
What's Popular

30-Minute Meals!
Join to receive our email series which contains a round-up of some of our quick and easy family favorite recipes.