
>>

Chewy coconut mounds topped with a crunchy almond and coated in silky semi sweet chocolate — nostalgic candy made at home with pantry ingredients.
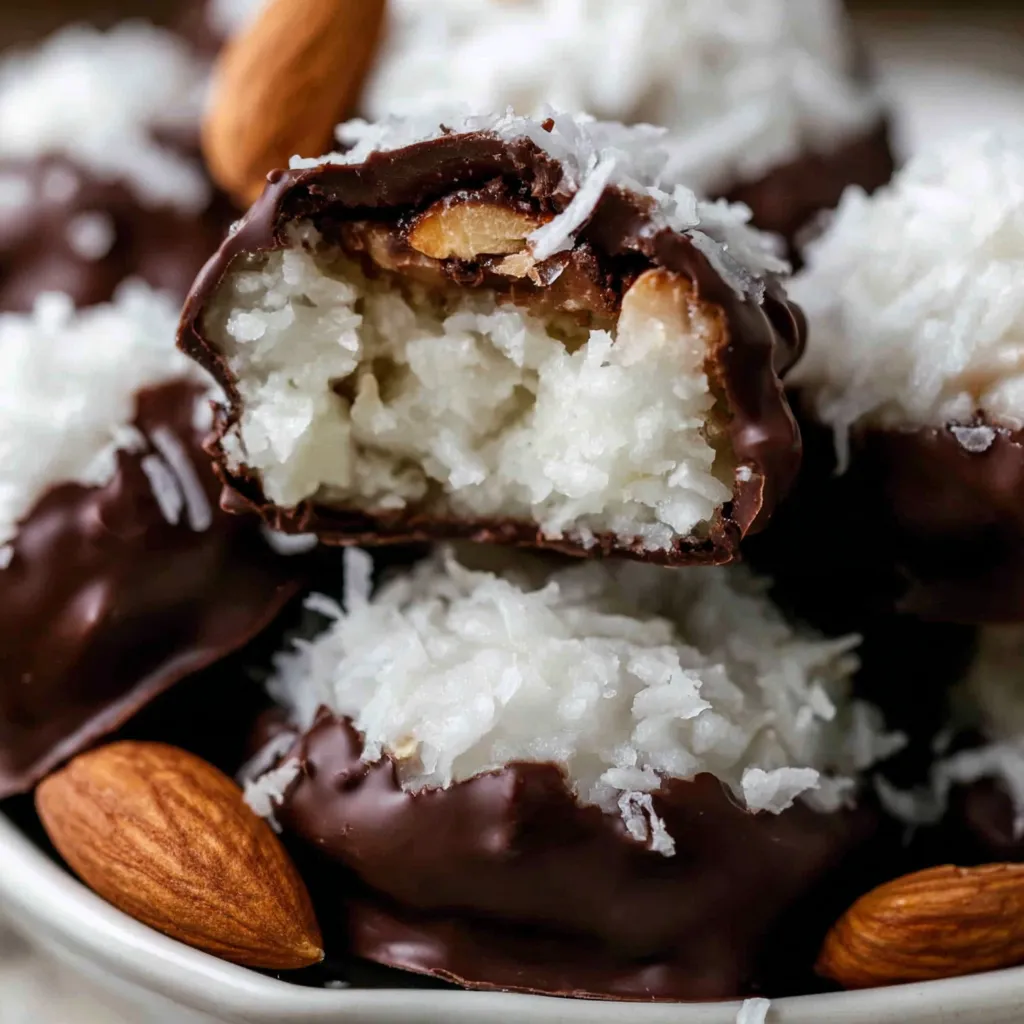
This recipe for homemade Almond Joys has been my shortcut to nostalgia and easy gifting for years. I first made these late one November when I was craving a candy bar that tasted like summer holidays but with the control of making each piece myself. The texture is everything here: a tender, chewy coconut center with a proud almond perched on top and a glossy chocolate shell that snaps just enough. Each bite balances sweet coconut, toasty almond, and bittersweet chocolate in a way store bought versions often miss. They are simple to make, forgiving of small errors, and perfect for sharing or for keeping in a freezer stash for unexpected guests.
What makes this version special is the technique I use to stabilize the coconut base so it holds its shape and dips easily without falling apart. I prefer to use mini marshmallows because they yield a soft but cohesive interior, while the light corn syrup adds the right chew and prevents the coconut from drying out. If you roast the almonds beforehand you get an extra aroma that elevates the whole treat. Over the years family and friends have asked for these when I say I am bringing dessert and they have become a holiday staple every winter and a small celebration candy all year round.
I still remember the first time I brought these to a neighborhood potluck; they disappeared first. Family members remarked that they tasted fresher than the store bought bars and asked for the recipe. Over time I fine tuned the cooling and dipping steps so they are much less messy and set up shinier than my first attempt. The combination of a slightly salty almond, chewy sweet coconut, and tempered melting chocolate is what keeps us coming back for more.
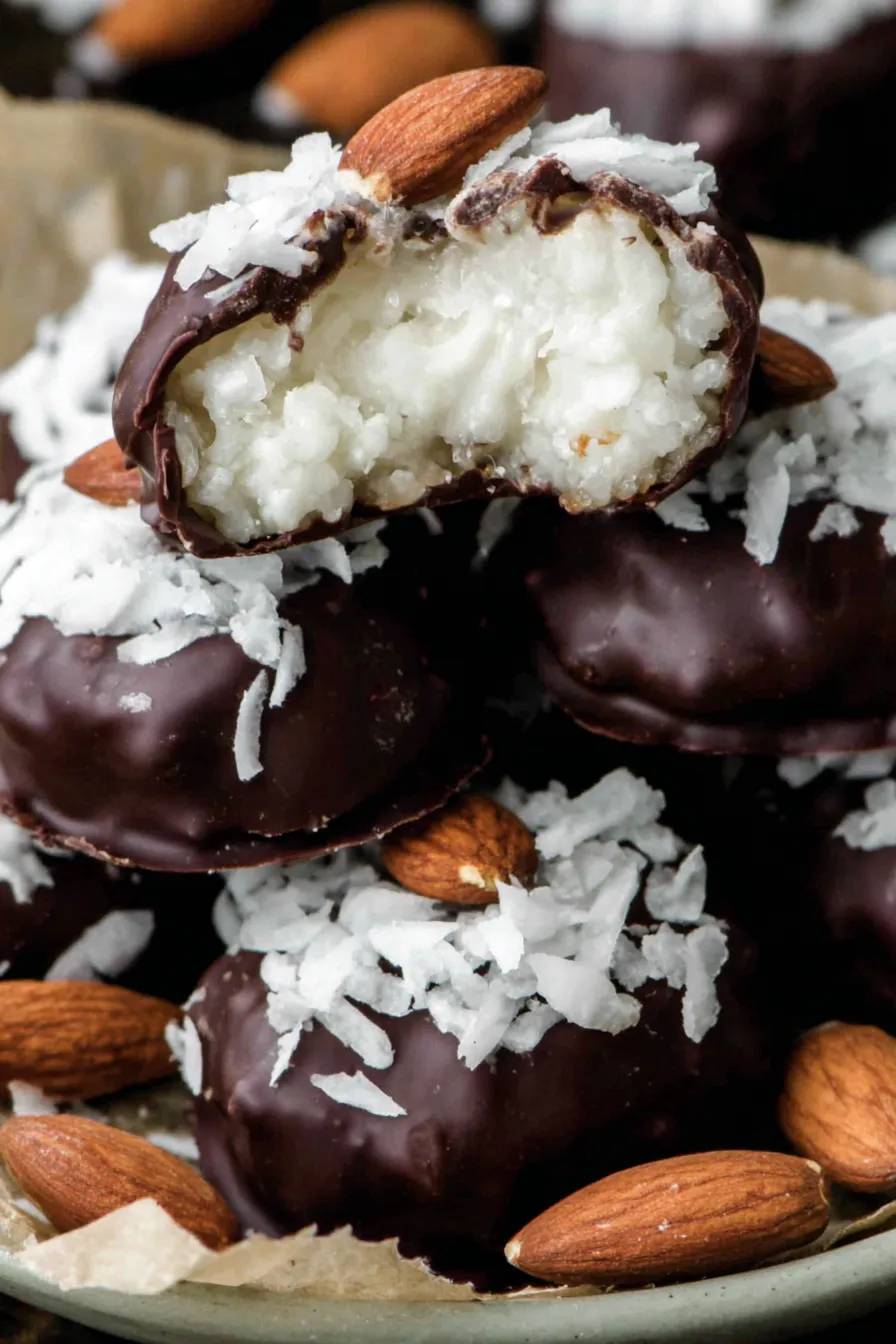
My favorite part of this process is how the kitchen smells when the chocolate is melting and the almonds were toasted earlier. Friends often ask whether they can help, and I give them the dipping station and a towel because dipping is the fun communal task. Over the years I learned that keeping the coconut mounds very cold makes the dipping stage much cleaner and that tapping to remove excess chocolate produces a shinier finish. The contrast between the chewy center and the crisp chocolate shell is what makes these candies feel indulgent yet homemade.
Store the finished candies in a single layer in an airtight container separated by parchment if stacking. At room temperature they will keep for a few days in a cool pantry, but refrigeration is best for longer storage to keep the chocolate from softening. For longer term storage place them in a freezer safe container with parchment layers and freeze up to three months. Thaw in the refrigerator for a few hours before serving to prevent condensation on the chocolate. When transporting, keep chilled in a cooler or use insulated packaging to avoid melting.
If you need dairy free options use a dairy free chocolate that melts well such as dark vegan bars with cocoa butter. For a vegan marshmallow version there are gelatin free marshmallows sold by specialty brands which maintain chew. Swap almonds for macadamia nuts to lean into a Hawaiian flavor profile or use chopped almonds pressed on top for a different crunch. If you want a less sweet interior choose unsweetened shredded coconut and add 1 to 2 tablespoons honey or agave if additional binding is needed.
Serve as a casual after dinner treat or box them in small batches for gifts. Garnish the tray with edible gold dust for a festive look or sprinkle a tiny pinch of flaky sea salt on each chocolate top right after dipping to add contrast. These pair well with coffee, espresso, or a nutty dessert wine. For a party serve them on a wooden board alongside other small confections and fresh fruit to balance sweetness.
These candies are inspired by a classic American candy bar known for its combination of coconut, almond, and chocolate. The concept of combining coconut and chocolate has roots in tropical trade and confectionery innovation, becoming mainstream in the mid twentieth century. Home versions like this one echo a tradition of small batch candy making where cooks adapted available pantry staples into luxurious treats to share at holidays and celebrations.
In summer consider swapping to dark chocolate and thinly slicing almonds for a lighter bite, or add finely grated citrus zest to the coconut for brightness. For winter add a pinch of cinnamon or a drop of rum extract to the coconut for a holiday twist. Around Valentine s Day press a single ornamental heart sprinkle on top of the chocolate before it sets for a themed presentation.
Make the coconut center up to three days ahead and keep chilled, then perform the chocolate dipping the day you plan to serve so the coating is freshest. Portion the centers on a lined baking sheet and freeze briefly before transfer to a container to prevent sticking. For gifting form and dip the candies the day before to allow the chocolate to fully cure and minimize condensation. Use shallow airtight tins with parchment for neat stacking.
These candies are a small labor of love that reward careful chilling and a steady hand at the dipping station. They bring together texture and flavor in a way that feels both homemade and indulgent. Try making a batch this weekend and keep a few in the fridge for a quick sweet treat that always elicits smiles.
Chill the coconut mounds until firm before dipping; colder centers make dipping cleaner and produce less chocolate drips.
Toast almonds at 350 degrees Fahrenheit for 6 to 8 minutes to boost flavor and crunch before pressing them onto the coconut.
Use a small cookie scoop for uniform sized pieces and consistent set times.
If the chocolate thickens while dipping warm it gently in the microwave in 10 second bursts stirring between each.
Seed a small amount of flaky sea salt on top of the freshly dipped chocolate for a sophisticated finish.
This nourishing homemade almond joys recipe is sure to be a staple in your kitchen. Enjoy every moist, high protein slice — it is perfect for breakfast or as a wholesome snack any time.
Yes. Use dairy free dark chocolate or vegan chocolate chips and swap regular marshmallows for gelatin free marshmallows to make a vegan friendly version.
Place in an airtight container in the freezer for up to three months. Thaw in the refrigerator to avoid condensation on the chocolate.
This Homemade Almond Joys recipe makes perfectly juicy, tender, and flavorful steak every time! Serve with potatoes and a side salad for an unforgettable dinner in under 30 minutes.
In a medium saucepan over medium heat combine corn syrup, mini marshmallows, and a pinch of salt. Stir constantly until the marshmallows collapse and the mixture becomes smooth, then stir for an additional minute off the highest direct heat to ensure full incorporation without scorching.
Remove from heat and immediately stir in shredded coconut and vanilla until evenly combined. If the mixture feels too loose add a bit more coconut. Transfer to a bowl, cover, and chill in the refrigerator for at least one hour until firm enough to shape.
Scoop chilled mixture into small logs or mounds using a small cookie scoop. Press a whole almond on top of each piece. Return to the fridge or freezer briefly to firm the pieces before dipping.
Chop chocolate and melt in a microwave safe bowl in 20 second increments, stirring between each until smooth. Keep the chocolate warm but not hot to maintain a good dipping consistency.
Using a fork dip each chilled coconut mound into the melted chocolate. Tap off excess chocolate on the rim of the bowl and place on parchment. Allow to set at room temperature or chill for quicker setting.
Last Step: Please leave a rating and comment letting us know how you liked this recipe! This helps our business to thrive and continue providing free, high-quality recipes for you.
Leave a comment & rating below or tag
@delishum on social media!

Thick chocolate chunk brownies crowned with melted mini marshmallows and drenched in glossy chocolate frosting for the ultimate fudgy, crowd-pleasing bite.

Buttery shortbread crust meets a lush brown sugar pecan topping. Crunchy, caramelly, and ready with just 10 minutes of prep for effortless indulgence.

Ultra-smooth pumpkin cheesecake with warm spice and a sturdy graham crust. A showstopper on its own, unforgettable with caramel and rum-kissed whipped cream.
Leave a comment & rating below or tag @delishum on social media!
Enjoyed this recipe? Share it with friends and family, and don't forget to leave a review!
This recipe looks amazing! Can't wait to try it.
Comments are stored locally in your browser. Server comments are displayed alongside your local comments.

Join to receive our email series which contains a round-up of some of our quick and easy family favorite recipes.
