
>>

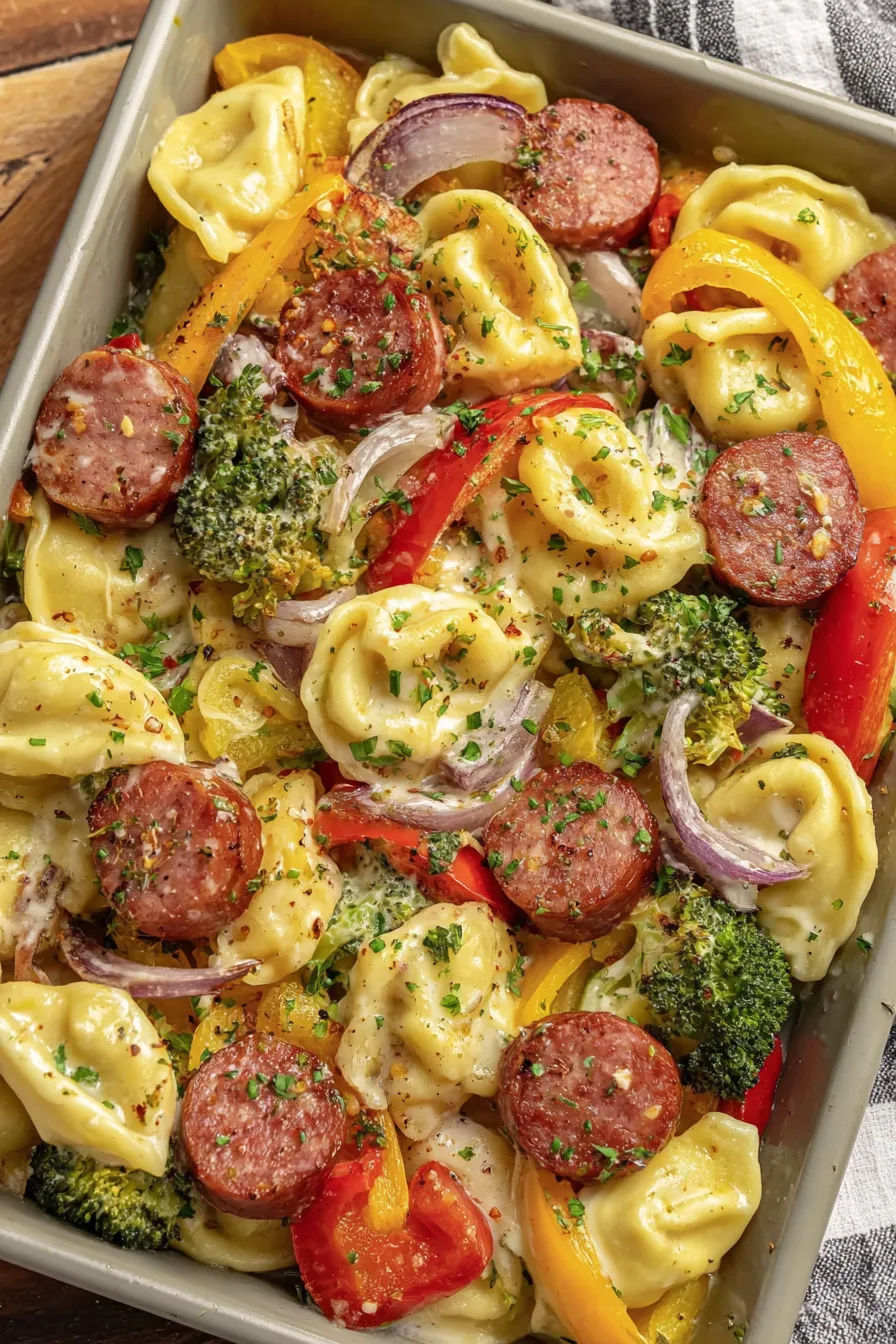
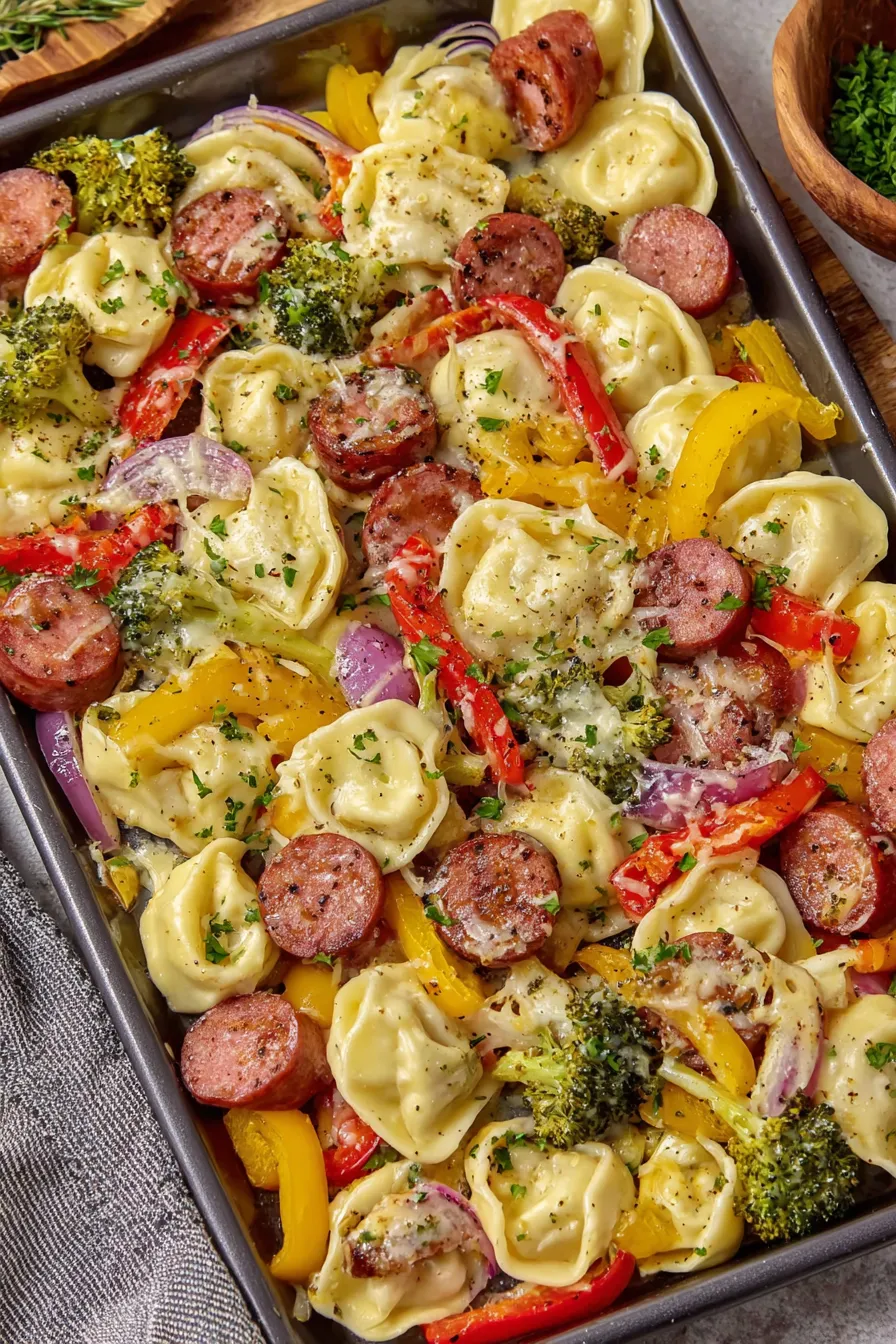
Crispy pierogies roasted with smoky kielbasa and colorful vegetables on one pan for a fast, crowd pleasing meal served with cool sour cream.
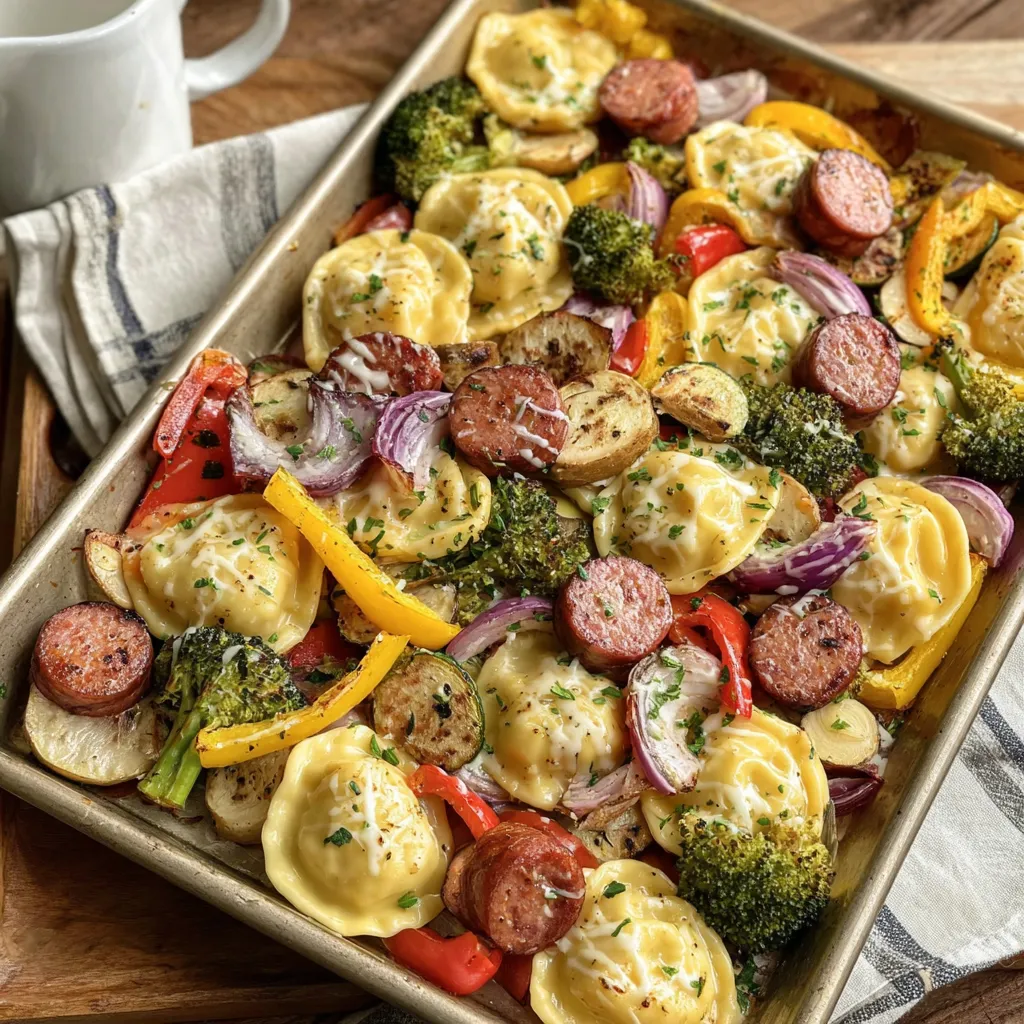
This sheet pan pierogies and kielbasa dish has been one of my quickest, most reliable weeknight solutions when life gets busy but I still want comfort on the table. I discovered this combination one rainy evening when the idea of frying pierogies in batches felt like too much work. Tossing frozen pierogies with kielbasa and vegetables and letting the oven do the heavy lifting created a crisp exterior and tender interior that felt indulgent and effortless at the same time. The simplicity is deceptive. Textures are the real star here. The pierogies blister and brown on their edges while the kielbasa caramelizes, releasing a smoky, slightly sweet fat that seasons the peppers and broccoli.
What makes this version special is the balance between speed and flavor. With just one sheet pan, a handful of pantry spices, and a single bowl for tossing, you can have a full, satisfying meal ready in under an hour, including prep. I first served this to friends who were skeptical about frozen dumplings becoming restaurant quality. They went back for seconds and asked for the recipe. Over time I refined the spice mix and vegetable choices to maximize color, nutrition, and that craveable crisp. It works beautifully for family dinners, casual guests, and even a simple meal for two with leftovers that reheat well.
In my experience this has become the meal I bring to casual potlucks because it travels well and holds temperature. Family members always comment on the pepper color and the way the kielbasa browns, which signals to everyone that this humble dish is turning into something special. It is the kind of recipe that sparks conversation and second helpings.
My favorite aspect is how forgiving the method is. Even if the peppers release liquid, the pierogies and kielbasa still reach a satisfying crust by the end. Friends and family always comment on how the dish tastes like it required much more effort than it does, which makes it my go to when I want to impress without spending hours in the kitchen.
Store leftovers in an airtight container in the refrigerator for up to four days. To freeze, cool completely then arrange in a single layer on a tray and freeze until firm before transferring to a freezer bag. This prevents sticking and preserves texture. When reheating from fresh, place on a sheet pan at 400 degrees Fahrenheit for 8 to 10 minutes to revive crispness. From frozen, roast at 425 degrees Fahrenheit for 12 to 15 minutes. Microwave reheating is convenient but will soften the exterior so use only for convenience.
If you prefer a lighter protein swap the kielbasa for chicken sausage sliced into rounds, or use a plant based sausage for a vegetarian friendly option. For dairy free finishes replace melted butter with olive oil or a dairy free garlic butter. If you need gluten free swap to dumplings or pierogies labeled gluten free, though cook time may vary. You can substitute broccoli with cauliflower or Brussels sprouts, but adjust roast time as smaller florets cook faster. Fresh garlic may replace garlic powder using one clove minced per teaspoon.
Serve with a side bowl of sour cream mixed with a teaspoon of lemon juice and chopped chives for brightness. A simple green salad dressed in lemon vinaigrette balances the richness. For brunch present with pickled red onions and a crisp rye or sourdough to create a sandwich style plate. For heartier fare add a green vegetable such as sautéed spinach or a chopped cabbage slaw to cut through the richness.
Pierogies have roots in Central and Eastern Europe and are beloved in Polish and Ukrainian culinary traditions. Traditionally boiled then pan fried, they are often filled with potato and cheese, sauerkraut, or sweet fillings. Kielbasa is a classic Polish smoked sausage, and pairing it with pierogies is a home style combination that reflects immigrants adapting simple proteins and dumplings into efficient, satisfying meals. The sheet pan adaptation is a modern convenience that preserves the spirit of those flavors while simplifying the technique.
In spring swap peppers for asparagus or peas and finish with lemon zest for brightness. In summer use charred cherry tomatoes and basil for a fresher profile. In autumn replace broccoli with roasted butternut squash cubes and add a pinch of smoked paprika for warmth. For winter entertain a richer finish with browned butter and sage for a more festive pairing. Adjust roasting times based on denser vegetables.
To meal prep make two sheet pans at once and freeze one batch after cooling. Pack portions in shallow airtight containers with a small container of sour cream. Reheat in a hot oven to regain texture then add fresh herbs. If preparing for the week keep vegetables firm and add quick steaming just before reheating to maintain color and bite. Label containers with date and contents for easy rotation.
This dish is forgiving and joyful to share. It combines nostalgic flavors with modern convenience and rewards a minimal amount of attention with maximum satisfaction. Try it with friends and make it your own.
Keep pierogies frozen until ready to roast to preserve structure and achieve a crisp exterior.
Spread the mixture into a single layer so hot air can circulate and brown everything evenly.
Use a well preheated oven and a hot sheet pan for the best Maillard reaction and caramelization.
Turn the pierogies halfway through roasting to expose all sides to heat and ensure even browning.
This nourishing easy sheet pan pierogies and kielbasa recipe is sure to be a staple in your kitchen. Enjoy every moist, high protein slice — it is perfect for breakfast or as a wholesome snack any time.
Yes. Keep pierogies frozen and roast directly from frozen for best texture. Thawing can make them soft and reduce crisping.
You can freeze leftovers for up to three months. Flash freeze on a tray first to prevent sticking, then transfer to a freezer bag.
This Easy Sheet Pan Pierogies and Kielbasa recipe makes perfectly juicy, tender, and flavorful steak every time! Serve with potatoes and a side salad for an unforgettable dinner in under 30 minutes.
Preheat the oven to 425 degrees Fahrenheit and line a large sheet pan with parchment paper or lightly grease it to prevent sticking.
In a large mixing bowl add the frozen pierogies, sliced kielbasa, chopped red and yellow bell peppers, sliced onion, and broccoli florets.
Drizzle three tablespoons olive oil over the mixture and sprinkle garlic powder, paprika, onion powder, salt, and black pepper. Toss until evenly coated.
Spread the coated mixture onto the prepared sheet pan in a single layer, ensuring pieces are not stacked or crowded to allow even browning.
Roast for 25 to 30 minutes at 425 degrees Fahrenheit, flipping the pierogies halfway through to ensure even crisping and browning.
Remove from the oven, drizzle with melted garlic butter if desired, and sprinkle with chopped parsley or green onions. Serve warm with sour cream.
Last Step: Please leave a rating and comment letting us know how you liked this recipe! This helps our business to thrive and continue providing free, high-quality recipes for you.
Leave a comment & rating below or tag
@delishum on social media!

Thick chocolate chunk brownies crowned with melted mini marshmallows and drenched in glossy chocolate frosting for the ultimate fudgy, crowd-pleasing bite.

Buttery shortbread crust meets a lush brown sugar pecan topping. Crunchy, caramelly, and ready with just 10 minutes of prep for effortless indulgence.

Ultra-smooth pumpkin cheesecake with warm spice and a sturdy graham crust. A showstopper on its own, unforgettable with caramel and rum-kissed whipped cream.
Leave a comment & rating below or tag @delishum on social media!
Enjoyed this recipe? Share it with friends and family, and don't forget to leave a review!
This recipe looks amazing! Can't wait to try it.
Comments are stored locally in your browser. Server comments are displayed alongside your local comments.

Join to receive our email series which contains a round-up of some of our quick and easy family favorite recipes.
