
>>

A foolproof no-knead loaf that yields a crisp crust and tender crumb with minimal hands-on time. Perfect for beginners and weekend bakers alike.
My family always notices when I skip a step or change a ratio. When I substituted half the bread flour with whole wheat the first time, everyone loved the deeper flavor and asked for that version specifically. The simplicity of the method means I tinker with mix-ins like rosemary or sunflower seeds without risking failure.
What I love most here is how reliably the method produces bakery-like results. I’ve taught friends who were nervous about baking, and they were amazed at the crust and aroma after their first attempt. The scent of the loaf filling the house is one of those small domestic pleasures that seems to slow everything down for a moment.
Store the cooled loaf at room temperature in a paper bag or loosely wrapped in a clean tea towel for up to two days to preserve crust crispness. For longer keeping, slice and store in a resealable plastic bag in the freezer for up to three months. Re-crisp slices in a toaster or under a hot broiler for 1 to 2 minutes; whole loaves reheat at 325 degrees Fahrenheit wrapped loosely in foil for about 10 to 15 minutes.
If you prefer a lighter loaf, replace the whole wheat with 1 cup all-purpose flour. For more chew and flavor, use 100 percent bread flour. To accommodate a gluten-free diet, this technique requires a specialized blend and xanthan gum plus adjusted hydration; expect a different crumb. Replace sugar with a teaspoon of honey for mild flavor variation and to feed yeast similarly.
This loaf is ideal for thick-cut toast with butter and jam, open-faced sandwiches with roasted vegetables, or paired with stews and soups. For a casual brunch, serve with whipped ricotta and honey, or slice thin for classic grilled cheese. Garnish with sea salt flakes and a drizzle of olive oil for a simple appetizer plate.
While this particular approach is a modern adaptation of traditional hearth baking, the technique relies on time and steam—methods used in many bread traditions across Europe. The no-knead method gained popularity for home bakers because it mimics slow fermentation principles once only possible in professional bakeries. It bridges rustic country loaves and contemporary home convenience.
In cooler months, increase whole wheat to add heartiness and fold in chopped toasted walnuts for a winter loaf. Spring and summer benefit from bright additions such as lemon zest and chopped rosemary or sundried tomatoes and olives for Mediterranean flair. Adjust hydration slightly when adding dense inclusions to maintain an open crumb.
Make dough the night before and refrigerate for a slow, overnight rise to deepen flavor. Bring to room temperature before shaping and baking. For grab-and-go breakfasts, slice and freeze individual portions. Toast from frozen and top with nut butter or avocado for quick, nutritious meals through the week.
This loaf invites personalization—once you master the basic formula, small tweaks produce entirely new results. Enjoy the process and the inevitable applause when you pull a warm loaf from the oven at home.
Measure flour by spooning it into the cup and leveling with a knife to avoid adding too much which leads to a dense loaf.
Preheat the Dutch oven for the full 30 minutes to ensure proper crust formation and steam retention.
Allow the dough to double in size rather than strictly following the clock; dough behavior is a better indicator than time alone.
If the dough is very sticky, add bread flour a tablespoon at a time while mixing until it pulls away from the bowl.
This nourishing easy no-knead yeast bread recipe is sure to be a staple in your kitchen. Enjoy every moist, high protein slice — it is perfect for breakfast or as a wholesome snack any time.
Yes. Use 1 packet (2 1/4 teaspoons) active dry yeast and warm water about 100 degrees Fahrenheit. Proof for 5–10 minutes until foamy.
Cool completely on a wire rack before slicing to prevent a gummy crumb; for best texture wait at least one hour.
This Easy No-Knead Yeast Bread recipe makes perfectly juicy, tender, and flavorful steak every time! Serve with potatoes and a side salad for an unforgettable dinner in under 30 minutes.
Dissolve the yeast in warm water (100 F) with sugar and let it proof for 5 to 10 minutes until foamy. A foamy bloom verifies active yeast and predictable fermentation.
Whisk bread flour, whole wheat flour, and salt together to ensure even distribution. Proper mixing prevents pockets of salt and creates consistent hydration during mixing.
Add the flour mixture to the mixer on low speed a bit at a time. Increase speed once incorporated and mix until the dough pulls away from the bowl, adding flour by tablespoon if too sticky.
If mixing by hand, stir until a smooth dough forms and perform a few gentle folds in the bowl. Minimal handling preserves dough fermentation and produces an open crumb.
Grease a large bowl, place the dough inside, cover with plastic wrap, and let it double in a warm place for about 1 1/2 hours. Look for dough that is relaxed rather than overly springy.
Turn dough onto a floured counter, pull corners to form a round, then place seam-side up back in a lightly floured bowl. Cover with a towel and let it rise while the oven heats.
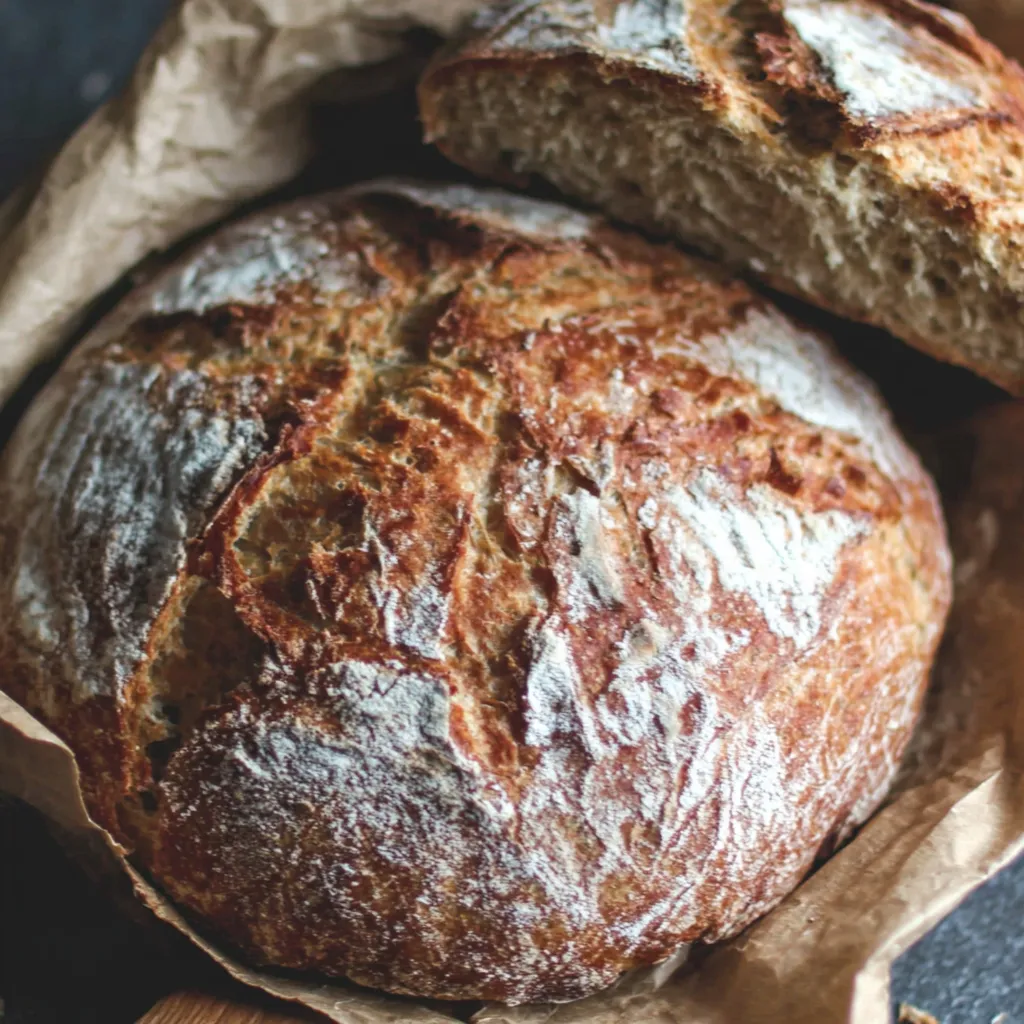
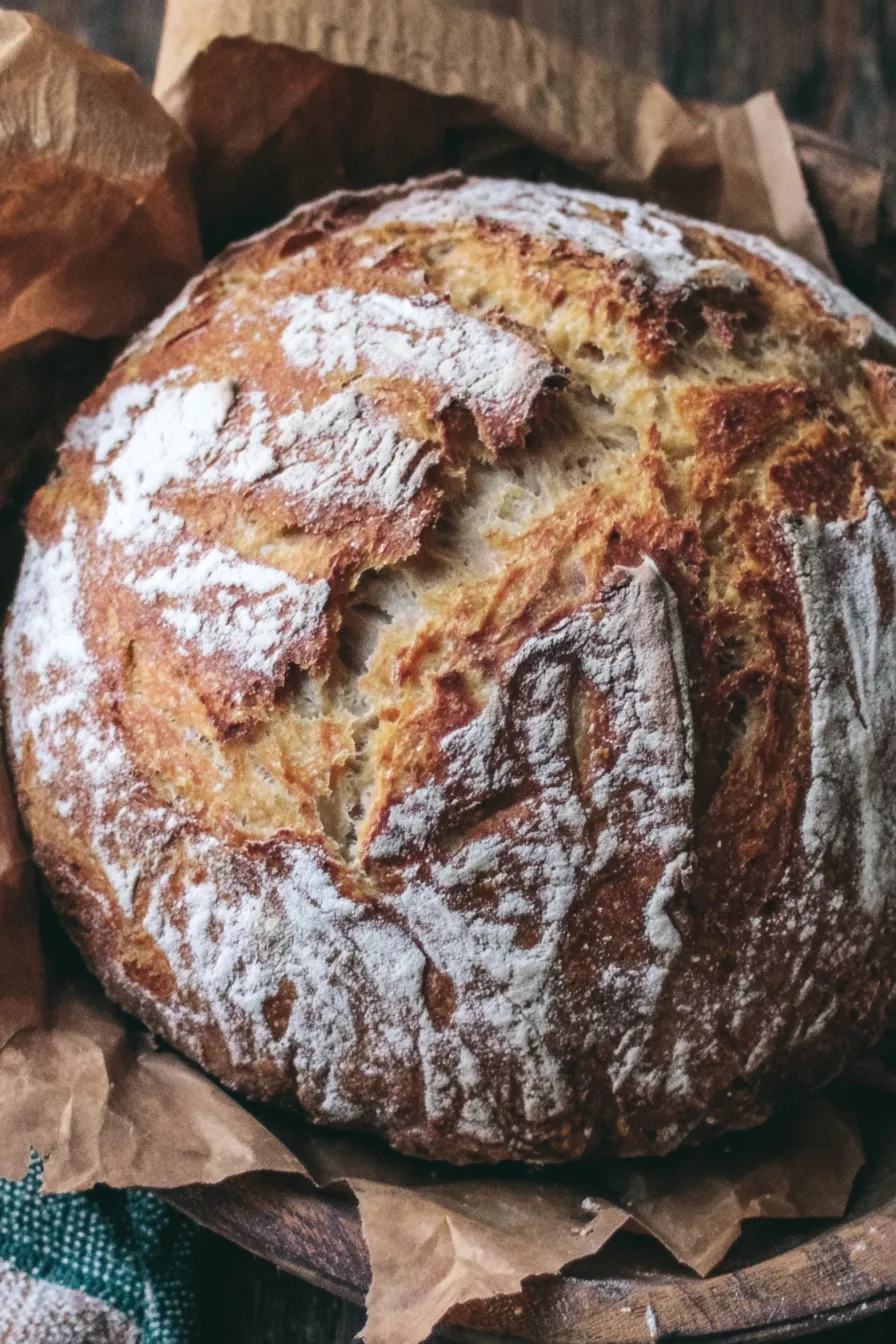
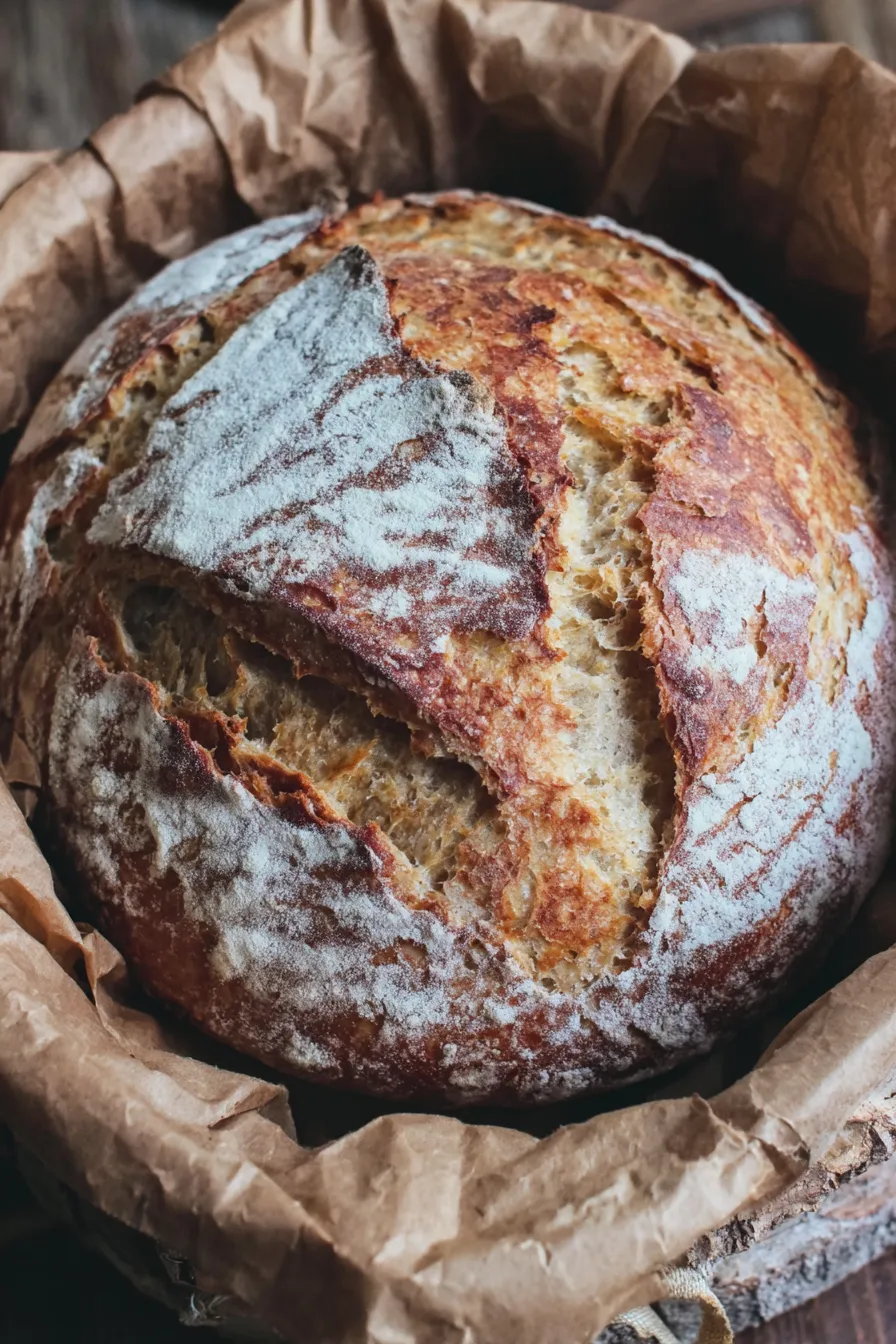
Preheat the oven to 460 degrees Fahrenheit with a covered 3 1/2-quart Dutch oven inside for 30 minutes. A thoroughly heated pot provides the necessary steam environment when baking.
Flip the loaf onto parchment paper, shape into a round, then lift using the parchment and place seam-side up into the preheated pot. Replace the lid quickly to trap steam.
Bake covered for 30 minutes to set the crust using trapped steam. This initial covered bake produces a crisp exterior with a tender interior.
Remove the lid and bake 15 to 20 minutes more until the crust is deep brown. For a fully developed crumb, aim for an internal temperature of about 205 F.
Lift the loaf out using the parchment, cool completely on a wire rack, and then slice. Cooling prevents a gummy crumb and yields the best texture when serving.
Last Step: Please leave a rating and comment letting us know how you liked this recipe! This helps our business to thrive and continue providing free, high-quality recipes for you.
Leave a comment & rating below or tag
@delishum on social media!

Thick chocolate chunk brownies crowned with melted mini marshmallows and drenched in glossy chocolate frosting for the ultimate fudgy, crowd-pleasing bite.

Buttery shortbread crust meets a lush brown sugar pecan topping. Crunchy, caramelly, and ready with just 10 minutes of prep for effortless indulgence.

Ultra-smooth pumpkin cheesecake with warm spice and a sturdy graham crust. A showstopper on its own, unforgettable with caramel and rum-kissed whipped cream.
Leave a comment & rating below or tag @delishum on social media!
Enjoyed this recipe? Share it with friends and family, and don't forget to leave a review!
This recipe looks amazing! Can't wait to try it.
Comments are stored locally in your browser. Server comments are displayed alongside your local comments.

Join to receive our email series which contains a round-up of some of our quick and easy family favorite recipes.
