
Decadent Brownie Pie

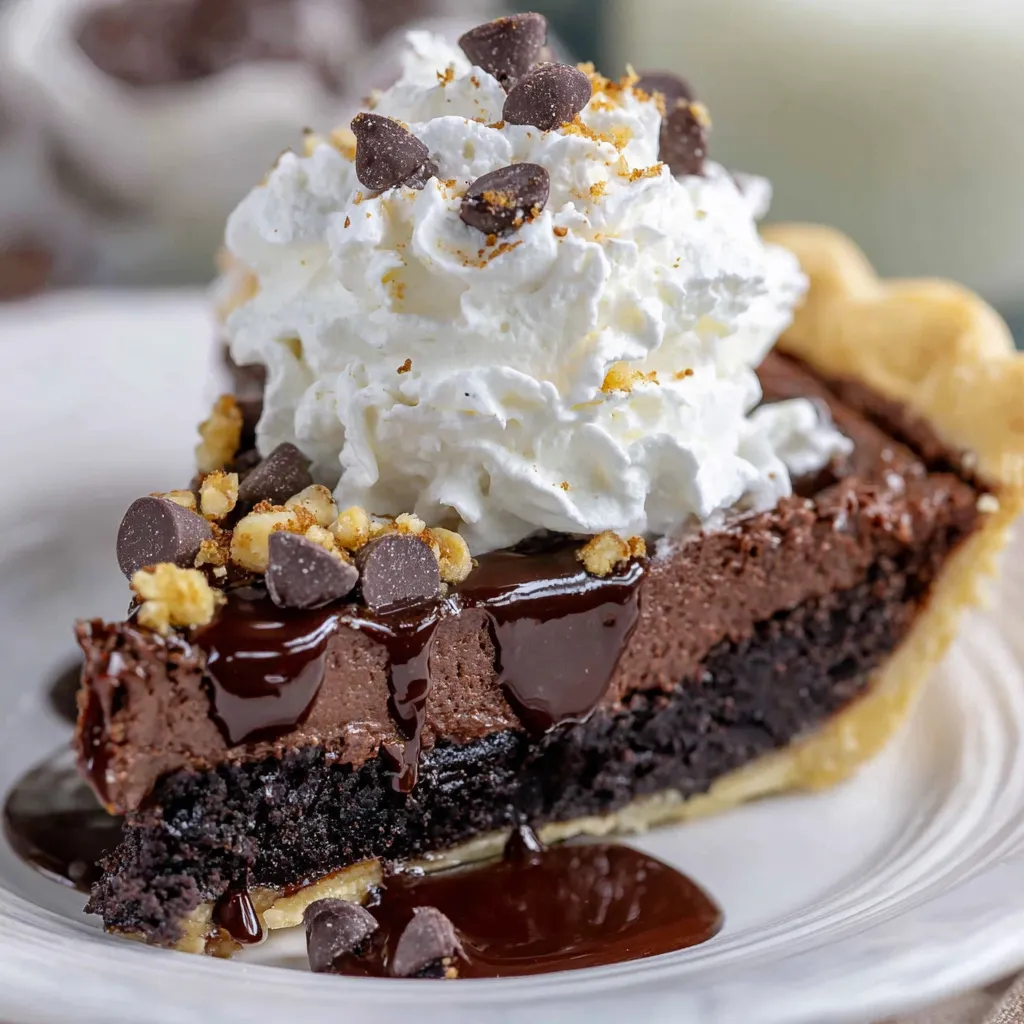
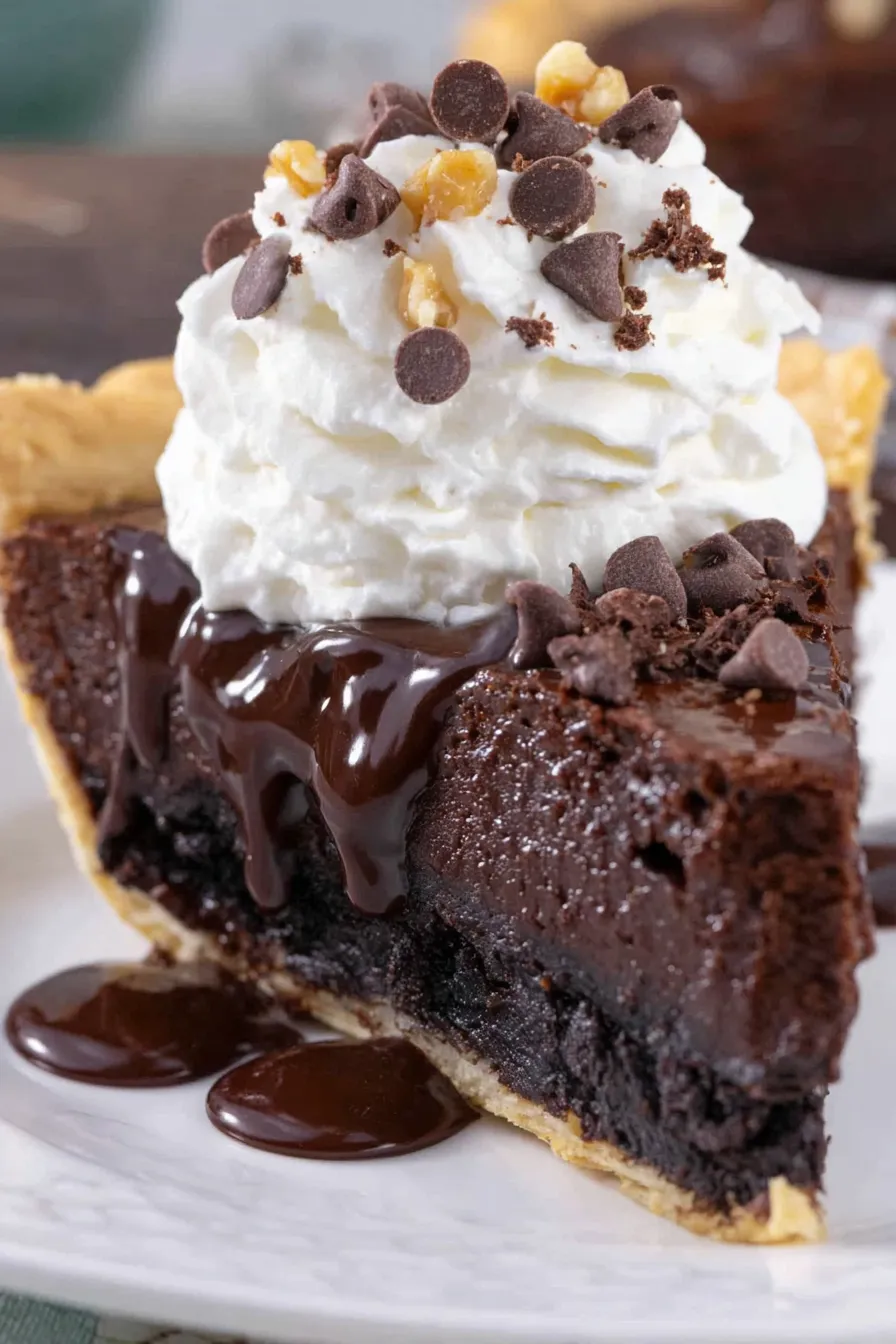
A fudgy, crackly-topped brownie baked in a 9-inch pie crust — simple to make, indulgent to eat, and perfect with ice cream or whipped cream.
This brownie pie was born from a weeknight craving and a frozen pie crust tucked in the back of my freezer. I first made it when I wanted something chocolatey without committing to dozens of individual brownies; the idea of pouring one rich batter into a ready-made crust felt like kitchen wizardry. What I love most is the contrast: a tender, fudgy interior, a shiny crackly top, and the buttery flake of the pie shell. My kids declared it the best dessert I had ever made, and my neighbor asked for the recipe the very next day.
I discovered the key technique early on: pour hot melted butter over granulated sugar and let the heat begin to dissolve the crystals before whisking. This small, nearly magical step gives the top an irresistibly glossy, crackled finish that looks professional but takes hardly any effort. Serve the pie slightly warm with vanilla ice cream for contrast, or chill it until very firm for a sliceable, almost brownie-like bar. Either way, it’s straightforward, fast, and reliably adored at potlucks and family dinners.
Why You'll Love This Recipe
- Fast: Ready in about 65 minutes start-to-finish with only 15 minutes of active prep, making it perfect for last-minute desserts.
- Minimal equipment: Uses a frozen 9-inch unbaked pie shell so you skip making pastry dough and still get great texture contrast.
- Pantry-friendly: Most ingredients are staples — cocoa powder, flour, sugar, and chocolate chips — so you can likely make it without a grocery run.
- Customizable sweetness: Use semisweet or milk chocolate chips to control sweetness; add chopped nuts for texture or leave them out for a smooth finish.
- Make-ahead friendly: Bakes well a day ahead and improves in flavor after resting; it also freezes well for longer storage.
- Crowd-pleaser: Rich, fudgy, and perfect with whipped cream or a scoop of ice cream for easy presentation and maximum enjoyment.
I first served this pie at a birthday gathering, and it disappeared faster than the store-bought cake we had alongside it. Family members raved about the crackled top and the buttery edge from the crust. Over time I've tweaked the timing to balance fudginess and set: pull it a little early for gooey slices or bake a touch longer for neat, clean wedges.
Ingredients
- Frozen 9-inch unbaked pie crust: A store-bought deep-dish or standard 9-inch crust works; keep it frozen until filling is ready so the crust won’t overbake before the filling sets.
- Unsalted butter: 8 tablespoons, melted and still warm — important for the sugar-dissolving step. Use high-quality butter for best flavor (I often reach for Plugratz or Land O'Lakes).
- Granulated sugar: 3/4 cup — the interaction of hot butter and sugar gives you that shiny, crackly top that looks and tastes like a bakery treat.
- Egg and egg yolk: 1 large egg plus 1 large yolk add richness and structure while keeping the filling luxuriously tender.
- Vanilla and water: 1 1/2 teaspoons pure vanilla and 1 tablespoon water for flavor balance and a silkier texture.
- Unsweetened cocoa powder and powdered sugar: 1/2 cup each — cocoa deepens chocolate flavor while powdered sugar helps with the glossy finish and sweetness distribution.
- All-purpose flour and kosher salt: 1/2 cup flour and 1/4 teaspoon salt to give just enough structure without drying out the filling.
- Semisweet chocolate chips: 1/2 cup; swap for milk chocolate if you prefer a sweeter result. High-quality chips (Ghirardelli or Guittard) will give a superior melt and flavor.
- Finely chopped walnuts (optional): 1/4 cup for crunch and a nutty counterpoint — toasted lightly for extra depth.
- Toppings (optional): Chocolate sauce, whipped cream, or vanilla ice cream to finish when serving — keep them chilled until ready to plate.
Instructions
Preheat and position: Preheat the oven to 350°F and position a rack in the lower third so the bottom of the pie gets steady heat. This prevents underbaked centers and yields an even set in the filling. Combine sugar and hot butter: In a large mixing bowl pour 3/4 cup granulated sugar and the 8 tablespoons of just-melted, still-warm butter. Stir briefly, then leave undisturbed for 5 minutes so the butter’s heat starts to dissolve the sugar crystals. After 5 minutes whisk vigorously for about 30 seconds until glossy; this step encourages that crackly top. Add eggs and flavor: Whisk in 1 large egg, 1 large yolk, 1 tablespoon water, and 1 1/2 teaspoons vanilla extract for about 30 seconds until combined and slightly frothy. Tap off excess batter from the whisk to avoid overmixing the dry ingredients later. Fold in dry ingredients: Sift or sprinkle 1/2 cup unsweetened cocoa powder, 1/2 cup powdered sugar, 1/2 cup all-purpose flour, and 1/4 teaspoon kosher salt over the butter mixture. Use a rubber spatula or wooden spoon to fold until glossy and uniform. Stir in 1/2 cup semisweet chocolate chips and 1/4 cup finely chopped walnuts if using. Fill the crust: Pour the batter into the frozen 9-inch unbaked crust and smooth the top gently with a spatula to an even layer. Lightly spritz a piece of foil with nonstick spray so it won’t stick to the surface, then tent the pie with the foil — avoid pressing the foil onto the batter to preserve the shiny top. Bake covered: Place the pie on a baking sheet and bake in the lower third of the oven for 25 minutes covered. The sheet helps catch any drips and gives even bottom heat. Bake uncovered and test for doneness: Carefully remove the foil and continue to bake uncovered for another 20 to 30 minutes. For a fudgier center, remove closer to 20–25 minutes after foil removal; for a more set, sliceable pie bake toward 30 minutes. The center should be slightly jiggly but not liquid. Allow to cool on a wire rack to finish setting. Serve: Serve slightly warm with a drizzle of chocolate sauce and a scoop of vanilla ice cream, or at room temperature. Refrigerate to firm the pie further if you prefer neat slices; colder pie will be firmer and easier to slice.
You Must Know
- Keep the pie crust frozen until you are ready to fill and bake to prevent the shell from becoming soggy or overbrowning before the filling sets.
- The heat-from-butter step is purposeful: letting warm butter sit on sugar for five minutes partially dissolves crystals and creates the crackly crown when baked.
- For fudgy texture remove the pie toward the shorter end of the uncovered bake time; for firm, cleaner slices bake longer — both are delicious but different in mouthfeel.
- Store leftovers lightly covered at room temperature for a day, refrigerated for 3–4 days, or frozen for up to 3 months. Thaw slowly in the refrigerator for even texture.
- Nuts are optional; omit for nut-free households or replace walnuts with chopped pecans for a different flavor profile.
My favorite aspect is how forgiving this preparation is: the batter tolerates slight timing shifts and still delivers a rich chocolate experience. I love serving it slightly warm when guests arrive so the kitchen smells decadent and the first slice pulls away with a glossy crackle on top. It’s a simple way to make people feel celebrated without fuss.
Storage Tips
Cool the pie completely before storing to avoid soggy condensation. For short-term storage keep it at room temperature under a cake dome or airtight container for up to 24 hours. For longer storage refrigerate in an airtight container for 3 to 4 days; slices firm up and slice more cleanly when chilled. To freeze wrap tightly in plastic wrap and aluminum foil and freeze for up to 3 months. Thaw overnight in the refrigerator and bring to room temperature or warm gently in a low oven (250°F for 10–15 minutes) before serving.
Ingredient Substitutions
Swap semisweet chips for milk chocolate for a sweeter pie, or use dark chocolate chips for extra depth. To make nut-free omit the walnuts entirely or substitute with seeds such as pepitas. If you need a gluten-free version, use a store-bought gluten-free pie shell and a 1-to-1 gluten-free flour blend in place of the all-purpose flour — expect a slightly different crumb. For dairy-free or vegan adaptations use a vegan pie crust, dairy-free margarine or coconut oil in place of butter, a flax or chia egg in place of the egg plus yolk, and vegan chocolate chips; texture will be slightly different but still satisfying.
Serving Suggestions
Serve warm with a generous scoop of vanilla bean ice cream and a drizzle of chocolate sauce for a classic pairing. For a grown-up finish try a pinch of flaky sea salt on top and serve with espresso. Garnish slices with lightly whipped cream and toasted walnuts for crunch and presentation. This pie shines at dinner parties — offer toppings on the side so guests can customize their bowls or plates. It also pairs well with bright fruit like raspberries to cut through the richness.
Cultural Background
While brownies are an American classic dating back to the early 20th century, baking them in a pie shell brings together two comfort traditions: tender chocolate squares and buttery pastry. This hybrid is an example of American home baking ingenuity — using a frozen crust saves time and adds a textural contrast that echoes the country’s love of convenient, comforting desserts. Regional variations abound: some families add nuts or marshmallows, while others prefer a denser, almost truffle-like interior.
Seasonal Adaptations
In summer serve slices with cold ice cream and fresh berries for a refreshing contrast. For fall and winter, stir 1/2 teaspoon ground cinnamon and a pinch of ground nutmeg into the batter, or fold in 2 tablespoons brewed espresso for a mocha twist. Around holidays consider swirling in salted caramel or folding in peppermint chips for festive flavors. The filling is adaptable — just be mindful that extra liquid will affect set time.
Meal Prep Tips
Make the batter ahead and keep it chilled for up to 24 hours before pouring into the frozen shell, or fully bake the pie and refrigerate for an easy grab-and-go dessert. For individual servings bake mini pies in a muffin tin lined with mini tart shells; reduce bake time and check frequently. Use airtight containers or well-wrapped aluminum foil to keep slices fresh when packing for travel or potlucks. Reheat gently if desired to recover that just-baked aroma and slightly gooey center.
Whether you’re after a quick weeknight treat or a simple showstopper for guests, this brownie pie is my go-to shortcut to wow. It’s forgiving, flexible, and rich enough to feel celebratory. I hope you make it your own and enjoy sharing it as much as I do.
Pro Tips
Pour hot melted butter over granulated sugar and let it sit 5 minutes before whisking to help create a glossy, crackly top.
Keep the pie crust frozen until you are ready to fill and bake to prevent a soggy shell.
Remove the pie toward the shorter end of the uncovered bake time for a fudgier center; bake longer for firmer slices.
Lightly spritz foil with nonstick spray before tenting to prevent foil from sticking to the batter.
Cool completely before wrapping to freeze to avoid condensation that can make the crust soggy.
This nourishing decadent brownie pie recipe is sure to be a staple in your kitchen. Enjoy every moist, high protein slice — it is perfect for breakfast or as a wholesome snack any time.
Tags
Decadent Brownie Pie
This Decadent Brownie Pie recipe makes perfectly juicy, tender, and flavorful steak every time! Serve with potatoes and a side salad for an unforgettable dinner in under 30 minutes.
Ingredients
Crust
Filling
Toppings (optional)
Instructions
Preheat oven and prepare rack
Preheat oven to 350°F and place a rack in the lower third. Positioning ensures even bottom heat so the crust cooks through as the filling sets.
Combine sugar and hot butter
In a large bowl pour 3/4 cup granulated sugar and 8 tablespoons of melted, still-warm butter. Stir briefly, then let sit 5 minutes to allow heat to begin dissolving sugar. Whisk vigorously for 30 seconds after resting.
Add eggs and flavorings
Whisk in 1 large egg, 1 large egg yolk, 1 tablespoon water, and 1 1/2 teaspoons vanilla extract until combined and slightly frothy. Tap off excess batter from the whisk.
Fold in dry ingredients
Sprinkle 1/2 cup cocoa powder, 1/2 cup powdered sugar, 1/2 cup flour, and 1/4 teaspoon salt over the butter mixture and fold with a spatula until glossy and uniform. Stir in 1/2 cup chocolate chips and 1/4 cup chopped walnuts if desired.
Fill the crust
Pour the batter into the frozen 9-inch crust and smooth to an even layer. Lightly spritz foil with nonstick spray and tent over the pie without pressing onto the batter.
Bake covered, then uncovered
Bake covered in the lower third of the oven for 25 minutes. Remove foil carefully and bake uncovered for an additional 20–30 minutes depending on desired set: 20–25 minutes for fudgy, 30 minutes for firm.
Cool and serve
Cool on a wire rack to finish setting. Serve slightly warm with ice cream or at room temperature. Refrigerate to firm for cleaner slices, and store leftovers refrigerated for up to 4 days.
Last Step: Please leave a rating and comment letting us know how you liked this recipe! This helps our business to thrive and continue providing free, high-quality recipes for you.
Nutrition
Did You Make This?
Leave a comment & rating below or tag
@delishum on social media!
Categories:
You might also like...

Gooey Marshmallow Chocolate Brownies
Thick chocolate chunk brownies crowned with melted mini marshmallows and drenched in glossy chocolate frosting for the ultimate fudgy, crowd-pleasing bite.

Buttery Pecan Pie Bars
Buttery shortbread crust meets a lush brown sugar pecan topping. Crunchy, caramelly, and ready with just 10 minutes of prep for effortless indulgence.

No-Crack Pumpkin Cheesecake
Ultra-smooth pumpkin cheesecake with warm spice and a sturdy graham crust. A showstopper on its own, unforgettable with caramel and rum-kissed whipped cream.
Did You Make This?
Leave a comment & rating below or tag @delishum on social media!
Rate This Recipe
Share This Recipe
Enjoyed this recipe? Share it with friends and family, and don't forget to leave a review!
Comments (1)
This recipe looks amazing! Can't wait to try it.
Comments are stored locally in your browser. Server comments are displayed alongside your local comments.

Hi, I'm Amelia!
What's Popular

30-Minute Meals!
Join to receive our email series which contains a round-up of some of our quick and easy family favorite recipes.