
>>

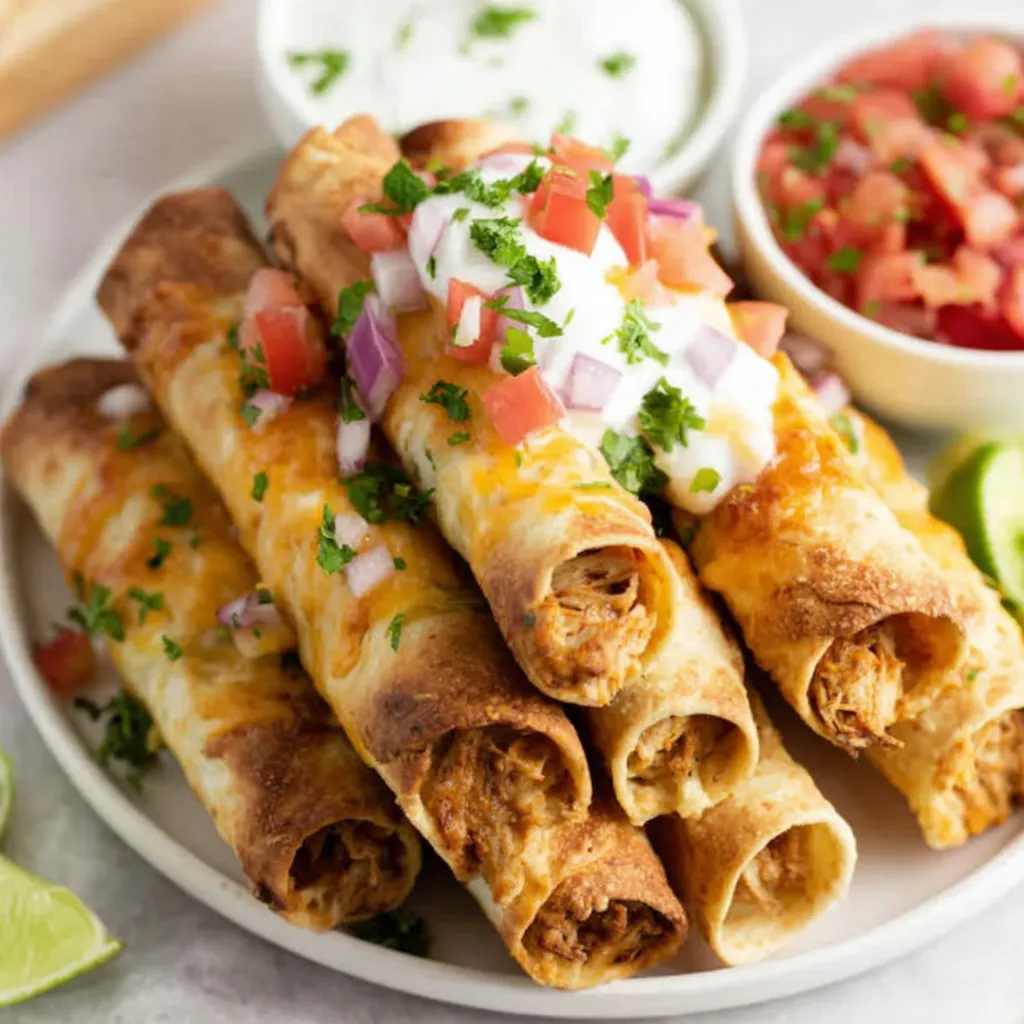
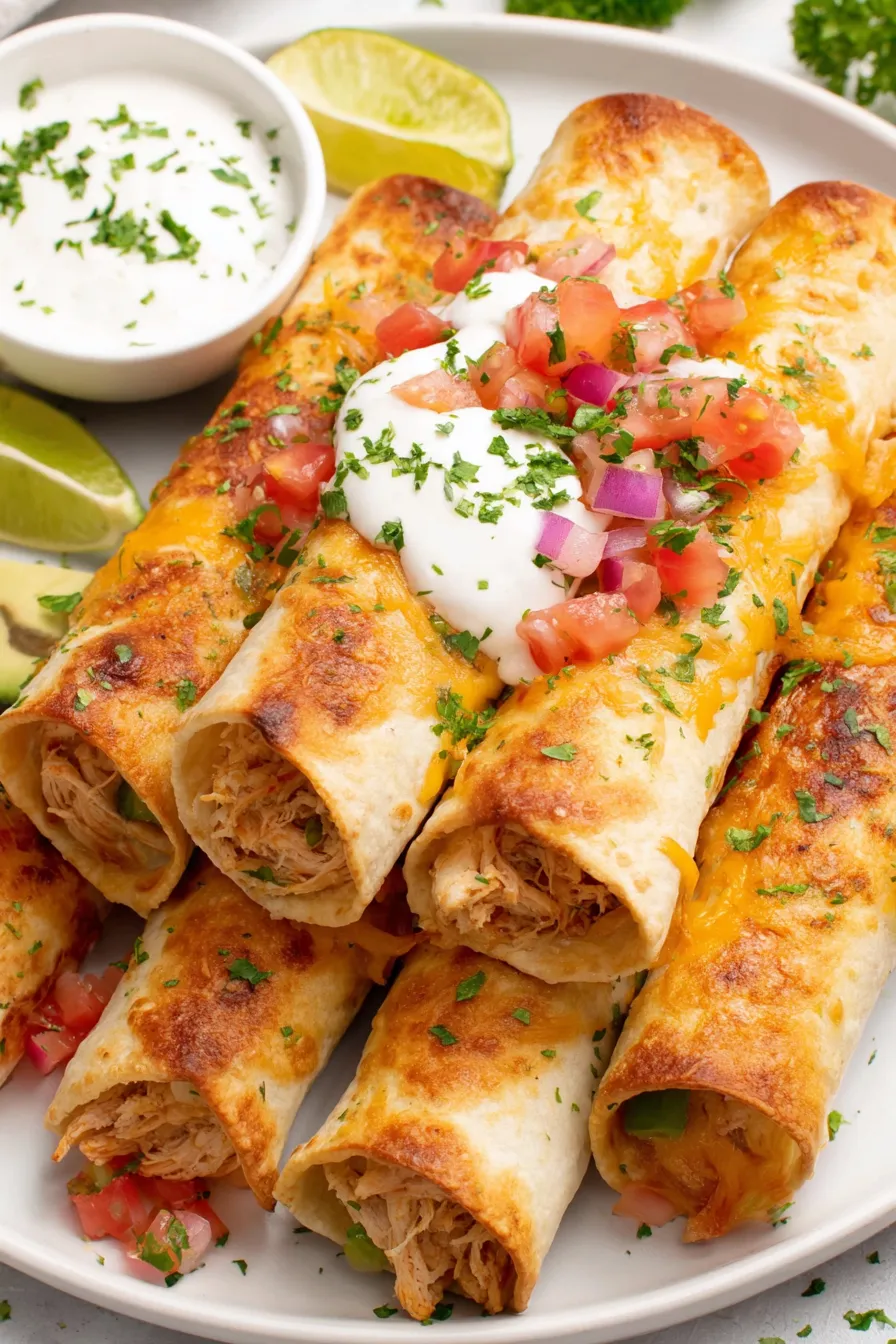
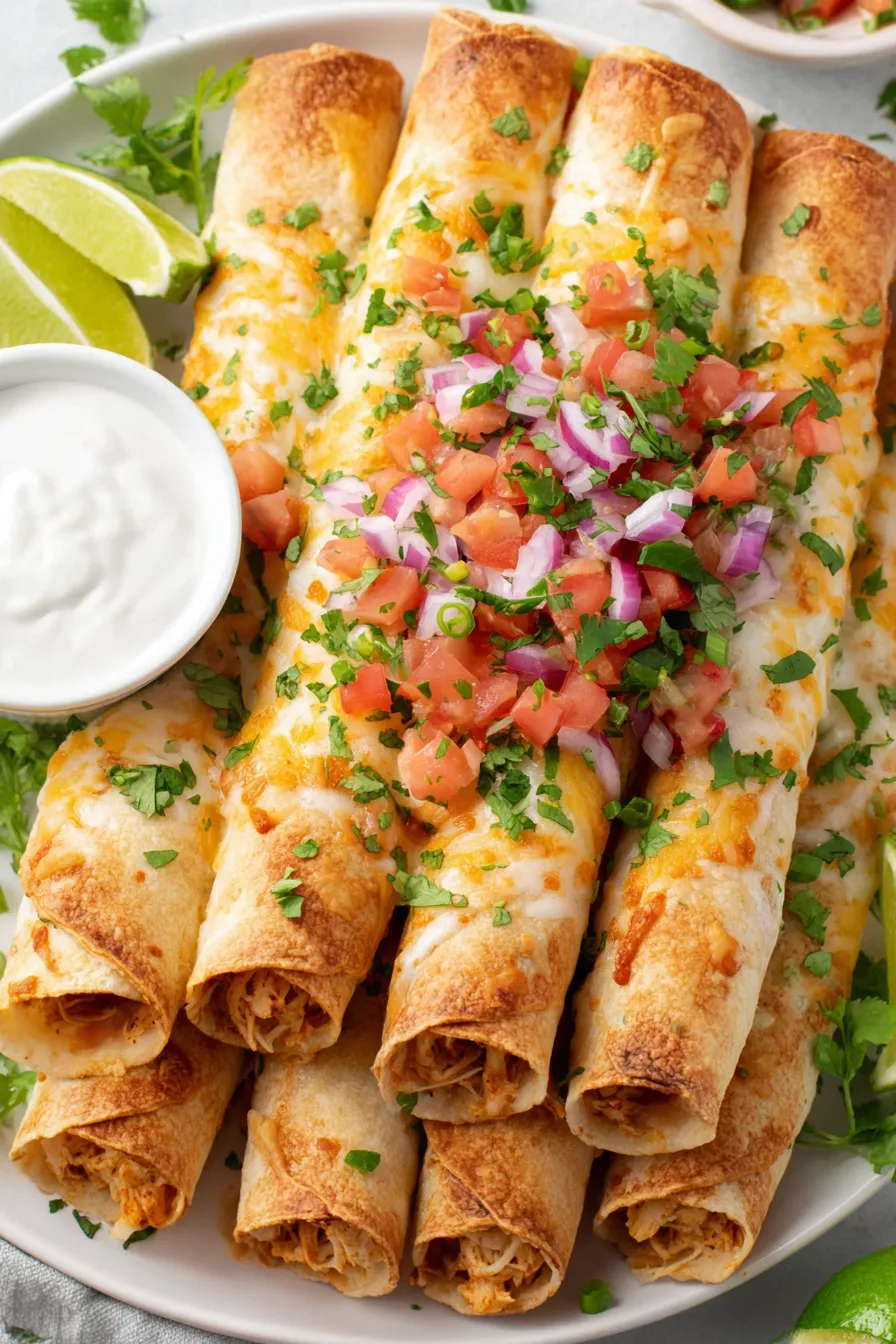
Golden, crunchy taquitos filled with creamy, tangy shredded chicken and Monterey Jack — perfect baked or fried and ready in about 30 minutes.
This recipe for chicken taquitos has been a weeknight lifesaver and party favorite in my home for years. I first put these together after a busy day when I needed something quick, portable, and wildly satisfying; the first bite reminded me of the handheld comfort foods I loved growing up but with brighter, fresher flavors. The filling is rich and creamy from cream cheese and Monterey Jack while lime, jalapeño, and cilantro keep every mouthful lively. They’re crunchy on the outside, soft and melty inside, and disappear faster than I can plate them.
I discovered this combination after pulling leftover shredded chicken from the fridge and riffing on a classic taquito I’d had at a neighborhood taquería. The balance of creamy, spicy, tangy, and cheesy is what makes these stand out — and because they can be baked or fried, they adapt to whatever time and equipment I have. My kids love dunking them in sour cream and salsa, my husband insists on extra jalapeño, and they’ve become my go-to when feeding a crowd or prepping make-ahead snacks for game day.
In my experience, the most memorable moments with these have been late-night gatherings where guests kept asking for “one more” — the crunchy exterior and creamy interior is a combination people genuinely crave. I love that a store-bought rotisserie bird transforms these into something that tastes homemade and intentional.
One of my favorite aspects is how adaptable the filling is; swap in smoked chicken or add charred corn for a sweeter crunch. Family get-togethers often turn into a taquito bar with bowls of toppings—everyone creates their perfect bite, and the leftovers are always claimed first the next day.
Store cooked taquitos in an airtight container in the refrigerator for up to 4 days. For longer storage, flash-freeze them on a sheet tray until solid, then transfer to a freezer bag and freeze for up to 3 months. To reheat, bake from frozen at 400 degrees F for 12–15 minutes or until heated through and crisp, flipping halfway. Avoid microwaving straight from frozen — you’ll lose crunch. Use parchment-lined containers for short-term storage to keep bottoms crisp and avoid condensation.
If you need dairy-free options, swap cream cheese for a dairy-free soft spread and use dairy-free shredded cheese; note that melting behavior may be slightly different. For gluten-free, choose certified corn tortillas and ensure your salsa and seasonings are gluten-free. If you prefer a lighter protein, substitute shredded rotisserie turkey or a pan-seared firm tofu crumbled and mixed with spices for a vegetarian twist (add extra binding like mashed beans or a small egg if rolling raw).
Serve with bowls of sour cream, guacamole, pico de gallo, and a vibrant tomatillo salsa. Pair with a simple slaw tossed in lime and cumin for contrast, or a bright cabbage salad to cut through richness. For brunch, plate them with fried eggs and charred lime halves. Garnish with chopped cilantro, thinly sliced radish, and lime wedges for pop and freshness.
Taquitos, sometimes called rolled tacos or flautas, trace their roots to Mexican regional street food where small rolled tortillas are deep-fried until crisp and served with chunky salsas. The version in many US kitchens has been adapted to suit quick home preparation and local palates, embracing cheeses like Monterey Jack and conveniences such as rotisserie chicken. This recipe blends traditional technique with modern pantry shortcuts for reliably delicious results.
In summer, add grilled corn, charred poblano, or fresh mango salsa to brighten the filling. Fall and winter call for warming spices — increase the paprika and add a pinch of smoked chipotle for depth. For holiday crowds, double the filling and offer a baked tray of taquitos alongside a trio of salsas so guests can help themselves without standing at the stove.
Roll taquitos ahead and refrigerate for 24 hours or freeze for later. If freezing raw, place rolled taquitos on a parchment-lined tray until firm, then bag and freeze. Label with date and cook directly from frozen for convenience. Portion into individual meal containers with small cups of salsa and sour cream so reheating becomes a grab-and-go lunch solution for busy weeks.
These taquitos strike a lovely balance between ease and flavor—crispy exteriors and creamy, seasoned centers that become a warm, familiar favorite. I hope you make them your own and share them often with friends and family.
Microwave 4 tortillas at a time for 30 seconds on a damp paper towel to make them pliable for rolling.
Place taquitos seam-side-down while baking to help them stay closed; use toothpicks if frying but remove before serving.
For extra crisp when baking, place taquitos on a cooling rack set on a baking sheet so hot air circulates underneath.
Avoid overcrowding the frying pan to maintain oil temperature and even browning.
This nourishing crispy chicken taquitos recipe is sure to be a staple in your kitchen. Enjoy every moist, high protein slice — it is perfect for breakfast or as a wholesome snack any time.
Yes. Use 2 cups cooked shredded chicken from a rotisserie, leftover roasted chicken, or poach two boneless chicken breasts for about 15 minutes then shred.
Yes, store cooked taquitos in the fridge for 3–4 days or freeze for up to 3 months. Reheat in a 400°F oven for best crispiness.
This Crispy Chicken Taquitos recipe makes perfectly juicy, tender, and flavorful steak every time! Serve with potatoes and a side salad for an unforgettable dinner in under 30 minutes.
In a large bowl, combine shredded chicken, shredded cheese, softened cream cheese, salsa, sour cream, lime juice, hot sauce, chopped cilantro, diced jalapeño, sliced green onions, and spices. Mix until smooth and evenly combined so the filling binds easily when rolled.
Warm tortillas in the microwave 4 at a time for about 30 seconds or in a skillet briefly to make them pliable. Spoon 3-4 tablespoons of filling into the center of each tortilla and roll tightly, placing seam-side-down on a plate.
Preheat oven to 425°F. Arrange taquitos seam-side-down on a lightly greased, light-colored baking sheet or on cooling racks set over the sheet. Brush tops with melted butter, avoiding ends, and bake 10-15 minutes until golden and crisp.
Heat oil to 350°F in a skillet to about 3/4-inch depth. Fry taquitos in small batches seam-side-down, turning with tongs, about up to 2 minutes per side until golden brown. Drain on a cooling rack and serve hot.
Serve hot with extra sour cream, salsa, guacamole, or pico de gallo. Reheat leftovers in a 400°F oven for 8-10 minutes for restored crispiness.
Last Step: Please leave a rating and comment letting us know how you liked this recipe! This helps our business to thrive and continue providing free, high-quality recipes for you.
Leave a comment & rating below or tag
@delishum on social media!

Thick chocolate chunk brownies crowned with melted mini marshmallows and drenched in glossy chocolate frosting for the ultimate fudgy, crowd-pleasing bite.

Buttery shortbread crust meets a lush brown sugar pecan topping. Crunchy, caramelly, and ready with just 10 minutes of prep for effortless indulgence.

Ultra-smooth pumpkin cheesecake with warm spice and a sturdy graham crust. A showstopper on its own, unforgettable with caramel and rum-kissed whipped cream.
Leave a comment & rating below or tag @delishum on social media!
Enjoyed this recipe? Share it with friends and family, and don't forget to leave a review!
This recipe looks amazing! Can't wait to try it.
Comments are stored locally in your browser. Server comments are displayed alongside your local comments.

Join to receive our email series which contains a round-up of some of our quick and easy family favorite recipes.
