
Christmas Sugar Cookie Bars

Soft, buttery sugar cookie bars frosted with creamy vanilla cream-cheese buttercream and topped with festive sprinkles — the easiest holiday traybake everyone will fight over.
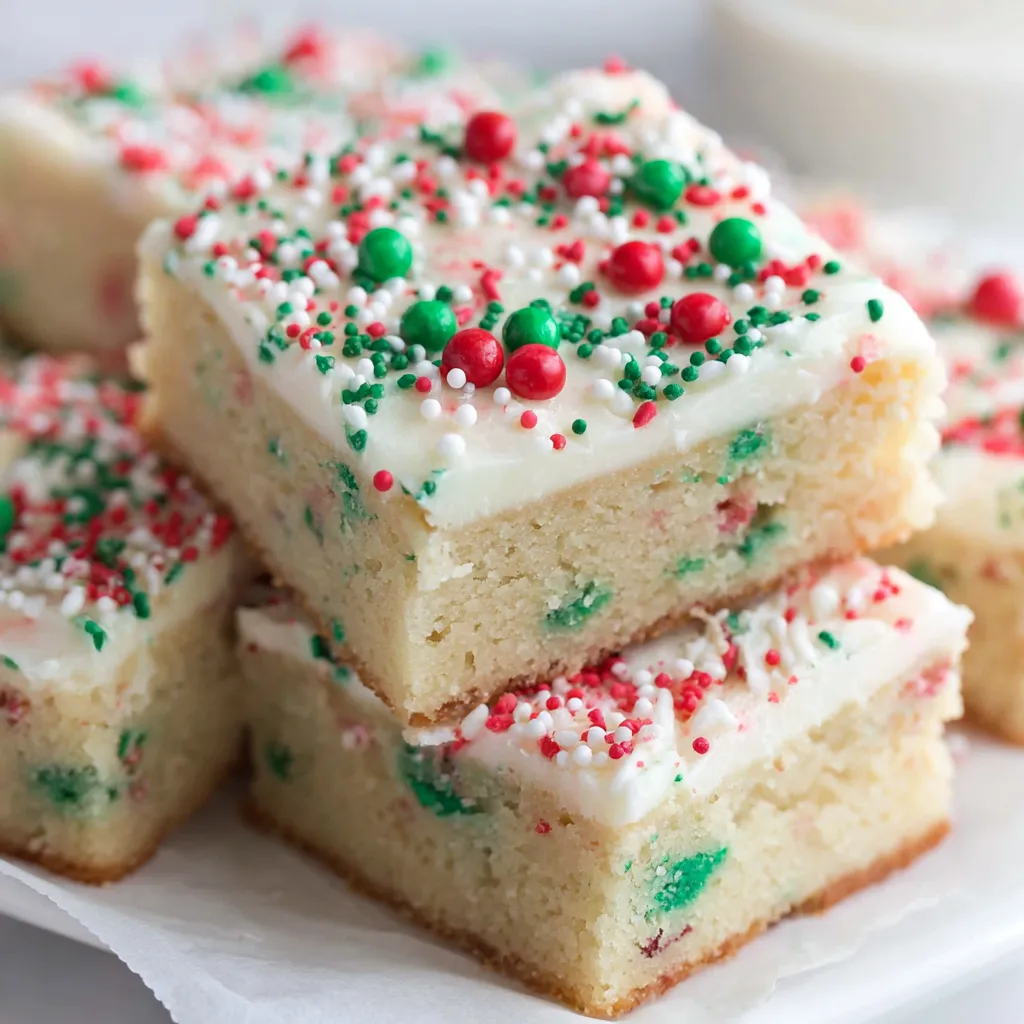
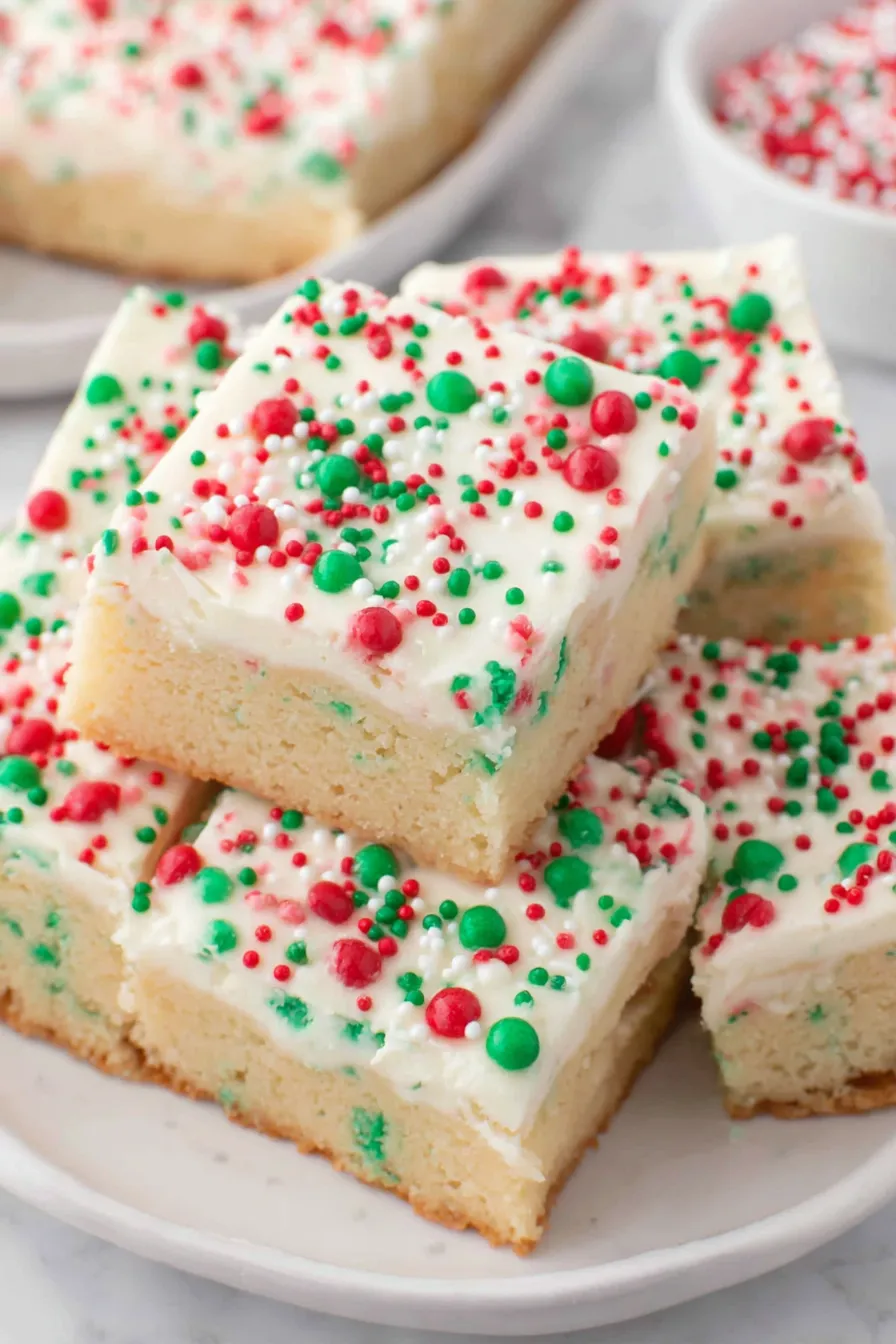
This tray of Christmas sugar cookie bars has been my holiday go-to for years. I first developed this version on a hectic December weekend when I wanted the bright flavor of a classic sugar cookie without rolling, chilling, and cutting dozens of individual cookies. The result is a thick, tender bar with a slightly crisp edge, a soft, cakey center, and a creamy frosting that sets into a sliceable top. It delivers all the nostalgia of cut-out cookies — buttery mouthfeel, vanilla-forward sweetness, and crunchy sprinkles — but in one pan that feeds a crowd.
I remember carrying a warm pan to a neighborhood cookie swap one year; people kept asking if I had actually rolled and cut every cookie by hand. The short answer: no. These bars look festive, slice beautifully, and travel well. The dough uses pantry staples and comes together quickly in a bowl. The frosting uses a touch of cream cheese for richness and tang, cutting through sweetness so each bite feels balanced. Whether you’re bringing them to a potluck, packing them in lunchboxes, or leaving a plate out for Santa, they always disappear fast.
Why You'll Love This Recipe
- One-pan convenience: makes a 9" x 9" tray that serves a crowd without rolling or cookie cutters, saving time during busy holidays.
- Familiar flavors: buttery sugar base with a vanilla-cream cheese frosting gives that classic sugar-cookie taste with a softer, easier-to-slice format.
- Beginner-friendly: simple mixing steps and clear visual cues — no advanced techniques needed, perfect for novice bakers or kids helping in the kitchen.
- Customizable topping: uses festive sprinkles to make it holiday-ready, but you can swap toppings for themed parties or dietary needs.
- Make-ahead flexibility: bake and store unfrosted for up to two days or freeze baked bars to frost later, useful for planning holiday baking sessions.
- Pantry-driven ingredients: most items are common on pantry lists — flour, sugar, butter, egg — making this an impulse-bake winner.
My family’s reaction when I first brought these to a holiday brunch was priceless: jaws dropped, then silence, then the muffled sounds of people trying to talk with mouths full. It’s become a mandatory contribution to our gatherings because it travels without drama and appeals to every age. Over the years I’ve learned which sprinkles hold color best after baking, how long to wait before slicing for clean edges, and how a little cream cheese in the frosting elevates the whole bar.
Ingredients
- Salted butter (for the bars): 1 stick (1/2 cup) softened — choose a high-quality brand like Land O'Lakes or Kerrygold for richer flavor; do not melt, just bring to room temperature so it creams properly.
- Granulated sugar: 1 cup — provides structure and slight chew; measure by leveling the cup for consistent results.
- Large egg: 1 — at room temperature for smoother incorporation and even texture.
- Vanilla extract: 1 teaspoon — use pure vanilla if you can; it makes a noticeable difference versus imitation.
- All-purpose flour: 2 cups — spoon into the cup and level off to avoid dense bars; brands like King Arthur yield reliable results.
- Baking powder: 1 teaspoon — the small lift keeps the center tender rather than flat.
- Festive sprinkles: 1/4 cup — use non-pariel or jimmies that won’t bleed color when baked; fold in gently to avoid streaking.
- Powdered sugar (for frosting): 2 cups — sift if lumpy to make a silky frosting.
- Salted butter (for frosting): 1 stick (1/2 cup) softened — matches the base and gives a cohesive buttery flavor.
- Cream cheese: 3 tablespoons softened — adds tang and smoothness; Philadelphia brand is reliable.
- Vanilla extract (frosting): 1 teaspoon — balances the powdered sugar.
- Milk: 2 tablespoons — use whole milk for a richer frosting or a splash more if you prefer a spreadable consistency.
- Additional sprinkles: for decorating the top — pick colors that match your theme.
Instructions
Preheat and prepare pan: Preheat the oven to 350°F and line a 9" x 9" baking pan with parchment paper, leaving an overhang for easy removal. Grease the parchment lightly with butter or nonstick spray so the bars lift cleanly. Cream butter and sugar: Using a stand mixer or hand mixer, beat 1/2 cup softened butter and 1 cup sugar on medium speed until pale and fluffy, about 2–3 minutes. Proper creaming traps air that helps with texture; scrape the bowl once to ensure even mixing. Add egg and vanilla: Beat in the room-temperature egg and 1 teaspoon vanilla until fully incorporated. The batter will be glossy at this stage — if the egg seems to separate, continue beating a bit longer; the emulsion will come together. Incorporate dry ingredients: With the mixer on low, add 2 cups all-purpose flour and 1 teaspoon baking powder a little at a time until a thick dough forms. Avoid overmixing once the flour is added to prevent toughness; stop as soon as you have a uniform dough. Fold in sprinkles and press into pan: Gently stir in 1/4 cup festive sprinkles with a spatula. Transfer the thick dough to the prepared pan and press evenly into the corners — damp hands or a piece of parchment on top helps smooth the surface without sticking. Bake and cool: Bake at 350°F for about 20 minutes, or until the top is lightly golden and a toothpick inserted into the center comes out with a few moist crumbs. Cool completely in the pan on a wire rack, then use the parchment overhang to lift from the pan before frosting. Make the frosting: Beat together 2 cups powdered sugar, 1/2 cup softened butter, and 3 tablespoons softened cream cheese until smooth. Add 1 teaspoon vanilla and 2 tablespoons milk; beat until creamy. Adjust milk by teaspoonfuls for desired spreadability. Frost and decorate: Spread the frosting generously over the cooled bars and scatter additional sprinkles on top. For cleaner slices let frosting set in the fridge 10–20 minutes; for softer tops serve immediately.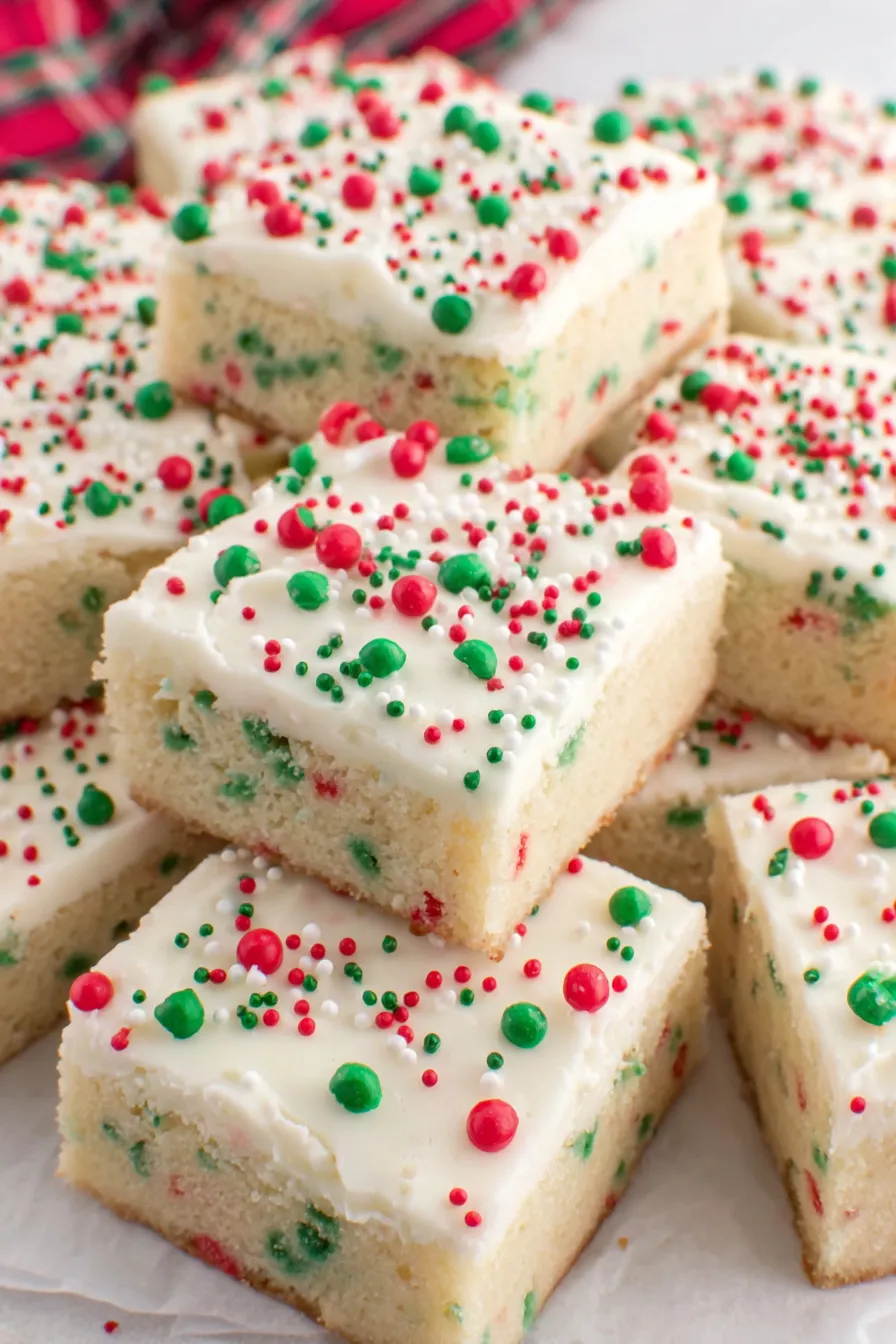
You Must Know
- These bars are best stored in an airtight container in the refrigerator for up to 5 days if frosted; unfrosted bars last 2 days at room temperature or up to 3 months frozen.
- Because the dough is thick, pressing it into the pan evenly is the key to uniform baking and clean slicing.
- Use non-bleeding sprinkles to avoid color transfer into the dough; if colors run, the bars still taste great but the appearance changes.
- The cream cheese in the frosting keeps it from tasting overly sweet and also helps it set more firmly when chilled.
- For precise slices, chill the frosted bars 15–20 minutes, then use a sharp knife wiped between cuts for clean edges.
I love how forgiving this formula is — even if you press the dough a little unevenly or your oven runs warm, slicing and frosting conceal small imperfections. Over the years I’ve served these at cookie swaps, holiday potlucks, and after-school parties; the consistency of feedback is always the same: everyone asks for the recipe because it looks like a hand-cut sugar cookie but is so much easier to make. That delight in surprising people with simplicity is my favorite part of baking these bars.
Storage Tips
To preserve texture and flavor, store frosted bars in a single layer in an airtight container in the refrigerator; they’ll keep well for up to 5 days. If you need to stack layers, separate them with parchment to prevent sticking. For longer storage, freeze unfrosted bars wrapped tightly in plastic wrap and foil for up to 3 months; thaw overnight in the refrigerator, then frost the next day. To refresh a chilled bar before serving, let it sit at room temperature for 15–20 minutes so the frosting softens slightly and the flavors bloom.
Ingredient Substitutions
If you need dairy-free options, swap the butter for a firm vegan butter and replace cream cheese with a plant-based cream-cheese alternative; note texture and flavor will be slightly different. For egg-free baking, use a commercial egg replacer or 3 tablespoons unsweetened applesauce — expect a slightly denser crumb. To reduce sugar, substitute half the granulated sugar with a cup-for-cup brown sugar alternative or use a granulated erythritol blend; the bars will be less crisp and slightly more hydrated. Gluten-free flours can be used in a 1:1 blend formulated for baking (e.g., Bob's Red Mill 1-to-1); add a teaspoon of xanthan gum if the blend doesn't include it for structure.
Serving Suggestions
Serve bars warm with a scoop of vanilla ice cream for an indulgent dessert or slice into smaller squares for a cookie platter. They pair beautifully with hot chocolate, mulled cider, or a bright cranberry-orange punch. For afternoon tea, garnish each square with a small mint leaf and a dusting of extra powdered sugar. These bars also make charming gifts: stack slices in a decorative box separated by parchment and tie with a ribbon for a homemade holiday present.
Cultural Background
Traybakes and sheet-style sweets are a longstanding tradition in many households because they maximize flavor while minimizing labor. These bars borrow the essence of classic sugar cookies — rooted in European holiday baking — and translate it into an American traybake format that’s perfect for modern entertaining. Using frosting and sprinkles to signal holidays is a contemporary twist; historically, sugar cookies were often cut into shapes and iced for celebrations, so these bars carry that same festive spirit with easier execution.
Seasonal Adaptations
Change sprinkles and frosting colors to match seasons: peppermint crunch and white sanding sugar for Christmas, pastel sprinkles and lemon zest in spring, or warm spices like cinnamon and nutmeg for a fall twist. For a summertime version, fold in mini chocolate chips and top with a thin glaze instead of cream cheese frosting. Holiday add-ins like finely chopped candied ginger or orange zest can also be stirred into the dough for a seasonal flavor boost without altering technique.
Meal Prep Tips
Bake several pans at once during a dedicated holiday-baking session and freeze the unfrosted bars. Thaw in the refrigerator the night before you need them, then frost and decorate on the day of serving for the freshest presentation. Cut bars into uniform squares using a ruler as a guide, and store pre-sliced bars separated by parchment in an airtight container for grab-and-go treats that work well for packed lunches or gift boxes.
These sugar cookie bars have become a quiet holiday tradition in my home — simple to make, impossible to resist. Whether you keep them classic or personalize them with unique toppings, they bring that cozy, festive feeling to any table. Bake a pan, share with friends, and watch how quickly they become a new favorite.
Pro Tips
Bring butter and egg to room temperature before mixing for a smooth, evenly emulsified dough.
Press the dough into the pan with lightly dampened hands or a piece of parchment to get a flat, even surface.
Chill the frosted bars briefly for cleaner slices and neater presentation if serving at a party.
Use non-bleeding sprinkles to avoid color transfer into the dough during baking.
This nourishing christmas sugar cookie bars recipe is sure to be a staple in your kitchen. Enjoy every moist, high protein slice — it is perfect for breakfast or as a wholesome snack any time.
FAQs about Recipes
How do I get neat slices?
If you want clean slices, chill the frosted bars 15–20 minutes before cutting. Use a sharp knife wiped between cuts to prevent dragging frosting.
Can I freeze these?
Yes — bake the bars, cool, wrap tightly, and freeze for up to 3 months. Thaw in the refrigerator overnight and frost when ready to serve.
Any tips for best texture?
Use a high-quality unsalted or salted butter and room-temperature egg. Overmixing after adding flour can make bars tough, so mix until just combined.
Tags
Christmas Sugar Cookie Bars
This Christmas Sugar Cookie Bars recipe makes perfectly juicy, tender, and flavorful steak every time! Serve with potatoes and a side salad for an unforgettable dinner in under 30 minutes.
Ingredients
Sugar cookie bars
Frosting
Instructions
Preheat and prepare pan
Preheat oven to 350°F. Line a 9 x 9-inch pan with parchment leaving an overhang for easy removal and lightly grease the paper.
Cream butter and sugar
Beat 1/2 cup softened butter and 1 cup sugar until pale and fluffy, about 2–3 minutes, scraping the bowl once for even mixing.
Add egg and vanilla
Mix in 1 room-temperature egg and 1 teaspoon vanilla until combined and glossy; continue mixing until emulsified.
Mix in dry ingredients
Slowly add 2 cups flour and 1 teaspoon baking powder on low speed until a thick dough forms; avoid overmixing after flour is added.
Fold in sprinkles and press dough
Gently fold 1/4 cup sprinkles into the dough, transfer to the pan, and press evenly into the corners using damp hands or parchment.
Bake and cool
Bake at 350°F for 20 minutes or until lightly golden and a toothpick returns a few moist crumbs. Cool completely before lifting from pan.
Prepare frosting
Beat 2 cups powdered sugar, 1/2 cup softened butter, and 3 tablespoons cream cheese until smooth. Add 1 teaspoon vanilla and 2 tablespoons milk; adjust for consistency.
Frost and slice
Spread frosting over cooled bars, top with sprinkles, chill briefly for firmer slices if desired, and cut into 16 squares.
Last Step: Please leave a rating and comment letting us know how you liked this recipe! This helps our business to thrive and continue providing free, high-quality recipes for you.
Nutrition
Did You Make This?
Leave a comment & rating below or tag
@delishum on social media!
Categories:
You might also like...

Gooey Marshmallow Chocolate Brownies
Thick chocolate chunk brownies crowned with melted mini marshmallows and drenched in glossy chocolate frosting for the ultimate fudgy, crowd-pleasing bite.

Buttery Pecan Pie Bars
Buttery shortbread crust meets a lush brown sugar pecan topping. Crunchy, caramelly, and ready with just 10 minutes of prep for effortless indulgence.

No-Crack Pumpkin Cheesecake
Ultra-smooth pumpkin cheesecake with warm spice and a sturdy graham crust. A showstopper on its own, unforgettable with caramel and rum-kissed whipped cream.
Did You Make This?
Leave a comment & rating below or tag @delishum on social media!
Rate This Recipe
Share This Recipe
Enjoyed this recipe? Share it with friends and family, and don't forget to leave a review!
Comments (1)
This recipe looks amazing! Can't wait to try it.
Comments are stored locally in your browser. Server comments are displayed alongside your local comments.

Hi, I'm Amelia!
What's Popular

30-Minute Meals!
Join to receive our email series which contains a round-up of some of our quick and easy family favorite recipes.