
>>

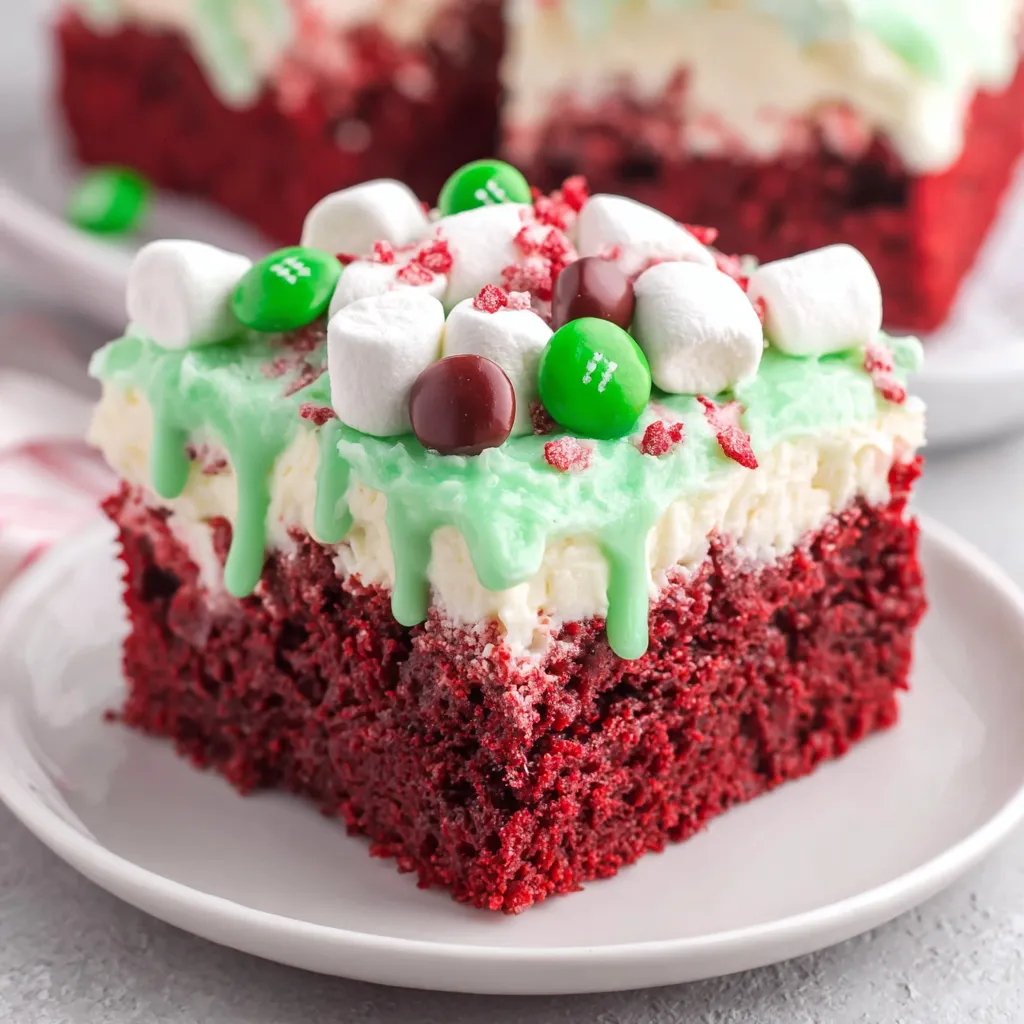
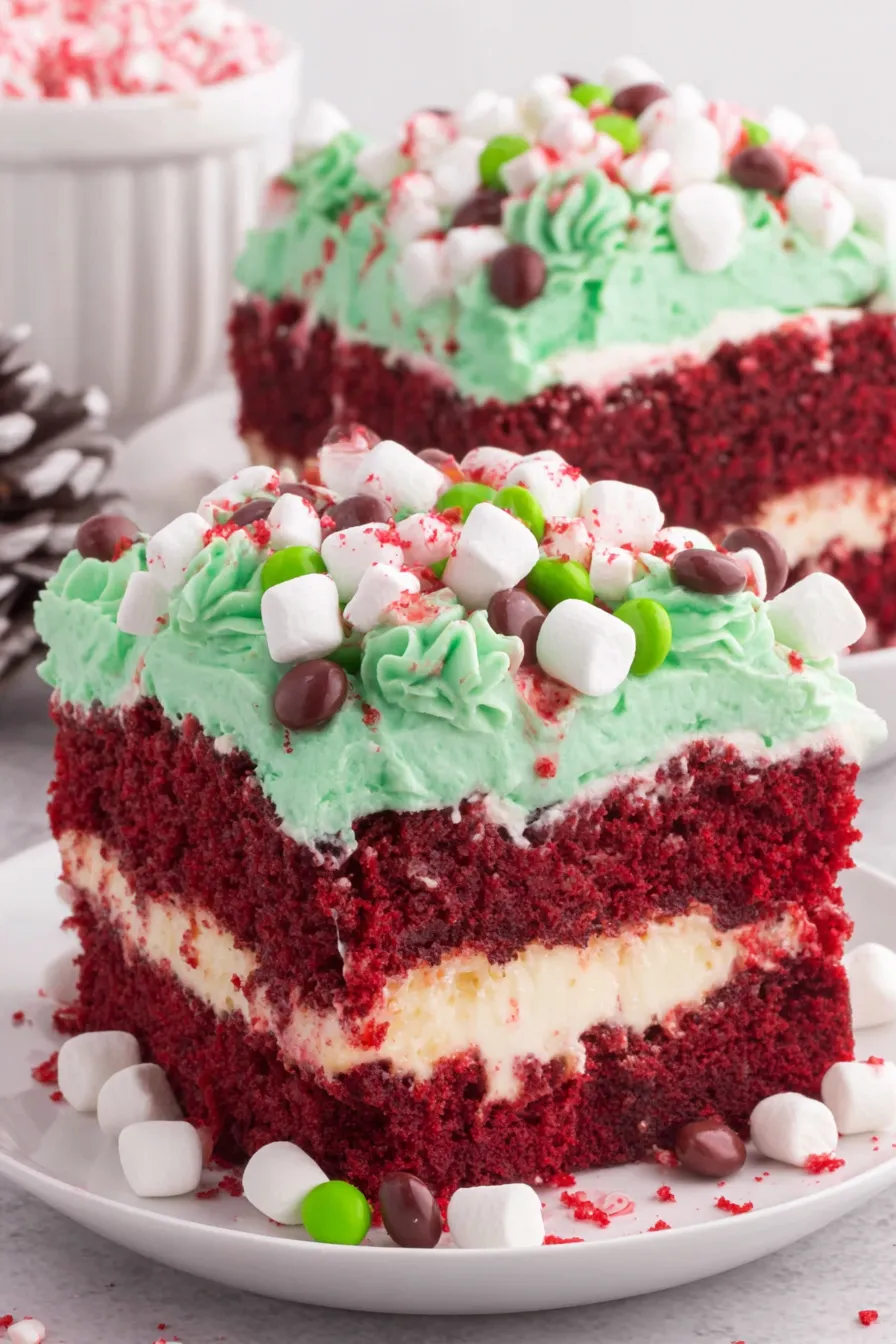
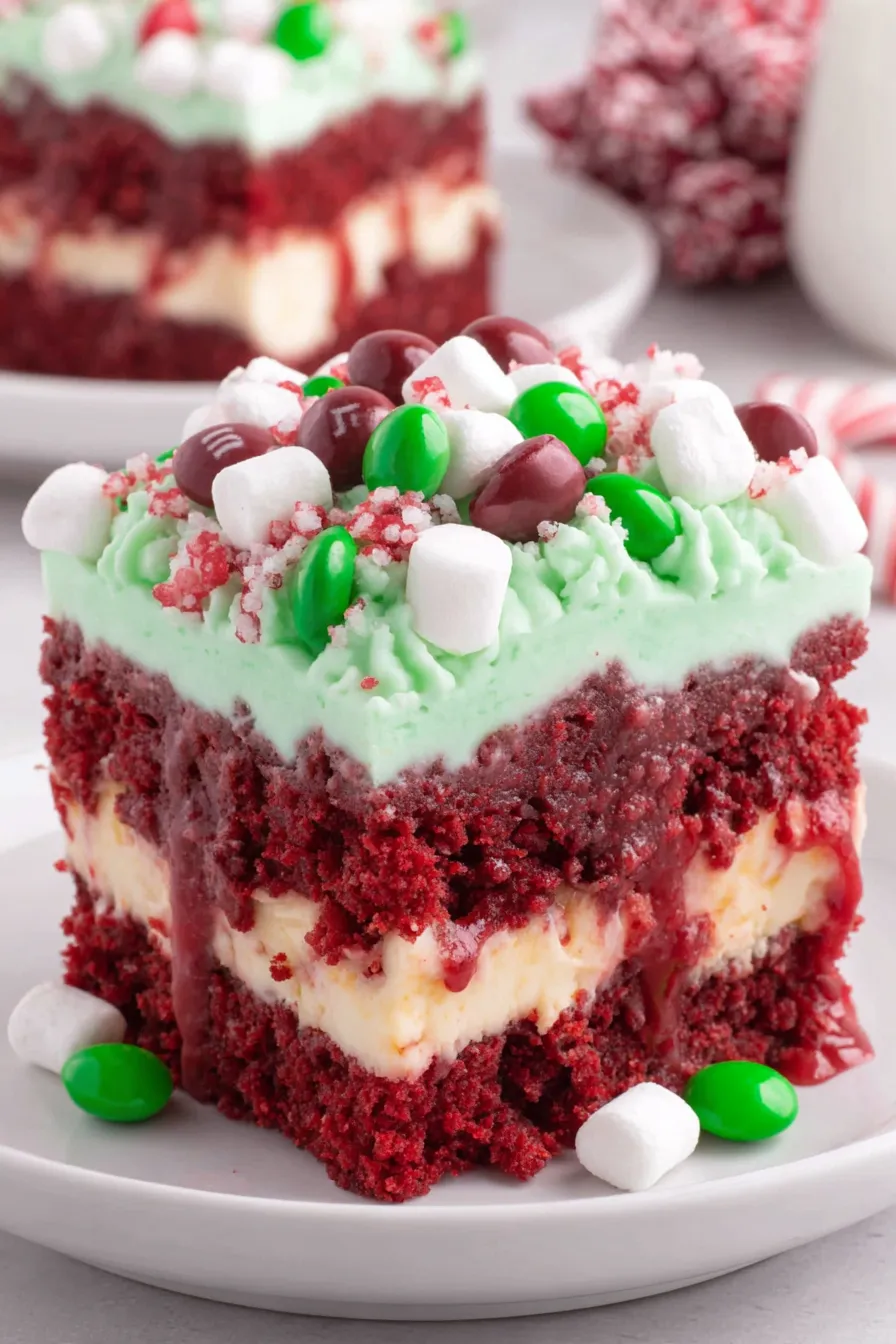
A festive, crowd-pleasing red velvet poke cake layered with cheesecake-flavored pudding and a green-tinted whipped topping, finished with marshmallows, red and green M&M’s, and sprinkles — perfect for holiday gatherings.
This Christmas Red Velvet Poke Cake has been a holiday mainstay in my kitchen for years. I first made it the December my sister asked for a dessert that looked festive but could be made ahead for a busy holiday party. The result — a tender, moist red velvet base studded with thin tunnels of cheesecake-flavored filling and a pillowy green-tinted whipped topping — became an instant favorite. It's the kind of dessert that arrives at the table and makes people smile before they even taste it.
The texture is what keeps everyone coming back: the cake stays soft and moist thanks to the pudding filling that seeps into the holes, while the whipped topping gives a light, creamy contrast. The mini marshmallows add nostalgic chew, and the M&M’s and red sprinkles bring a playful, festive crunch. It’s easy to assemble, travels well, and can be refrigerated for a few days, which makes it ideal for holiday entertaining when you need something showy without hours of prep.
In my household this cake became the signature dessert at our holiday brunch. One year I brought it to a cookie exchange and everyone asked for the recipe; another Christmas it accompanied a slow-roasted ham and was the first thing to disappear from the buffet. The simplicity and festive look make it my go-to when I want a dessert that feels special without fuss.
My favorite part is how the pudding transforms the cake from everyday boxed mix into a dessert that tastes homemade and thoughtful. The first time I made it for a family gathering, my aunt asked for the recipe and my cousin kept reaching for seconds. It’s an easy way to make a big, festive impression without complex techniques.
Store leftovers in an airtight container in the refrigerator for up to 3 days. If you’ve decorated with marshmallows, the marshmallows may lose a bit of their chew over time; store a small extra bag of marshmallows and add fresh ones just before serving for best texture. For longer storage, wrap the uncut cake tightly in plastic and foil and freeze for up to 3 months; thaw overnight in the refrigerator before applying toppings and serving.
If you prefer a lighter topping, substitute homemade stabilized whipped cream (use 1 cup heavy cream whipped with 1 tablespoon powdered sugar and 1 teaspoon gelatin dissolved in 2 tablespoons warm water) for the whipped topping. For a dairy-free version, use a dairy-free whipped topping and a nondairy milk in the pudding (note: instant pudding may not set the same with nondairy milk). For a richer base, replace the vegetable oil with melted butter (1/2 cup) for a slightly deeper flavor and more tender crumb.
Serve chilled on a festive platter; garnish each square with an extra marshmallow or a mint leaf for an elevated look. This goes beautifully with coffee, hot cocoa, or a lightly spiced mulled wine at holiday parties. For a brunch spread, pair small squares with savory options like quiches or smoked salmon to balance the sweetness.
Red velvet desserts have roots in Southern American baking and became popular for their dramatic color and tender crumb. The name likely comes from the slight cocoa content and the resulting mahogany hue when combined with acidic ingredients. Over time, red velvet has evolved into everything from layer cakes to cookies and fun seasonal variations like this poke-style version that incorporate pudding layers and playful decorations.
For winter gatherings, stick to the red and green palette; in other seasons you can change the color of the whipped topping and candy to match holidays—pastel colors for spring, orange and brown for autumn. You can also toss fresh berries over the top in summer instead of candy for a lighter, fruit-forward adaptation.
Make the cake and pudding layer a day ahead, chill overnight, and add the tinted whipped topping and decorations a few hours before serving. Use a sharp, warmed knife for clean slices: dip the blade in hot water, dry it, and cut, wiping between slices. Pack individual squares in single-serve containers for grab-and-go holiday lunches or party favors.
This Christmas Red Velvet Poke Cake combines ease and festive flair, making it a dependable choice for hosts who want something both delightful and simple to prepare. Give it a try at your next holiday gathering — you’ll likely find it becoming part of your seasonal rotation.
Use room-temperature eggs for a more even cake rise and lighter texture.
Whisk the instant pudding with cold milk thoroughly for 60–90 seconds to ensure proper thickening before pouring over the cake.
For clean slices, refrigerate the finished cake for at least 30 minutes after decorating and use a knife warmed under hot water.
This nourishing christmas red velvet poke cake recipe is sure to be a staple in your kitchen. Enjoy every moist, high protein slice — it is perfect for breakfast or as a wholesome snack any time.
This Christmas Red Velvet Poke Cake recipe makes perfectly juicy, tender, and flavorful steak every time! Serve with potatoes and a side salad for an unforgettable dinner in under 30 minutes.
Preheat oven to 350°F. Spray a 9×13-inch pan with baker’s spray. In a medium bowl combine cake mix, water, vegetable oil, and eggs; beat with a handheld mixer on medium until smooth. Pour into the pan and bake 25 minutes or until a toothpick comes out with a few moist crumbs. Let cool 5–10 minutes.
Use the rounded handle of a wooden spoon to poke holes about 1/2 inch apart across the warm cake to allow the pudding to seep in for a moist texture.
Whisk the cheesecake instant pudding mix with 3 3/4 cups cold whole milk for 1 to 1 1/2 minutes until thickened and glossy. Cold milk is essential for proper setting.
Pour the thickened pudding evenly over the cake, spreading to ensure coverage and allowing it to fill the holes. Cover tightly and refrigerate at least 4 hours or overnight.
Stir 10–12 drops of green food coloring into the thawed whipped topping until color is uniform. Spread over chilled pudding layer with a spatula for a smooth finish.
Evenly sprinkle mini marshmallows, red and green M&M’s, and red sprinkles. Chill briefly if needed, then cut into twelve 3-inch x 3-inch squares for serving.
Last Step: Please leave a rating and comment letting us know how you liked this recipe! This helps our business to thrive and continue providing free, high-quality recipes for you.
Leave a comment & rating below or tag
@delishum on social media!

Thick chocolate chunk brownies crowned with melted mini marshmallows and drenched in glossy chocolate frosting for the ultimate fudgy, crowd-pleasing bite.

Buttery shortbread crust meets a lush brown sugar pecan topping. Crunchy, caramelly, and ready with just 10 minutes of prep for effortless indulgence.

Ultra-smooth pumpkin cheesecake with warm spice and a sturdy graham crust. A showstopper on its own, unforgettable with caramel and rum-kissed whipped cream.
Leave a comment & rating below or tag @delishum on social media!
Enjoyed this recipe? Share it with friends and family, and don't forget to leave a review!
This recipe looks amazing! Can't wait to try it.
Comments are stored locally in your browser. Server comments are displayed alongside your local comments.

Join to receive our email series which contains a round-up of some of our quick and easy family favorite recipes.
