
Christmas Oreo Tree Cookies

Festive Oreo cookies transformed into little Christmas trees with white and green chocolate, candy star toppers, and optional chocolate jimmies trunks — a quick, crowd-pleasing holiday treat.
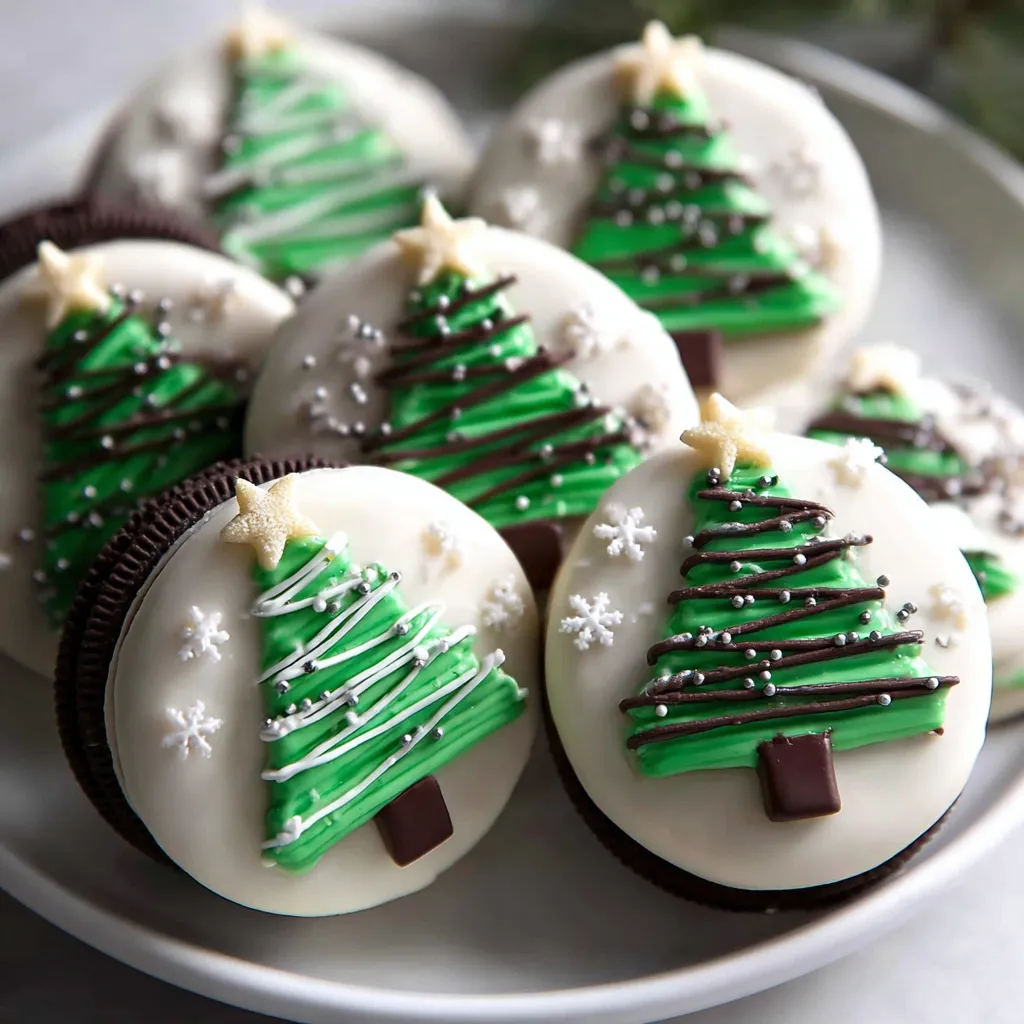
This little project started one December afternoon when I wanted a holiday cookie that was unbelievably simple yet charming enough to gift to neighbors. Using familiar store-bought ingredients I already had on hand, I turned ordinary sandwich cookies into festive Christmas tree treats. The result is a crisp contrast between the crunchy Oreo, a smooth layer of white chocolate, and bright green decoration that makes the cookies look both whimsical and professional. I discovered the easiest decorating rhythm while making them with my niece: dip, pipe, top, and let set. In less than an hour we had a tray of cookies that disappeared at our holiday party faster than any other dessert.
What makes these cookies special is the combination of accessible ingredients and forgiving technique. You do not need piping experience; a small zip-top bag with a snipped corner creates tidy trees. The white chocolate base adds sweetness and a stable surface so the green chocolate holds shape. For texture contrast, a strip of chocolate jimmies makes a convincing trunk. This is the kind of recipe that turns well for kids' activities, last-minute hostess gifts, or a simple addition to a dessert buffet. I love how each cookie becomes a tiny, edible ornament that brings an instant smile.
Why You'll Love This Recipe
- Ready in about 30 minutes from start to finish, making it ideal for last-minute holiday baking when time is short.
- Uses pantry staples and store-bought cookies and melting wafers so there is no need for tempering chocolate or advanced tools.
- Highly adaptable: swap green wafers for colored candy melts to match a party theme or dietary needs.
- Kid-friendly decorating step that doubles as an activity; children can practice piping and placing star toppers.
- Make-ahead friendly: cookies set well and keep for several days in an airtight container, perfect for prepping ahead of a gathering.
When I first made these with a small group, neighbors kept asking for the recipe and the children insisted on adding extra stars. The balance of textures and the visual charm are always the highlights; grown-ups appreciate the flavor, kids love the glittering stars, and the cookies are portable enough to tuck into gift boxes.
Ingredients
- Oreos (15 cookies): Use regular sandwich cookies for the best contrast between chocolate cookie and white coating. Aim for a fresh package so cookies do not crumble while dipping. Brands: Classic Oreo or store-brand equivalent work equally well.
- White melting chips (6 oz): Choose compound white coating or candy melts labeled for melting; they dry with a smooth sheen and are forgiving in the microwave. Avoid plain baking white chocolate which can seize more easily when overheated.
- Green melting wafers (3 oz): Bright green candy melts or colored confectionery coating are ideal for piping tree shapes. If you prefer a natural option, use tinted white candy melts.
- Candy stars (15): Small edible star candies or sugar decorations make perfect toppers; choose a size that sits comfortably on the cookie's upper edge without sliding off.
- Chocolate jimmies (1/4 cup, optional): Use small chocolate sprinkles to build a trunk; if you do not have jimmies, a dab of melted chocolate piped into a short rectangle works just as well.
Instructions
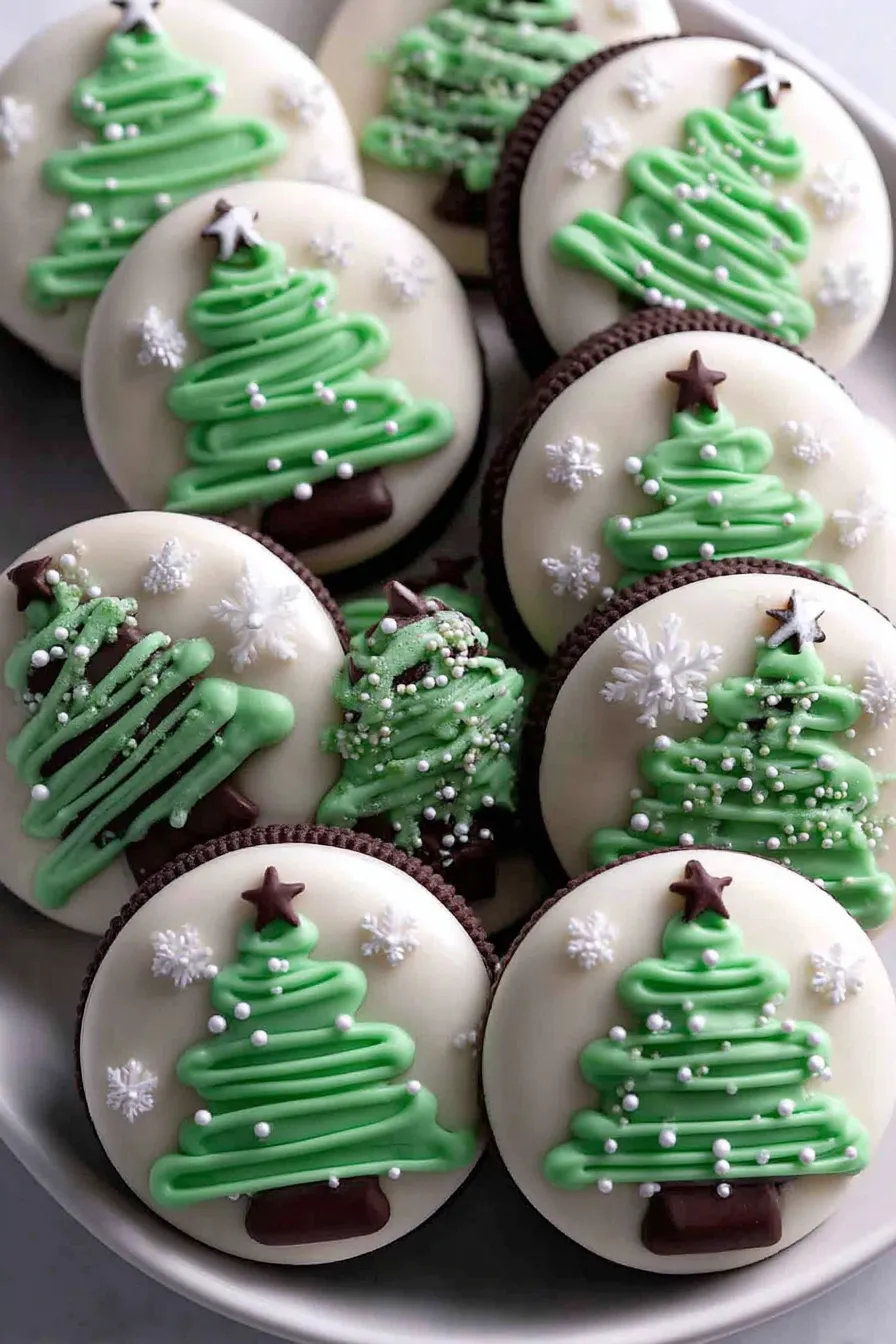
Prepare the workspace: Line a baking sheet or tray with parchment paper and arrange the 15 cookies in a single layer with a little space between them. This prevents sticking and gives you room to work quickly while the coatings are fluid. Melt the white coating: Place 6 ounces of white melting chips in a microwave-safe bowl. Heat for 30 seconds on high, then stir thoroughly. Repeat in 15- to 20-second bursts, stirring between each, until the coating is fully melted and smooth. The total time should be about 60 to 90 seconds depending on your microwave. The stirring is crucial to prevent overheating and graininess. Dip the cookies: Hold each Oreo by the undecorated half and dip about halfway into the melted white coating so the top remains exposed. Lift and let excess drip back into the bowl, then place the cookie on the prepared parchment. Work in small batches so the coating remains warm and fluid for a smooth finish. Melt the green coating: In a separate microwave-safe bowl, melt 3 ounces of green melting wafers using the same technique: 30 seconds first, then short bursts with stirring. Transfer the melted green coating to a small piping bag or a zip-top plastic bag, pushing the coating toward one corner for controlled piping. Pipe the trees: Snip a very small portion of the bag's corner to create a fine tip. Using a steady back-and-forth motion, pipe a triangular tree shape onto the white-coated portion of each cookie. Start with a small horizontal line at the top and gradually increase width on lower layers to mimic tree branches. Keep your hand steady and use light pressure to avoid thick blobs. Add toppers and trunk: Place one candy star at the top center of each piped tree before the green coating fully sets so it adheres. For the trunk, press 1 to 2 chocolate jimmies vertically under the bottom of the tree or pipe a short rectangle of leftover white or dark coating. Allow the cookies to sit undisturbed at room temperature until completely set, about 20 to 30 minutes depending on ambient temperature. Final set and serve: Once the coatings are firm to the touch, move the cookies to an airtight container for storage or arrange them on a platter for serving. If you need them to set faster, place the tray in the refrigerator for 10 minutes but avoid prolonged chilling which can cause condensation when brought back to room temperature.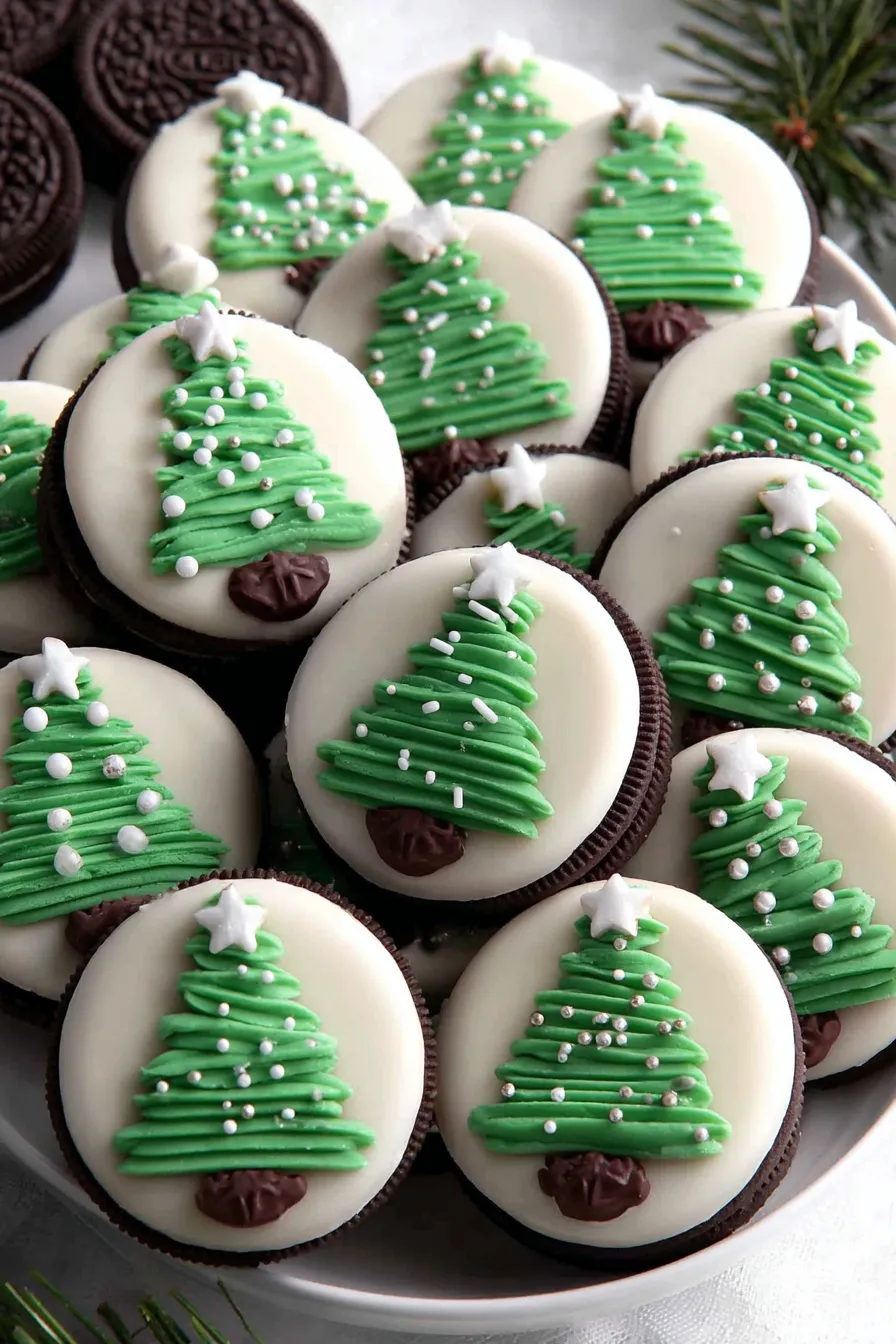
You Must Know
- These cookies are not freezer-friendly once decorated because the sugar decorations and coating can shift; however, undecorated dipped cookies can be frozen for up to 1 month. Thaw completely before adding green piping and toppers.
- They are a quick high-impact item for a cookie swap or classroom party and keep well in an airtight container for 3 to 5 days at room temperature.
- Nutrition note: each cookie is a treat-sized portion high in sugar and fat; enjoy as an occasional holiday indulgence rather than a daily snack.
- Temperature matters: if your kitchen is warm, the green coating will remain too soft to hold defined branches; work in cool batches or refrigerate briefly to firm layers between piping.
My favorite part of this process is watching how different each cookie becomes based on piping pressure and star placement. One year my son insisted on making every tree a little
Pro Tips
Work quickly while coatings are warm and fluid for the smoothest finish.
Stir melted coatings thoroughly between short microwave intervals to prevent grainy texture.
Use parchment and space cookies so decorations do not touch while setting.
If the green coating is too runny, refrigerate for 5 to 10 minutes to firm slightly before piping.
This nourishing christmas oreo tree cookies recipe is sure to be a staple in your kitchen. Enjoy every moist, high protein slice — it is perfect for breakfast or as a wholesome snack any time.
FAQs about Recipes
Can I freeze these cookies?
Yes. Undecorated dipped cookies can be frozen for up to 1 month. Thaw before adding piped decorations.
Can I use a zip-top bag instead of a piping bag?
Yes. Use a small zip-top bag as a piping bag and snip a tiny corner for a fine tip.
What if my green chocolate becomes thick?
If the green coating thickens, warm it in 5 to 10 second bursts and stir; do not overheat.
Tags
Christmas Oreo Tree Cookies
This Christmas Oreo Tree Cookies recipe makes perfectly juicy, tender, and flavorful steak every time! Serve with potatoes and a side salad for an unforgettable dinner in under 30 minutes.
Ingredients
Cookies
Coatings and decorations
Instructions
Prepare the pan
Line a baking sheet with parchment paper and arrange cookies to prevent sticking while decorating.
Melt white coating
Melt 6 ounces of white melting chips in short bursts in the microwave, stirring between intervals until smooth.
Dip Oreos
Dip each Oreo halfway into the white coating and place on the prepared tray to set.
Melt green coating
Melt 3 ounces of green melting wafers in a separate bowl using short microwave bursts and stir until fluid.
Pipe tree shapes
Transfer green coating to a piping bag, snip a small corner, and pipe triangular tree shapes on the white-coated portion.
Add toppers and trunks
Place a candy star at the top of each tree and press chocolate jimmies beneath as trunks. Allow to set fully before serving.
Last Step: Please leave a rating and comment letting us know how you liked this recipe! This helps our business to thrive and continue providing free, high-quality recipes for you.
Nutrition
Did You Make This?
Leave a comment & rating below or tag
@delishum on social media!
Categories:
You might also like...

Gooey Marshmallow Chocolate Brownies
Thick chocolate chunk brownies crowned with melted mini marshmallows and drenched in glossy chocolate frosting for the ultimate fudgy, crowd-pleasing bite.

Buttery Pecan Pie Bars
Buttery shortbread crust meets a lush brown sugar pecan topping. Crunchy, caramelly, and ready with just 10 minutes of prep for effortless indulgence.

No-Crack Pumpkin Cheesecake
Ultra-smooth pumpkin cheesecake with warm spice and a sturdy graham crust. A showstopper on its own, unforgettable with caramel and rum-kissed whipped cream.
Did You Make This?
Leave a comment & rating below or tag @delishum on social media!
Rate This Recipe
Share This Recipe
Enjoyed this recipe? Share it with friends and family, and don't forget to leave a review!
Comments (1)
This recipe looks amazing! Can't wait to try it.
Comments are stored locally in your browser. Server comments are displayed alongside your local comments.

Hi, I'm Amelia!
What's Popular

30-Minute Meals!
Join to receive our email series which contains a round-up of some of our quick and easy family favorite recipes.