
>>

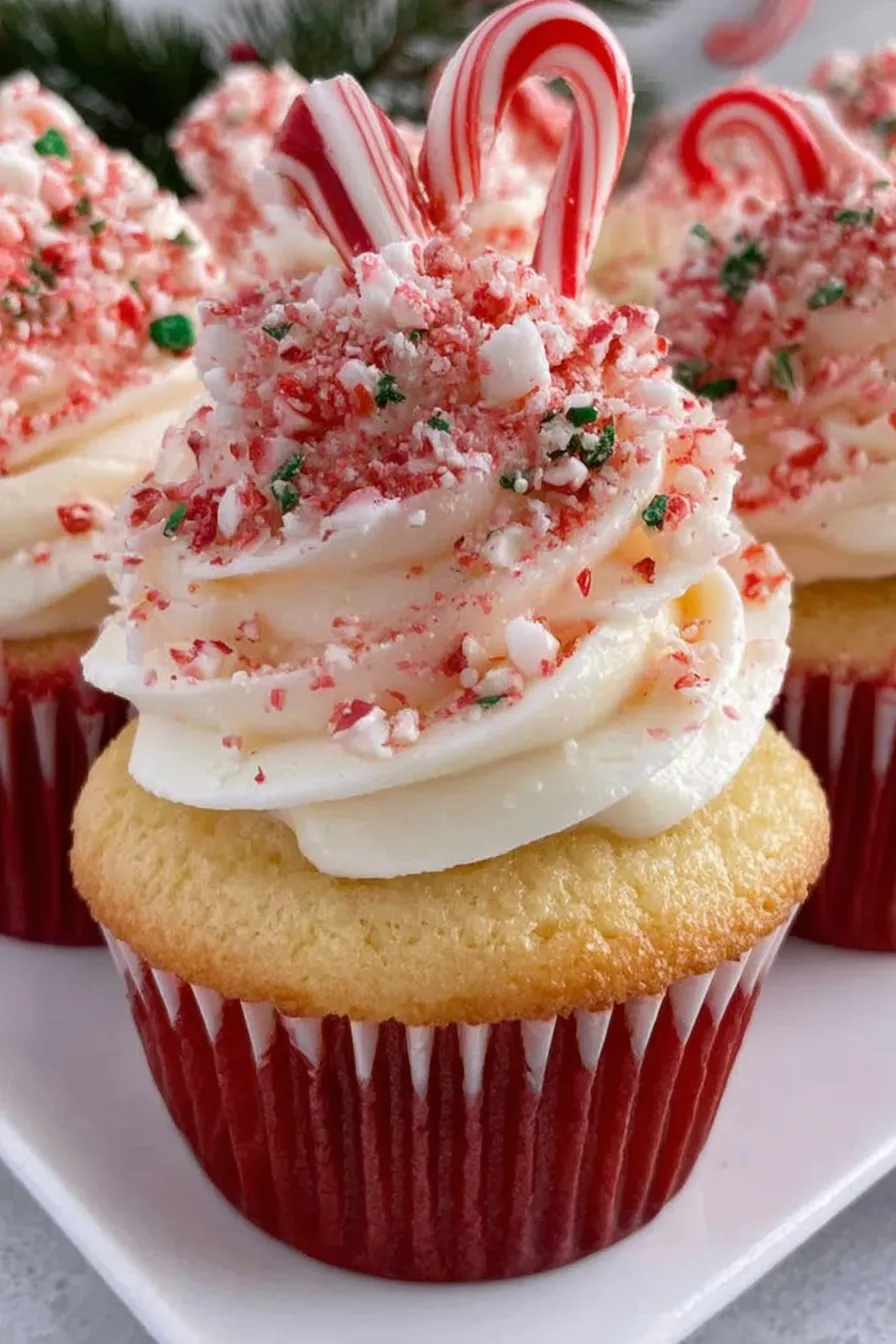
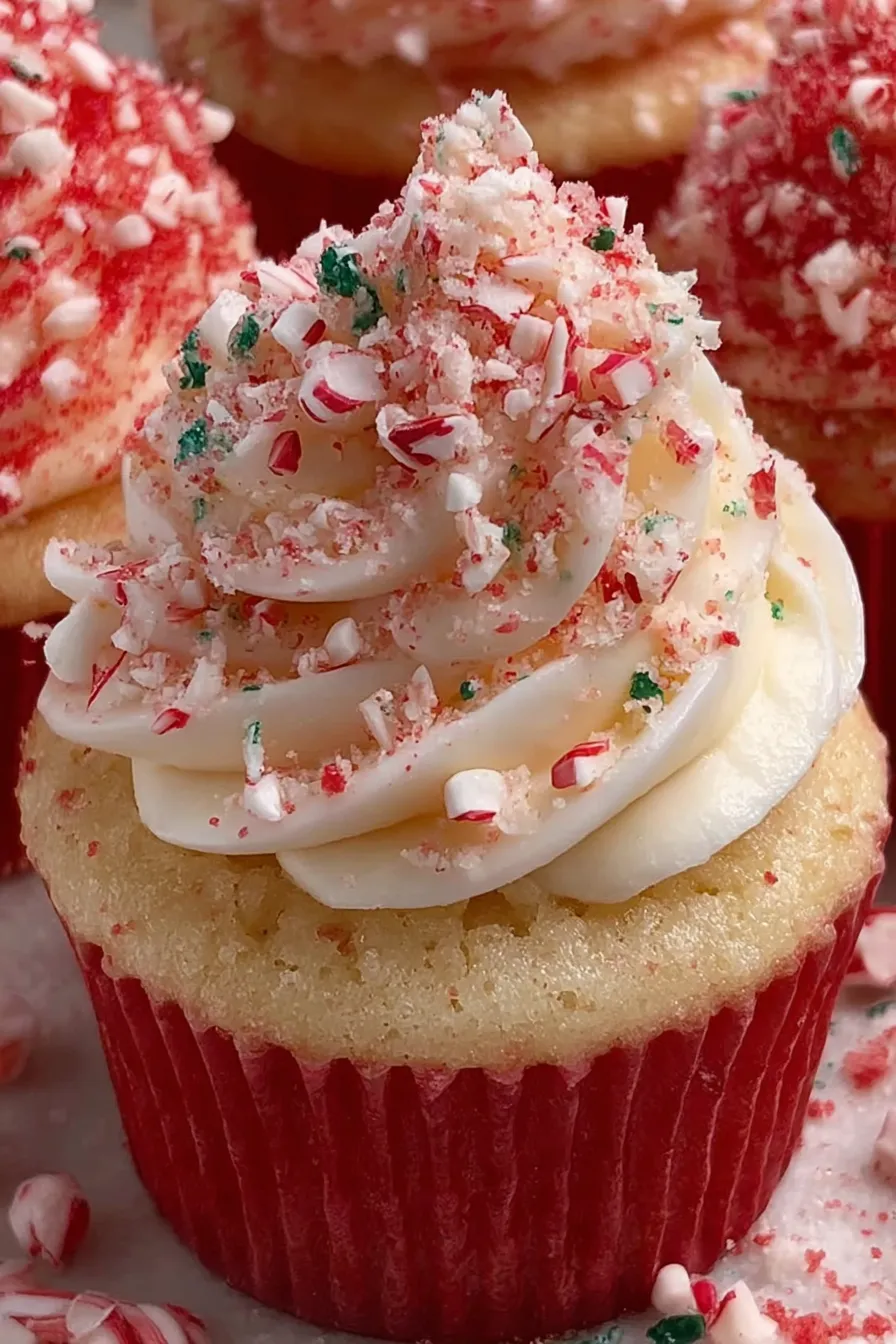
Festive red-and-white cupcakes flavored with cool peppermint buttercream and decorated with mini candy canes — a holiday favorite that's easy to make and impressive to serve.

I tested this several times across different ovens and crowd sizes — once at a family reunion where a dozen kids demolished 18 cupcakes in under 30 minutes. My sister asked for the recipe on the spot and my neighbor now requests these every year for our block's cookie exchange. The technique is forgiving: even if your piping lines are imperfect, the finished cupcakes still photograph beautifully and taste consistently great.
My favorite part of these is how the simple red streaks transform basic buttercream into a holiday statement. At one cookie swap I made a double batch and received compliments not just on taste but on presentation — guests assumed I had spent much longer decorating than I actually did. The combination of tender white cake and peppermint buttercream is nostalgic and festive, perfect for family celebrations and neighborhood parties alike.
Store frosted cupcakes in a single layer inside an airtight container at room temperature for up to 48 hours; if your kitchen is warm, refrigerate them instead to maintain frosting shape. For longer storage, freeze unfrosted cupcakes cooled completely in a single layer on a baking sheet, then transfer to a freezer bag for up to 3 months. To freeze frosted cupcakes, flash-freeze on a tray until firm, wrap individually in plastic wrap, and place in a rigid container to avoid crushing. Thaw overnight in the refrigerator and bring to room temperature before serving to restore tenderness.
If you prefer less sugar, swap half the confectioners’ sugar for a powdered sugar substitute formulated for baking, but expect a slight change in texture. For dairy-free needs, use vegan stick butter and a non-dairy creamer or full-fat coconut milk to mimic the creaminess; flavor will shift slightly. To make the cake from scratch, use a white cake batter recipe with 2 cups flour, 1 1/2 cups sugar, 1/2 cup milk, 1/2 cup oil, 3 egg whites, and 2 teaspoons baking powder — adjust quantities to yield 18 cupcakes. For a stronger mint punch, use peppermint oil sparingly (1/4 teaspoon) because it's more concentrated than extract.
Serve these with hot chocolate, coffee or a peppermint mocha for a holiday pairing that highlights the mint. For a party dessert table, arrange cupcakes on a tiered stand with matching red-and-white napkins and a scattering of crushed candy canes for texture and color contrast. Garnish with a tiny mint leaf for a fresh look, or lightly dust with edible shimmer for a festive sheen. They make stylish gifts — place two in a clear box with a ribbon for a delightful hostess present.
Although not tied to a single traditional confection, candy-cane flavors belong to winter holiday customs across many Western countries. Peppermint became associated with Christmas in the 19th and 20th centuries when candy canes evolved into symbolic decorations and treats. These cupcakes borrow that seasonal palette and combine it with American-style buttercream and boxed cake convenience — a modern take on holiday flavor that blends commercial traditions with home-baked warmth.
In summer, swap peppermint extract for lemon or strawberry extract and paint the piping bag with a pale yellow or pink gel for a springtime twist. For Valentine’s Day, use a deep pink gel and heart-shaped sprinkles instead of candy canes. Around the winter holidays, add a teaspoon of finely grated orange zest to the batter for a chocolate-orange profile, or fold in a tablespoon of crushed peppermint into the frosting for extra crunch.
To streamline holiday hosting, prepare the cupcakes a day ahead: bake and cool the cakes, then wrap and store overnight. Make the frosting the next day and decorate just before serving to keep garnishes crisp. If transporting, secure cupcakes in a cupcake carrier with inserts to hold them steady. For large events, double the buttercream recipe and pipe on-site; this keeps the frosting from softening during travel and allows for last-minute decoration touches.
These candy cane peppermint cupcakes are proof that a few smart techniques — a boxed mix, a painted piping bag, and a balanced buttercream — can produce a show-stopping holiday treat without stress. Make a batch, share them with neighbors, and enjoy the smiles that come with every peppermint-topped bite.
Use gel food coloring to avoid thinning the batter or frosting.
Ensure cupcakes are completely cool before frosting to prevent melting.
If frosting seems too soft, chill for 10–15 minutes, then re-whip briefly before piping.
Tap filled muffin tins on the counter to release large air pockets for even crumb.
This nourishing candy cane peppermint cupcakes recipe is sure to be a staple in your kitchen. Enjoy every moist, high protein slice — it is perfect for breakfast or as a wholesome snack any time.
Store in an airtight container at room temperature for up to 48 hours, or refrigerate for up to 5 days. Freeze unfrosted for up to 3 months.
Use a small brush to paint gel lines inside the piping bag; if you skip this step, you can still swirl plain frosting.
This Candy Cane Peppermint Cupcakes recipe makes perfectly juicy, tender, and flavorful steak every time! Serve with potatoes and a side salad for an unforgettable dinner in under 30 minutes.
Place oven racks in the upper and lower thirds and preheat oven to 350°F. Line 18 cups in two 12-cup muffin tins with paper liners.
Prepare cake batter according to package directions. Divide batter in half; tint one half with red gel until desired color is reached.
Alternate spooning white and red batter into liners until half full (about 3–4 tablespoons per cup). Bake 18–20 minutes, rotating tins halfway through. Test with a toothpick for doneness.
Cool cupcakes in the pan 5 minutes, then transfer to a wire rack to cool completely prior to decorating.
Beat softened butter and salt for 2 minutes. Add confectioners’ sugar in two batches, then heavy cream, vanilla and peppermint. Beat until light and fluffy, about 2 minutes on medium-high.
Paint two thin lines of red gel inside a piping bag fitted with a 1/2-inch round tip using a small brush or skewer. Fill with frosting, pipe, and garnish with mini candy canes or peppermint sugar.
Last Step: Please leave a rating and comment letting us know how you liked this recipe! This helps our business to thrive and continue providing free, high-quality recipes for you.
Leave a comment & rating below or tag
@delishum on social media!

Thick chocolate chunk brownies crowned with melted mini marshmallows and drenched in glossy chocolate frosting for the ultimate fudgy, crowd-pleasing bite.

Buttery shortbread crust meets a lush brown sugar pecan topping. Crunchy, caramelly, and ready with just 10 minutes of prep for effortless indulgence.

Ultra-smooth pumpkin cheesecake with warm spice and a sturdy graham crust. A showstopper on its own, unforgettable with caramel and rum-kissed whipped cream.
Leave a comment & rating below or tag @delishum on social media!
Enjoyed this recipe? Share it with friends and family, and don't forget to leave a review!
This recipe looks amazing! Can't wait to try it.
Comments are stored locally in your browser. Server comments are displayed alongside your local comments.

Join to receive our email series which contains a round-up of some of our quick and easy family favorite recipes.
